On Oct 25, 2012, at 2:47 PM, V wrote:
Hi Karen,
I am back and ready to put my brain into “art world”.
I know it is probably impossible to repeat and explain what the class was about but could you give me a little review and direction on what we are supposed to work on for next Wednesday.
D emailed me some already and I am trying to understand it…. trying to call her but she is not home.
I was thinking if I get some info from 3 different persons, I will whether get all mixed up OR be able to put it together! Ha, ha!
Thanks,
V
D’s email:
GET FAMILIAR WITH VIMEO LESSONS – so that we are all speaking the same language. Watch them several times so that we understand them and know the vocabulary.,
* Dick told a story about his brother in WW 2 – he learned morse code and could send the signals, but at first could not understand how the receivers could read it that fast… then one day it suddenly happened and he could read it that fast too. – Analogous to how we will struggle at first, but some day it will all click.,,
* In our new exercises he does not want to see shapes made with the brush … rather shapes made by painting the negative shapes around the light areas.,,
* Count 1’s 2’s and 3’s . Colors made with 1 pigment, mixtures of 2 pigments, and mixtures of 3 pigments.,,
* Go into the painting(s) from last time and add more layers to certain parts to make vanishing boundaries and halations.,,,,
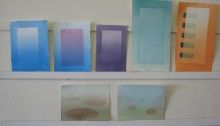
Homework Parameters:,- Make rectangles of varying sizes and saturations.,
– Make light rectangles by surrounding dark shapes.,- Create halations,
– Create vanishing boundaries ( by leaving white in yellow layer),
– Create fire-engine red and other strong hues by using high saturations of pigments,- Create light hues by low saturations,
– Build saturations across the page – sequential,
– As we are finishing up go for 90% 3’s – get many grays, greens, browns.,,,
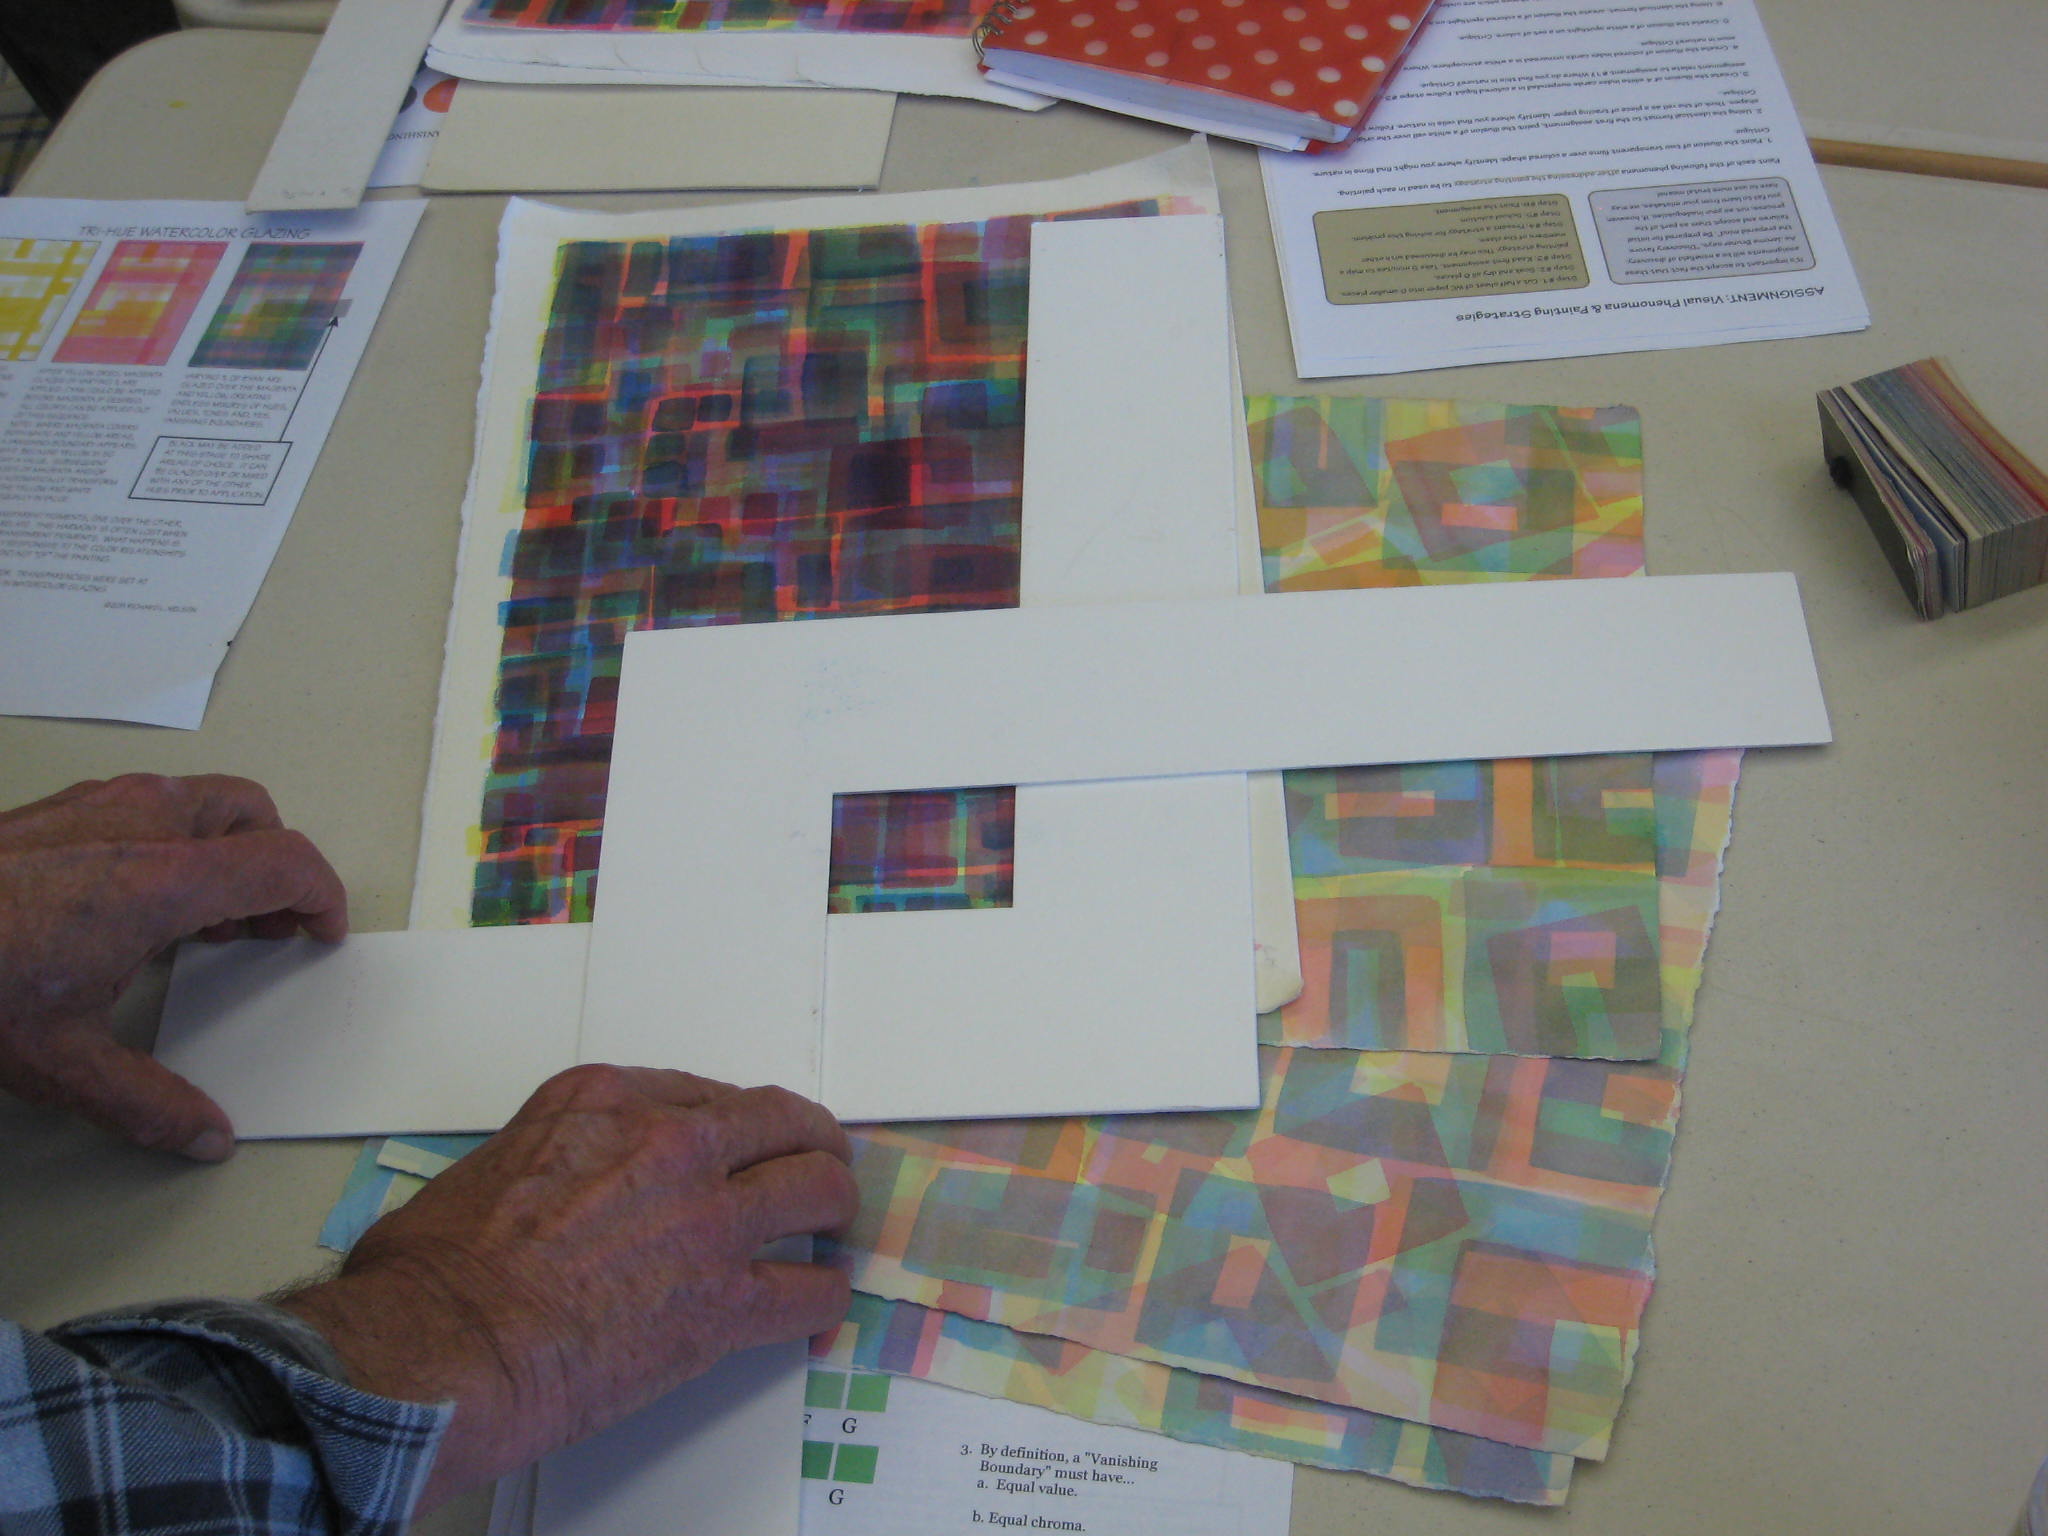
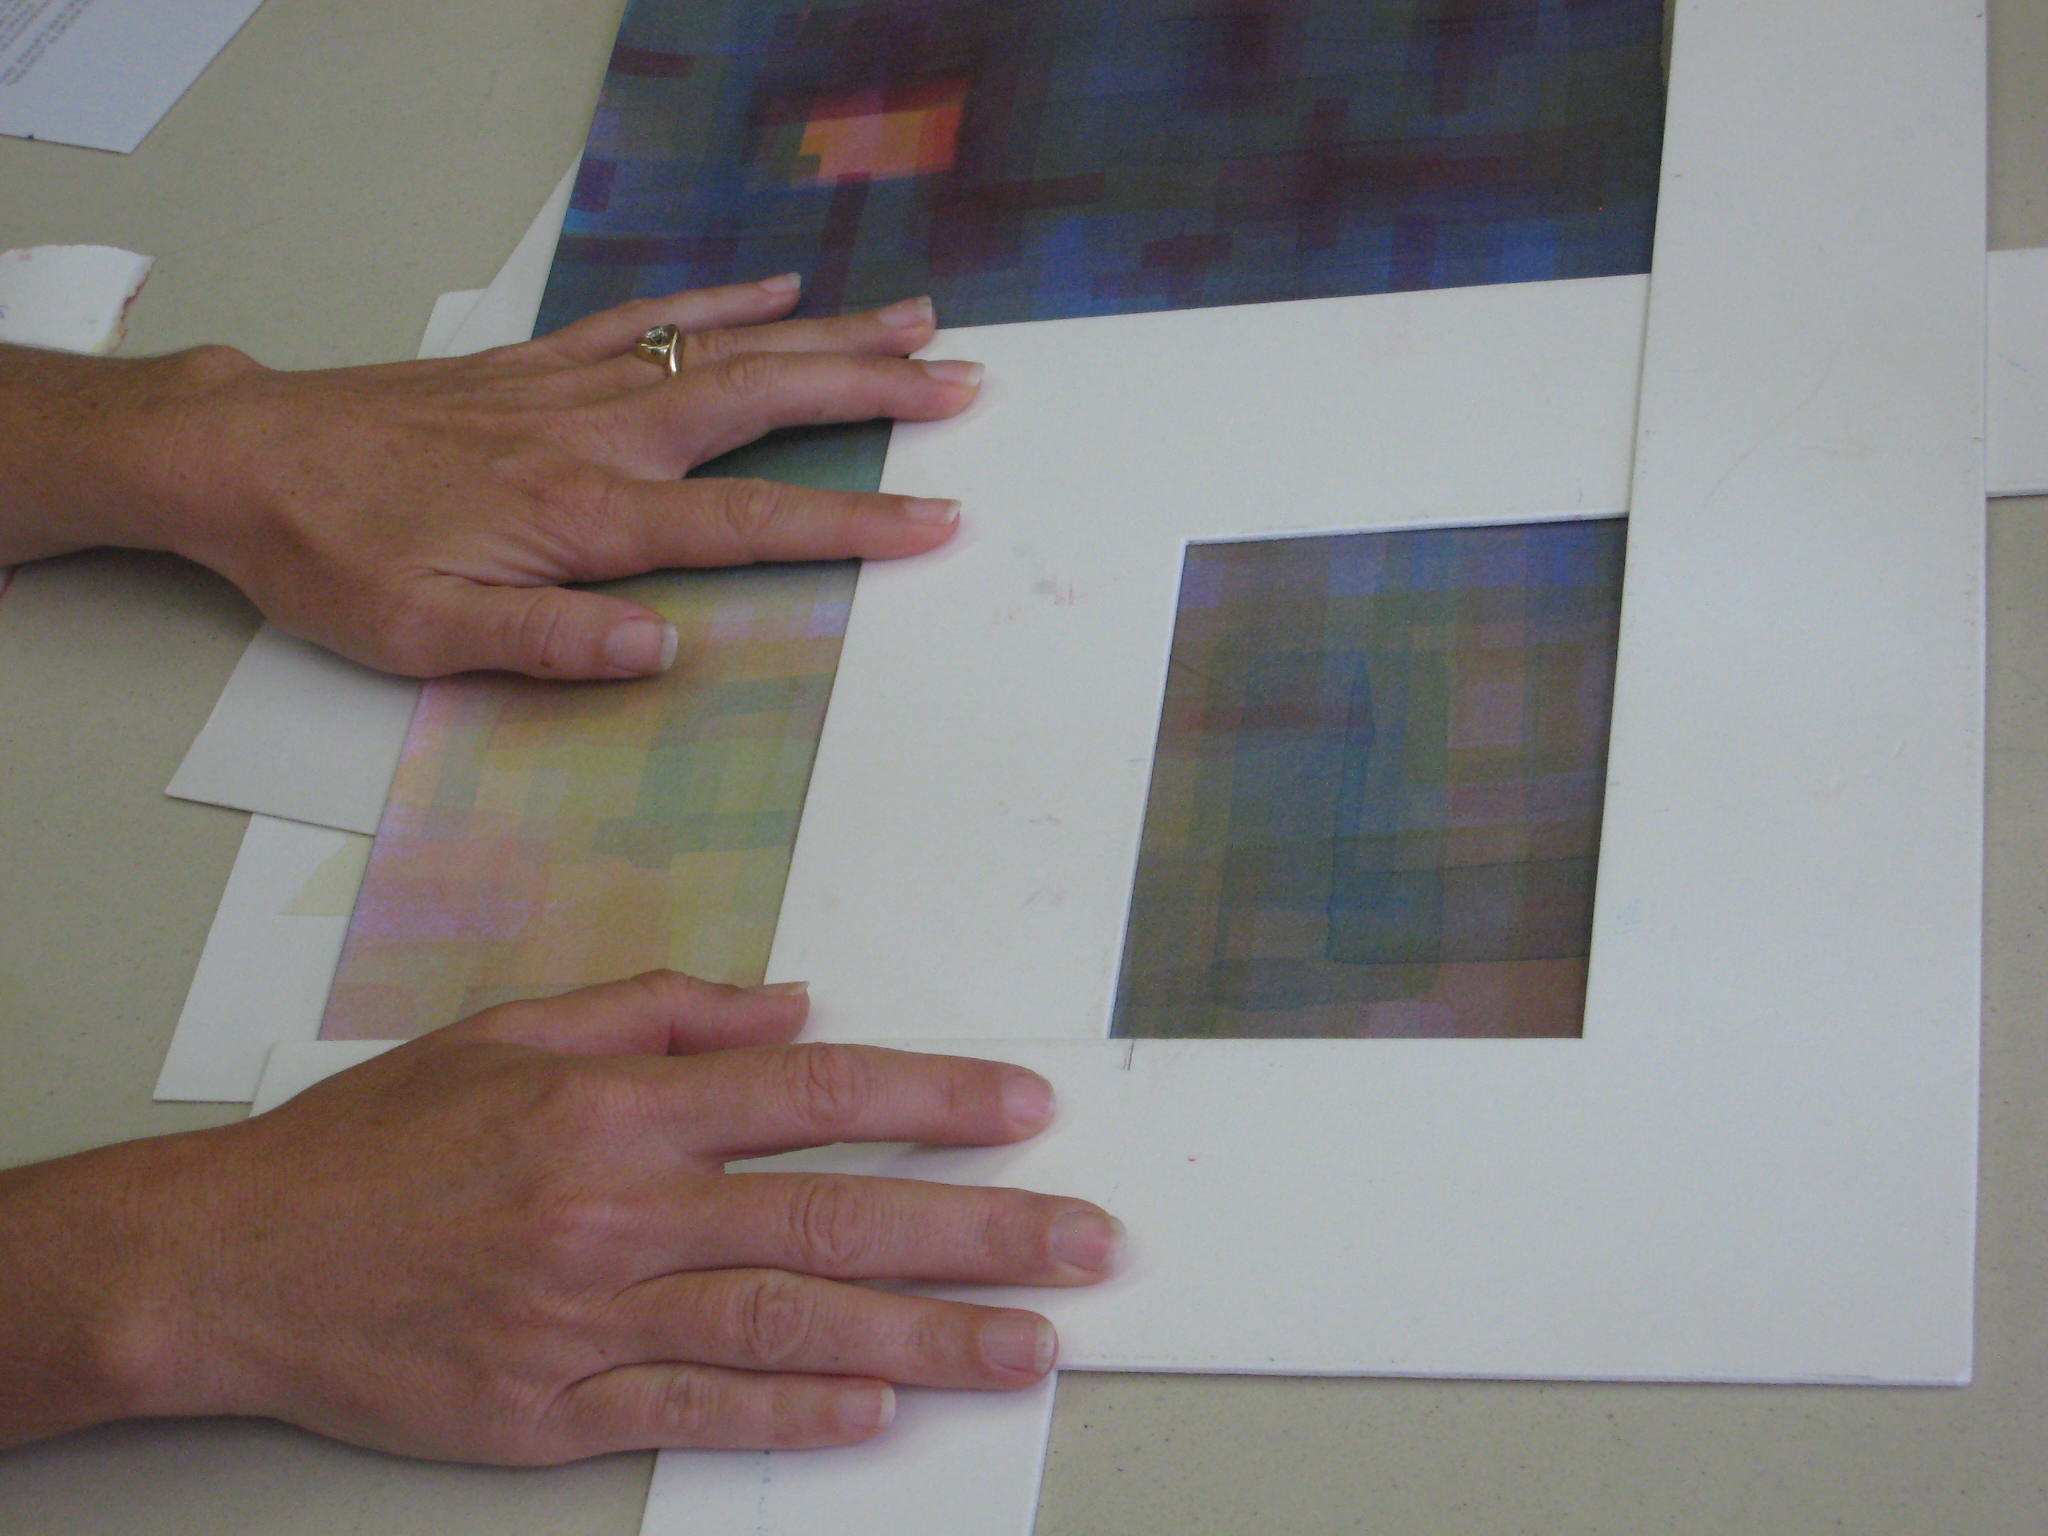
I’ll tell you about finding “gems” by using the L shaped mat boards.
Date: 10/25/2012 4:17:45 PM
Subject: Re: Trihue week 2
D took some great notes, and I think a lot of it will make more sense once you’re able to talk to her, and especially if you’re able to get together in person so she can show you some things in her painting and yours. Are you familiar with the concepts of vanishing boundaries and halations? We spent a lot of time discussing them and finding them in TINY spaces in peoples’ paintings (using mat board Ls).
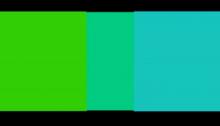
This video is 4 minutes long and focuses on luminosity created by vanishing boundaries and halations.
Here’s a screen shot from 1:43. Look at it for a few seconds, and focus on the middle color. Its right edge looks a little more green (like the left square) than the center, and its left edge looks more blue, like the right square. But it’s not a gradation, it’s one solid color, which you can see if you cover one or both of the large squares. That apparent gradation is an optical phenomenon called halation, which we can achieve in watercolors by layering.

(While we’re on the subject of the videos, make sure you also watch the color wheel one and are familiar with the terminology: hues, shades, tints, tones, values, saturation. They have precise meanings and he wants us to use them correctly when we talk about what we see.)
The assignment is basically the same as last week, except
- You don’t need to tape off the outside after each color
- You determine the saturation you want to use for each layer (doesn’t have to be 20 20 40 80)
- You can go back in with magenta and cyan after you’ve already laid in all three colors (you could also go in with yellow again, but Dick warned that most yellows seem to sit on top of the other colors, so they may create a chalky or opaque appearance, instead of the transparent effect we want)
The criteria are as listed in the assignment and by D below. His main criticism of our first results was that the main ingredients (CMY) were too evident – he wants “fine French cuisine” where the flavors (colors) blend subtly. He’s looking for lots of “3s” (areas where all 3 primaries are used, in varying amounts). He wants to see more nuanced colors, like browns and grays and olives. (And also some bold ones like fire engine red, as D mentioned.) You might want to have different moods in different parts of the painting (soft, loud, earthy, …)
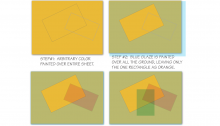
A clue is that you automatically get vanishing boundaries when you layer other colors over places where yellow is next to white, since the yellow is so light (you will get similar values of slightly different hues). So leave some white near your yellows. Also notice that the cyan really dominates, so you have to use a light touch with it if you want subtle!
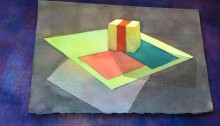
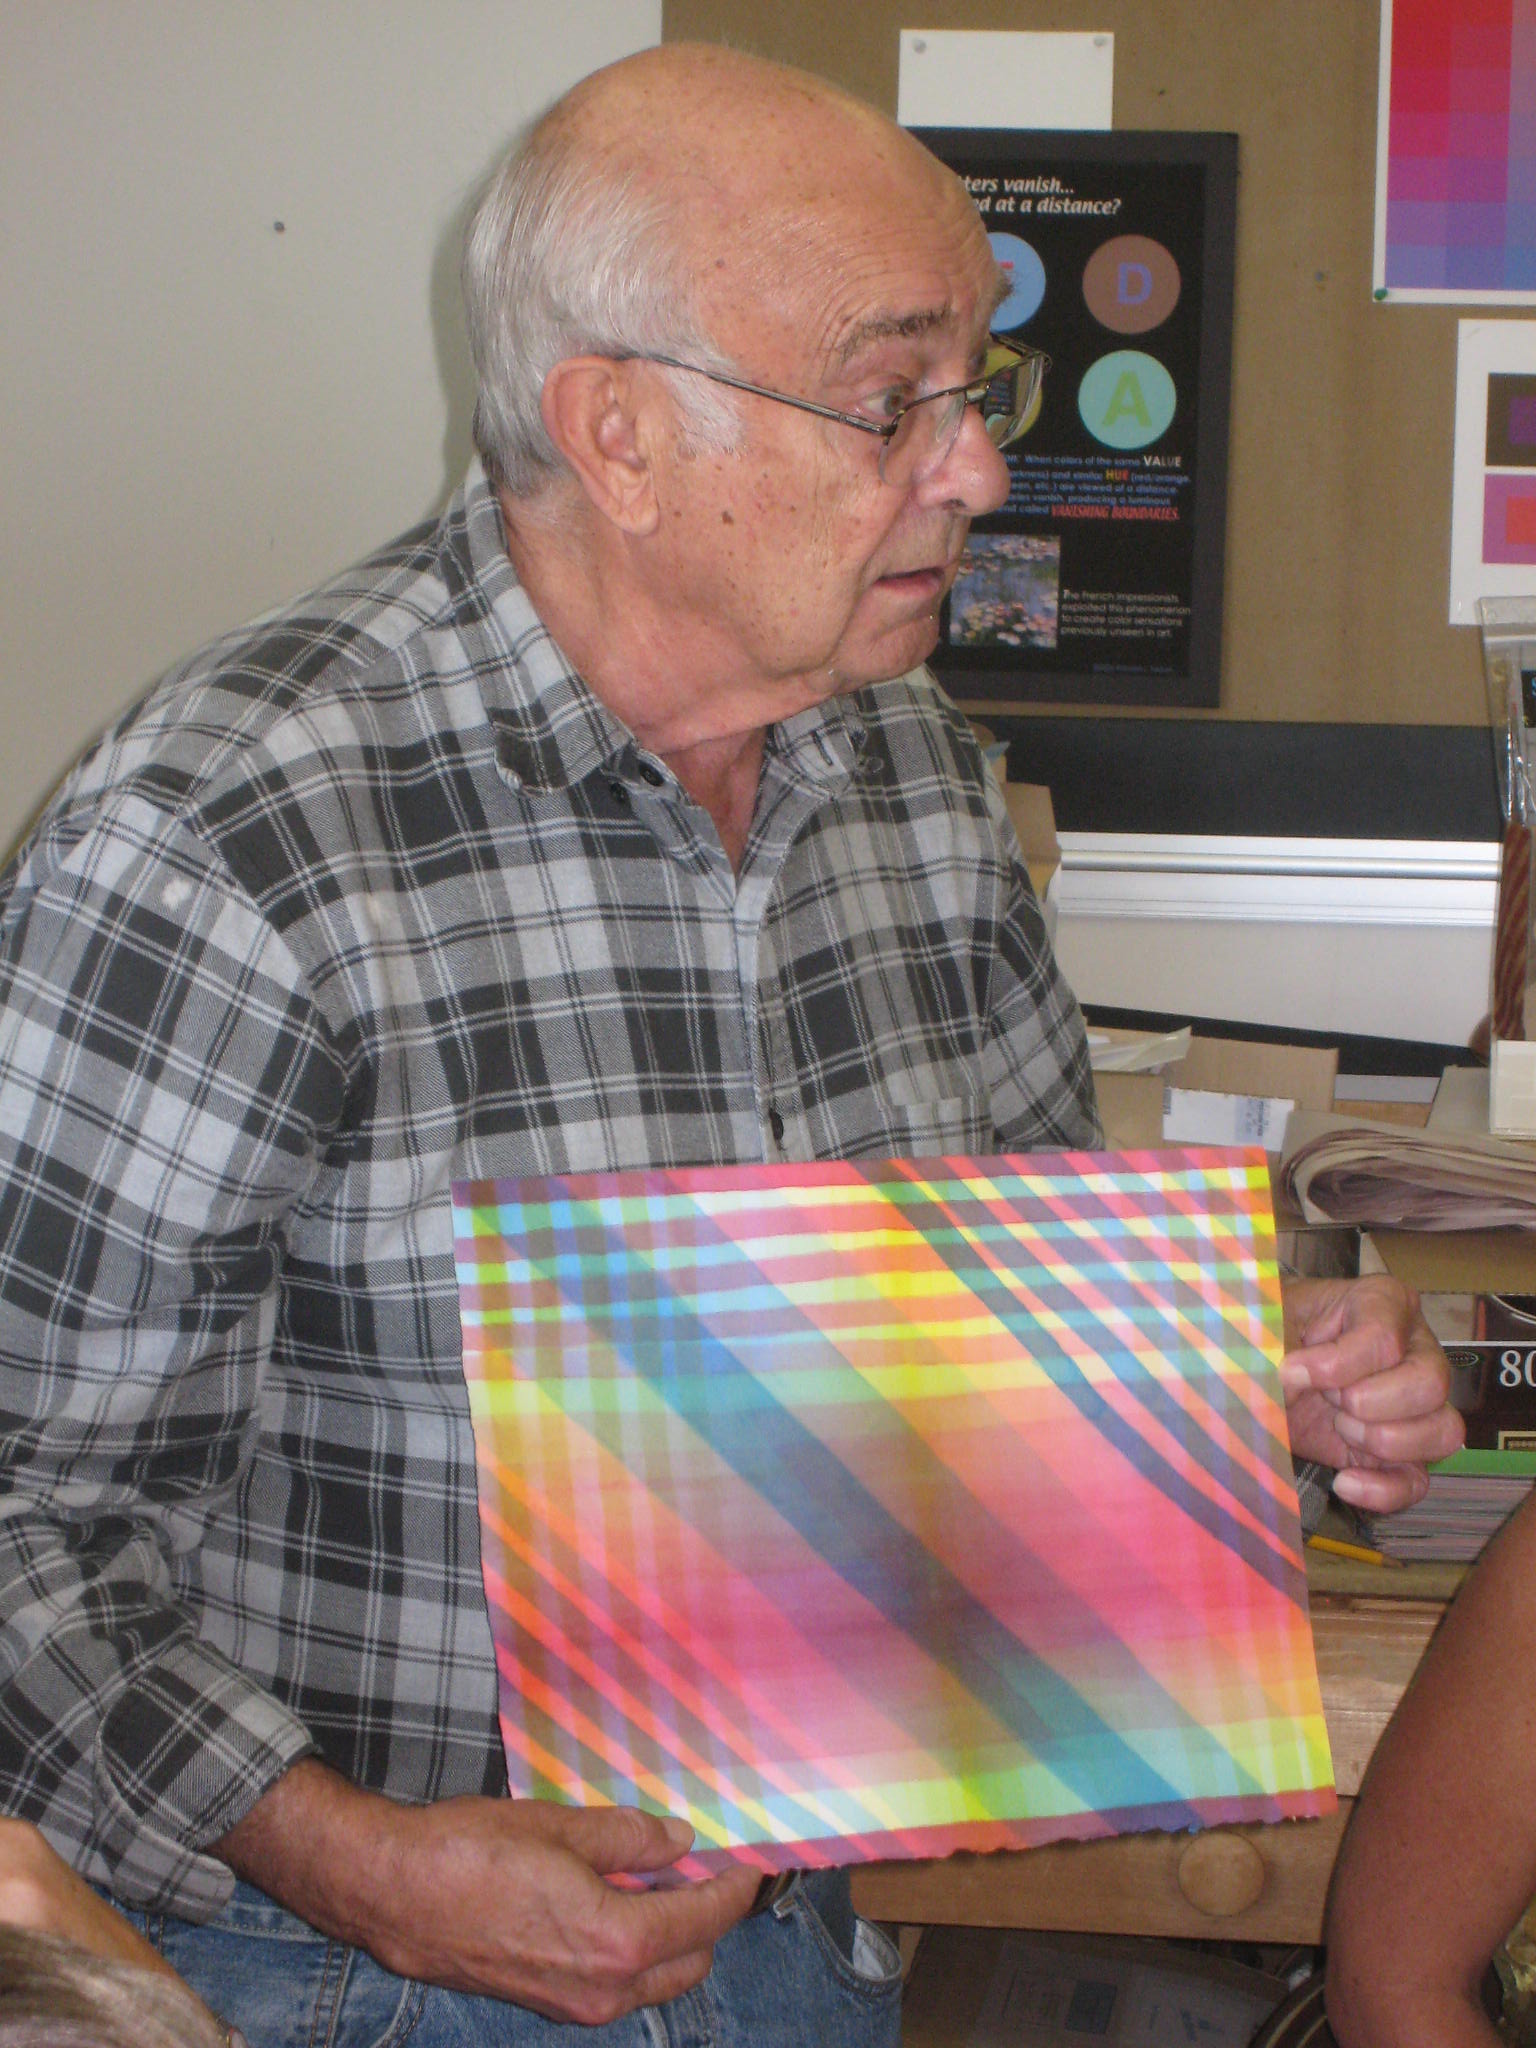
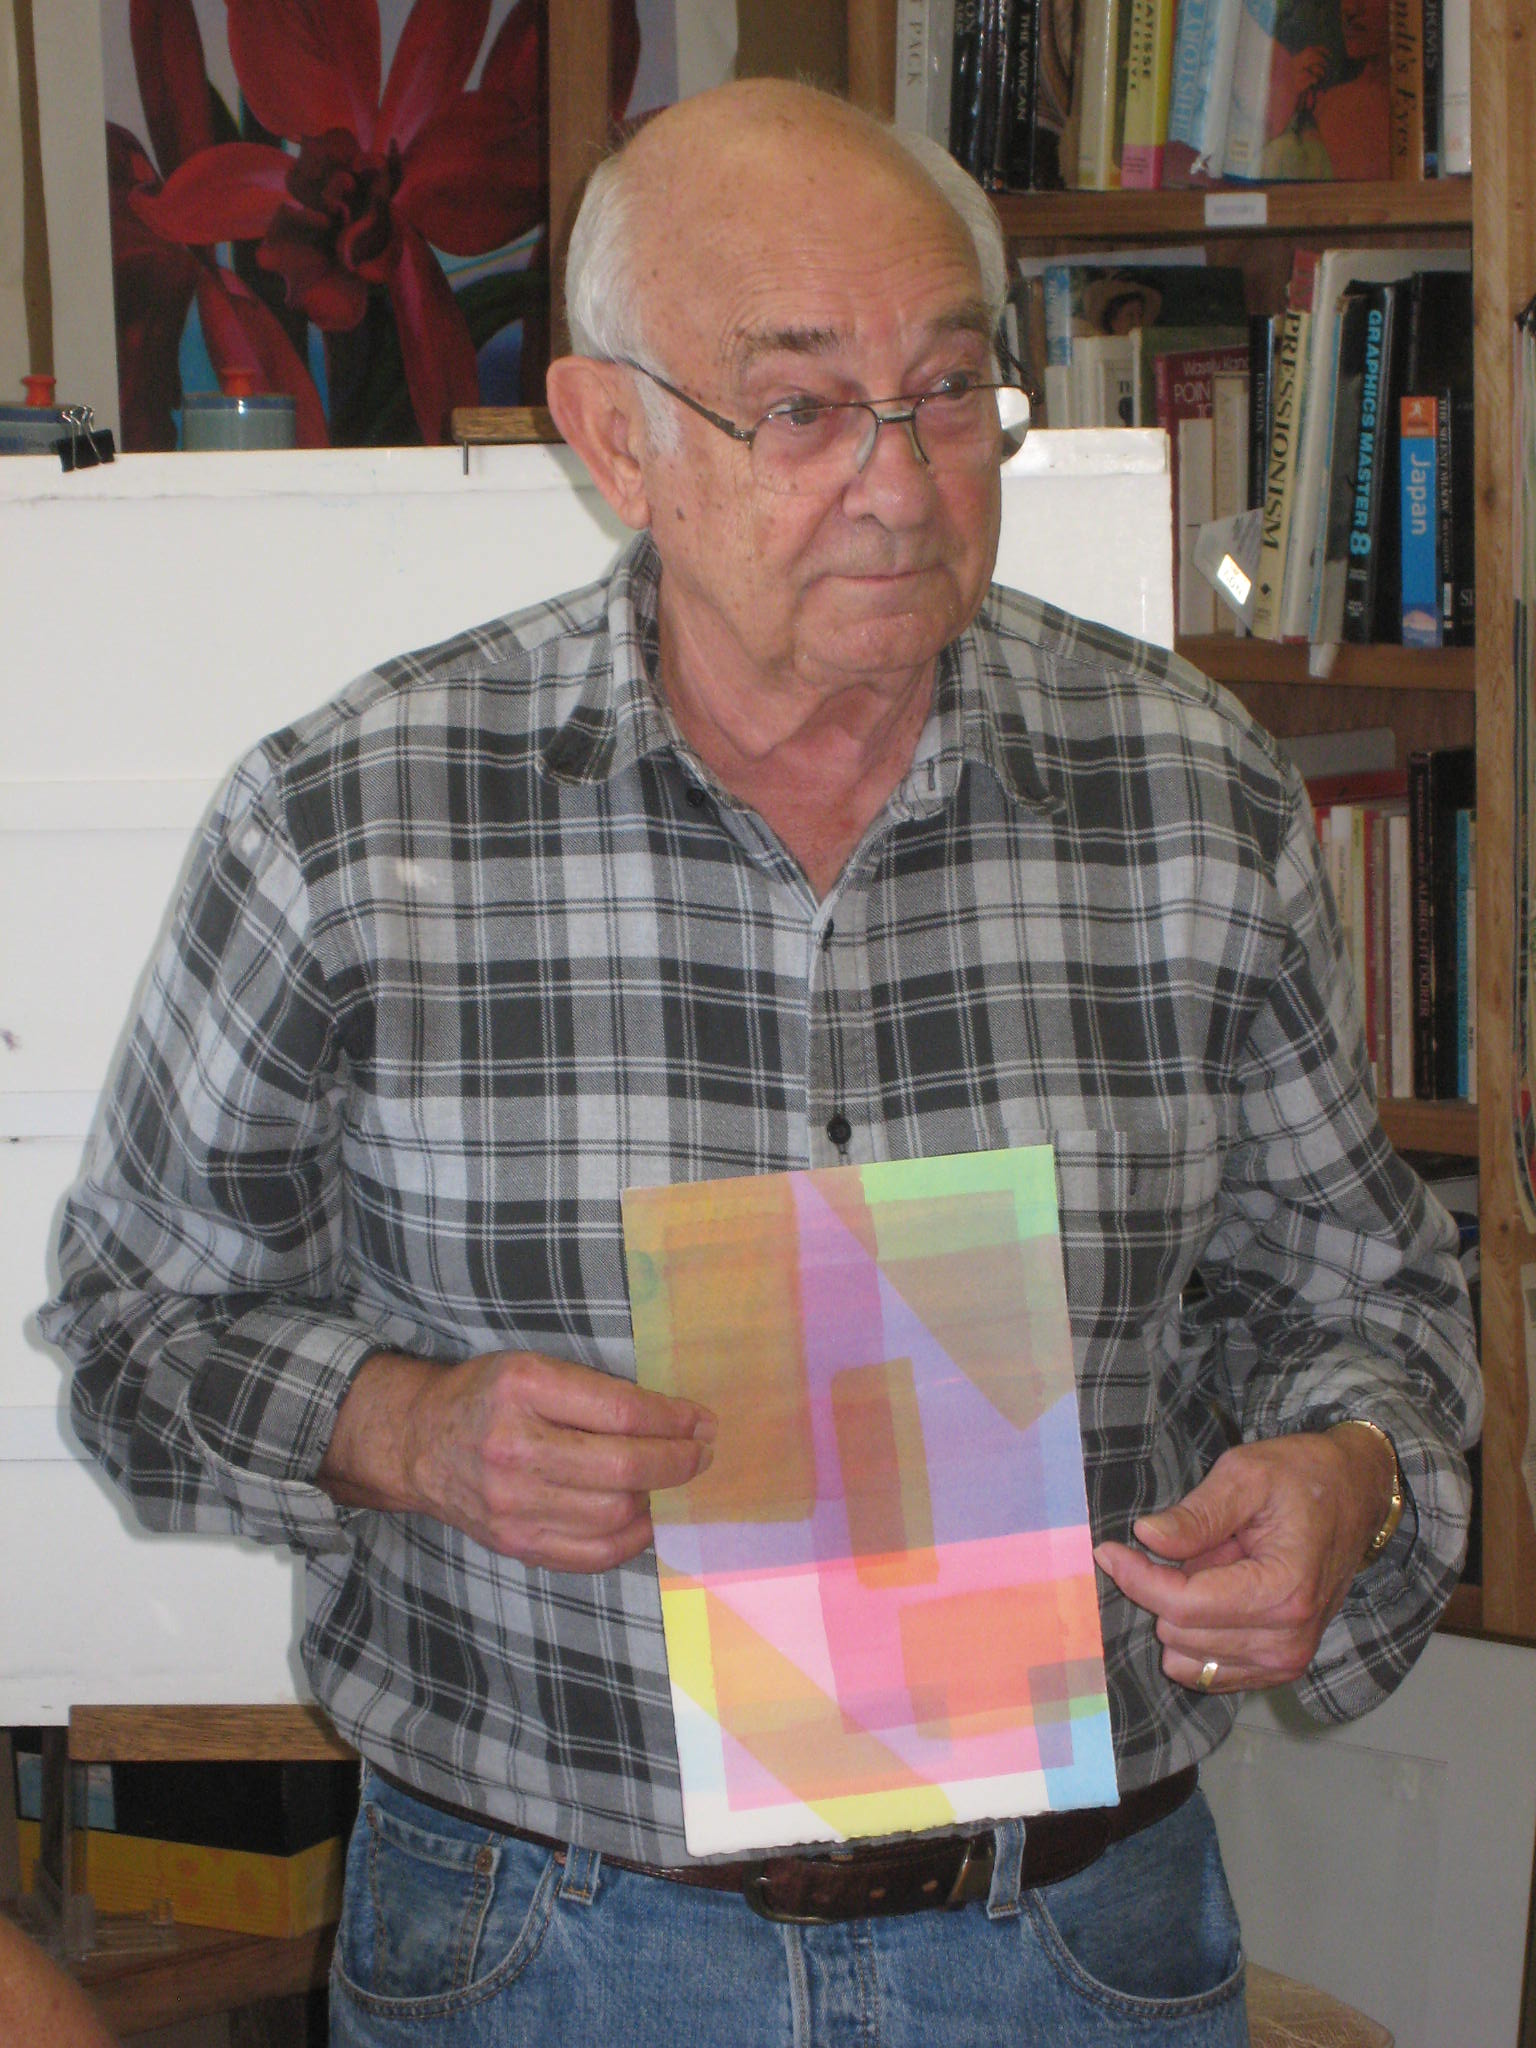
Another big thing he’s looking for is light shapes created by surrounding dark shapes – so don’t just paint rectangles with the brush (which will always be darker than their surroundings), but look for opportunities to create light rectangles.
You can do one or more of these paintings. Bring them in next week.
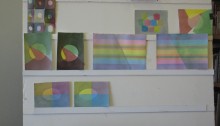
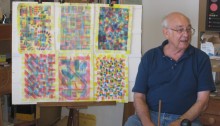
I’ll send everyone a couple photos I took, which should also help you make sense of this.
Good luck, and let me know if you have any more questions!
Karen
On Oct 25, 2012, at 4:45 PM, V wrote:
One more thing, my mind has a hard time grasping this: Another big thing he’s looking for is light shapes created by surrounding dark shapes – so don’t just paint rectangles with the brush (which will always be darker than their surroundings), but look for opportunities to create light rectangles.
I think D put it this way and I had the same problem: In our new exercises he does not want to see shapes made with the brush … rather shapes made by painting the negative shapes around the light areas.,,
Does it mean that we are free to not make rectangle shapes to start with, just drop the paint and let it go where it wants but sometimes after when adding more layers… make rectangle shapes…..
Date: 10/25/2012 5:39:17 PM
Subject: Re: Trihue week 2
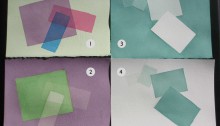
I think he purposely left it a little vague about exactly how to make them, to make us think about it and experiment. But I think 2 ways to do it are to paint a frame, and to paint Ls surrounding a space. (You can think of a frame as four connected rectangles, and an L as two…) He demonstrated with a little zigzag kind of thing.
I can see at least 3 light rectangles in this bit. Can you see them now? Does that help?

He wants subtle. He doesn’t want the obvious. Dark paint on a light background is obvious. Instead of using the dark paint to make me look at IT, can you use it to make me look at an area that, before I painted, was background?
And yes, for now we’re not mixing wet colors; our brushes carry only a single primary hue at a time, in varying saturations. (He rarely mixes them wet – I’ve only seen him do it rarely, near the end of a painting, when he wants a particular effect in a specific place). This is to help teach us the strategy we need to consider as we plan our painting. He wants us to think and be contemplative as we paint.
Karen
thank you again Karen. You are very very helpful. The rectangle thing hasn’t sunk in yet…. but I will let the night work it out….. it will click!