The eighth sessions of the Trihue Watercolor class for Winter 2018 were held on Wednesday, March 7 and Sunday, March 25. The surface and volume color homework was critiqued, and a review covered the whole course. All of the visual phenomena and principles covered in the course are tools you, as an artist, can choose to use, or not, depending on your goals. All have the potential to integrate and contribute to visual harmony, because they behave as nature does. Understanding them will allow you to create visual magic, whether working from nature or your own imagination.
Artist Kit Gentry joined the group by Skype for a question-and-answer session and discussion of artistic concerns.
A ninth, “Do-over” session was held on Wednesday, March 28, for people from both groups to bring reworked studies for critique. Much of the time was spent on the surface reflection exercise, and we have video of Dick illustrating and explaining how to plot reflections and shadows.
Videos – Q&A with Kit Gentry
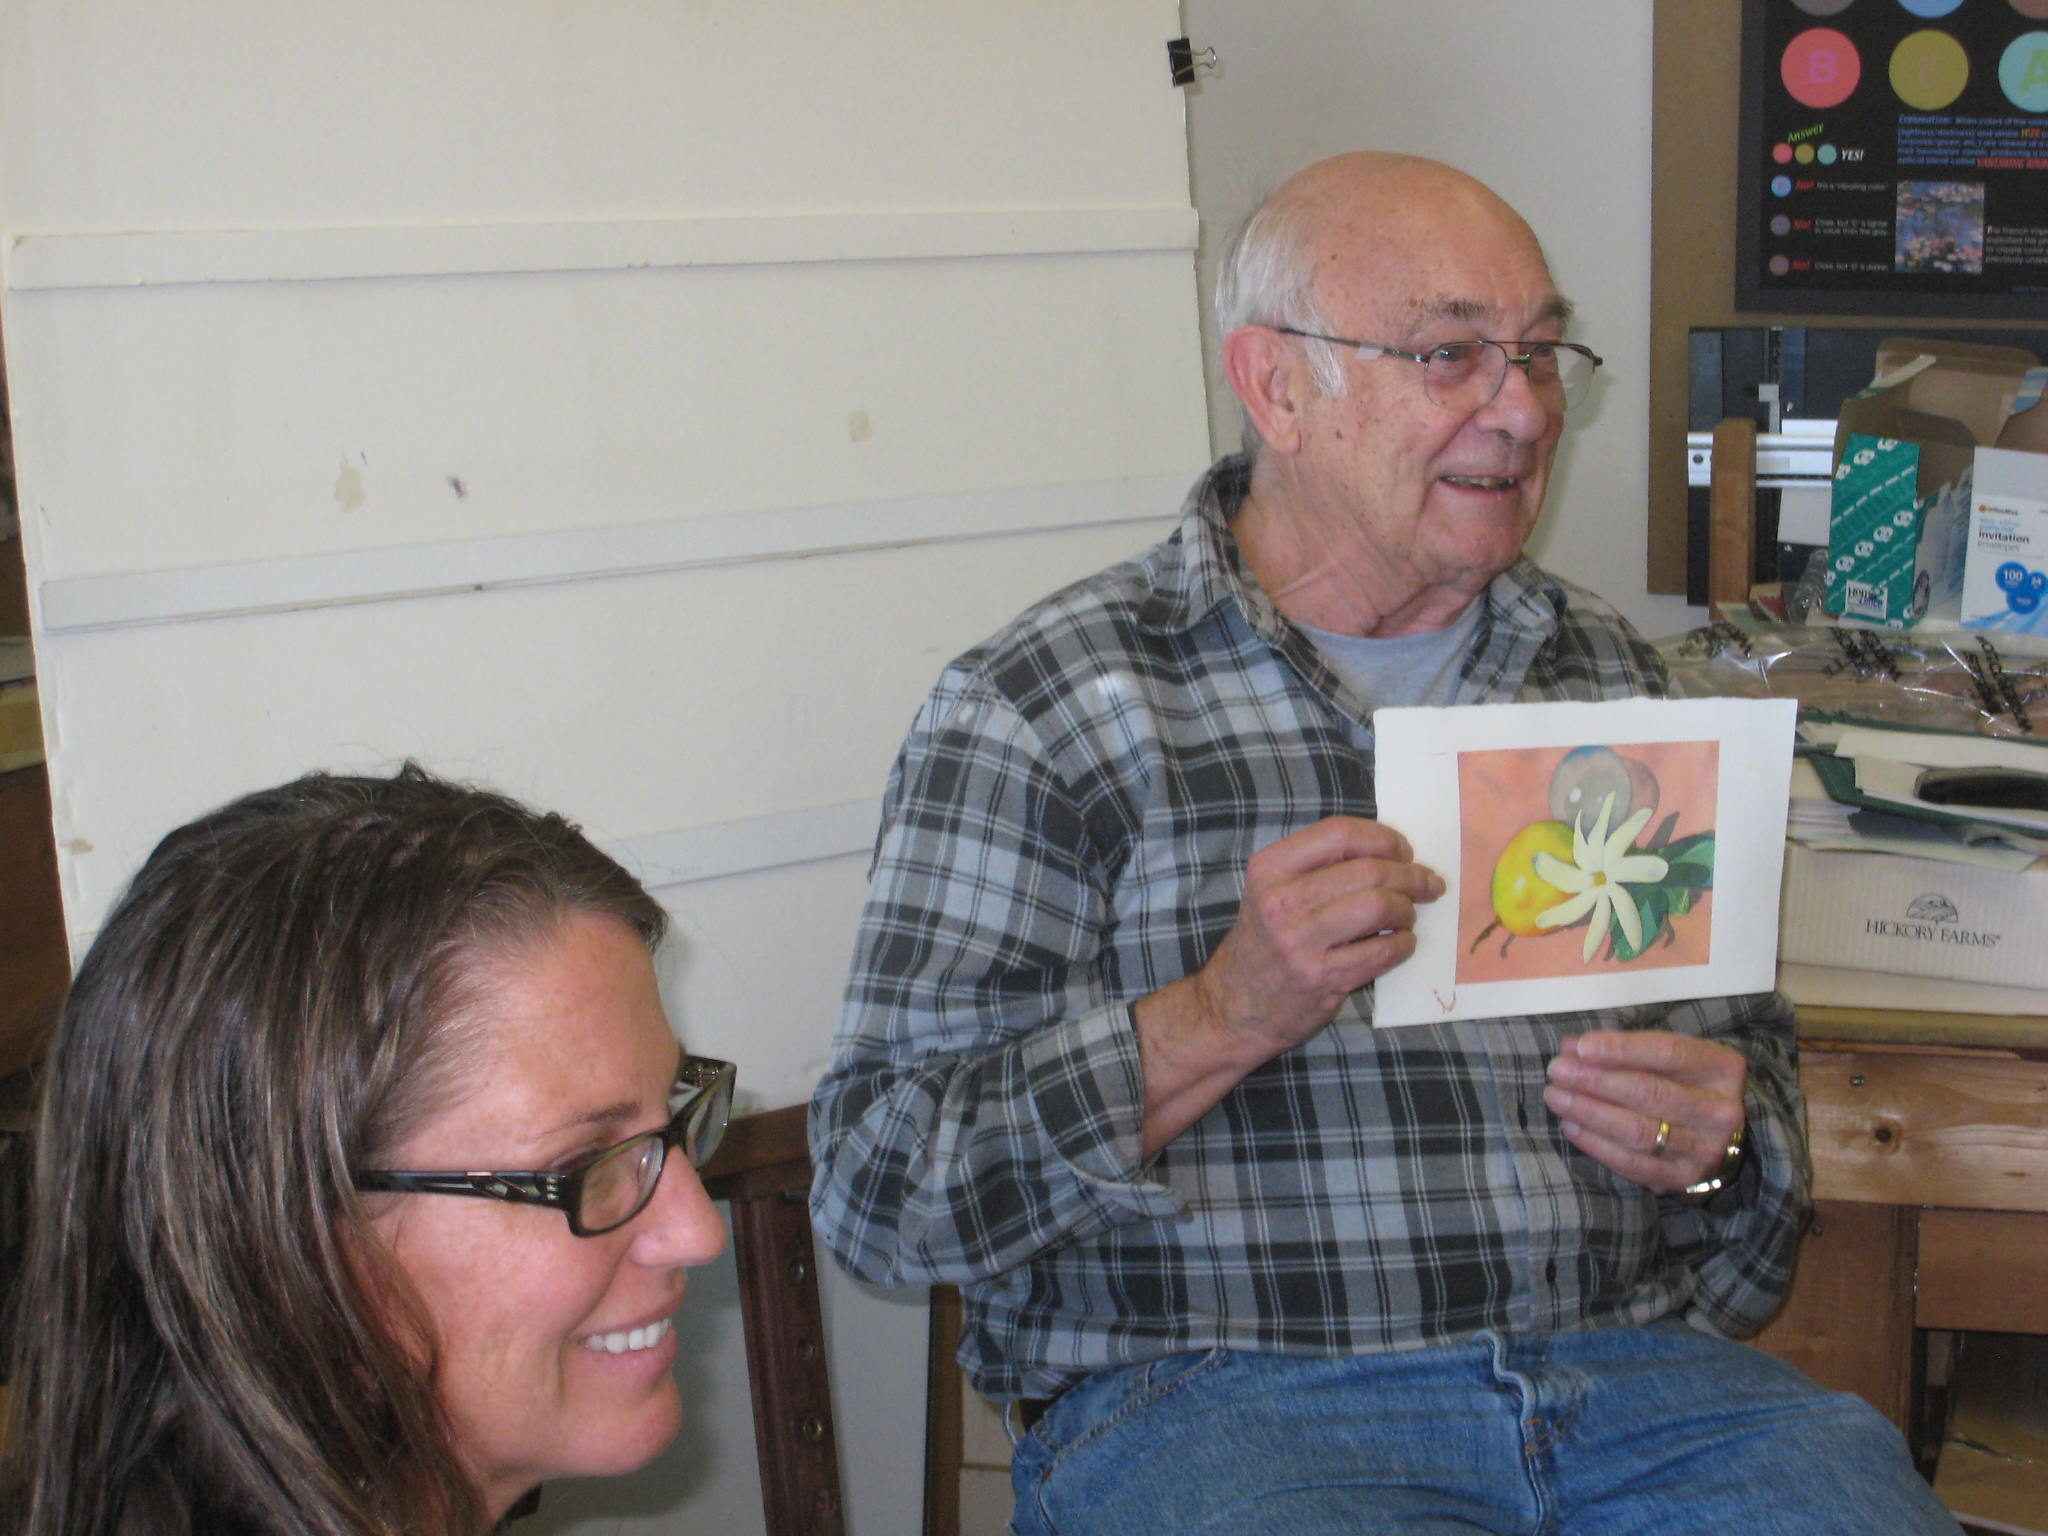
Netherworld by Kit Gentry (pastel)
Kit Gentry is an artist who took Dick’s Color Relationships course several years ago. In almost every class since, Dick has raved about how Kit has applied those lessons to his painting. Kit no longer lives on Maui, but they stay in touch, and Dick asked him to join this class via Skype for some discussion.
They started by talking about Netherworld, the pastel pictured above.
In the video below, Kit Gentry describes how he prepares his paper for a pastel painting. (2:42) For more detail, see this page on his website. He has separate discussions on his website for each medium he uses.
In the second video, Kit Gentry describes some influences, talks about viewing distance, and chasing fog. (8:21)
In the third video, Kit provides some words of wisdom regarding color. (5:18)
Kit aims for the ring of truth in color relationships, to approach the luminosity of nature. (3:32)
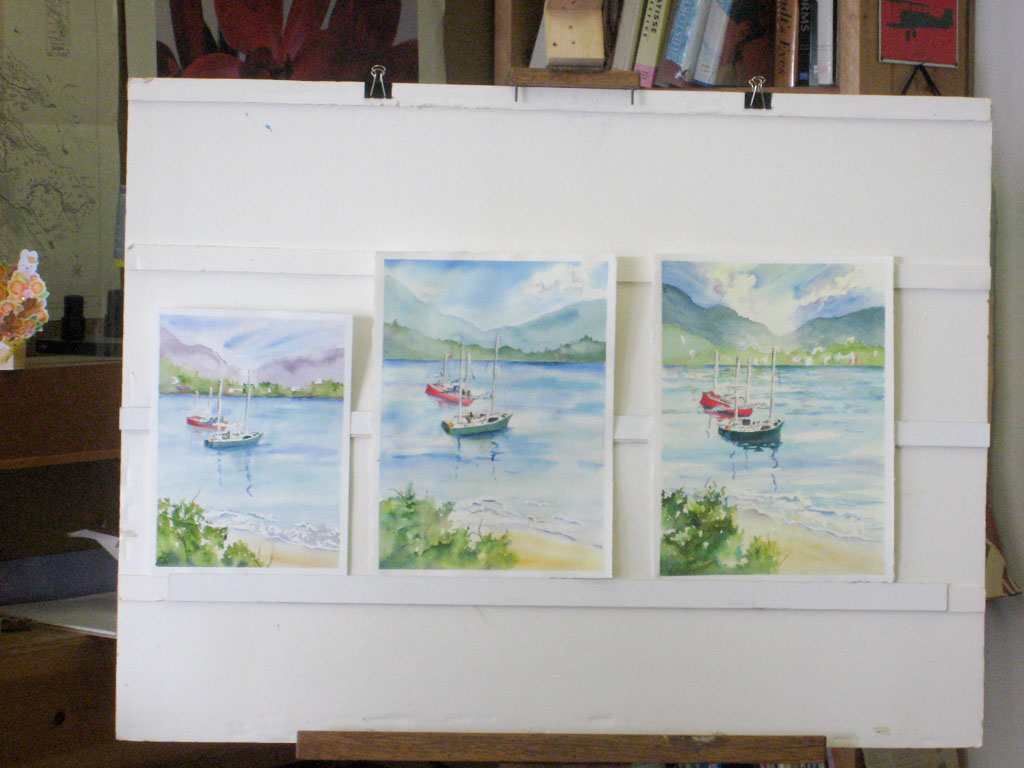
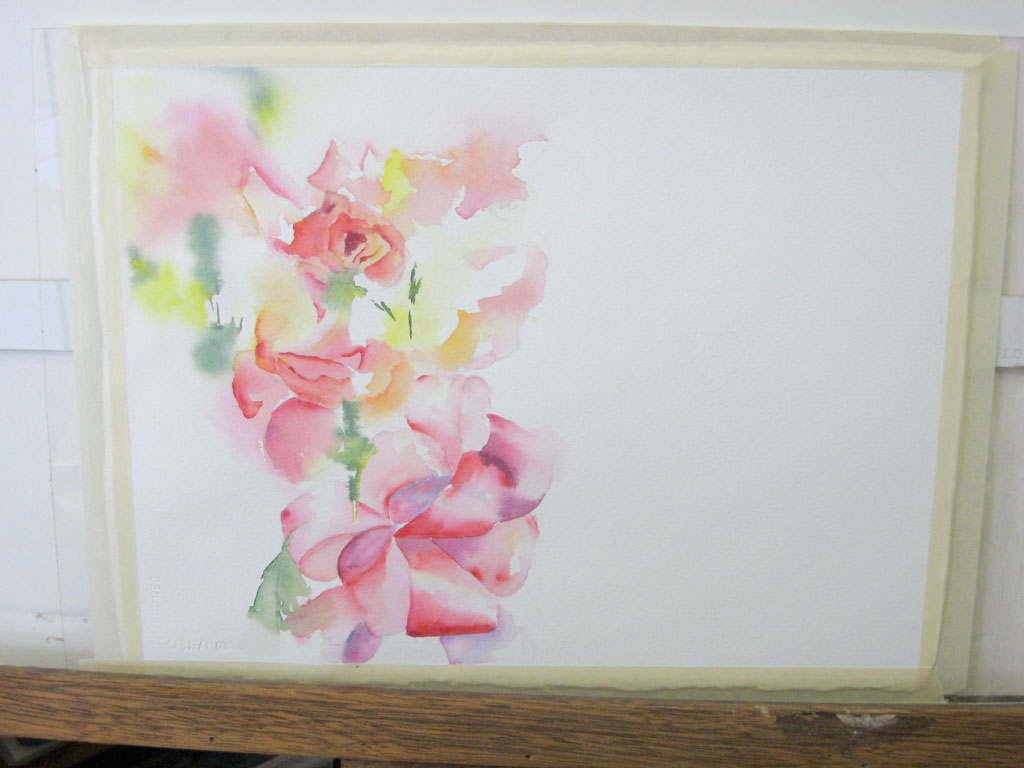
Wednesday class photos
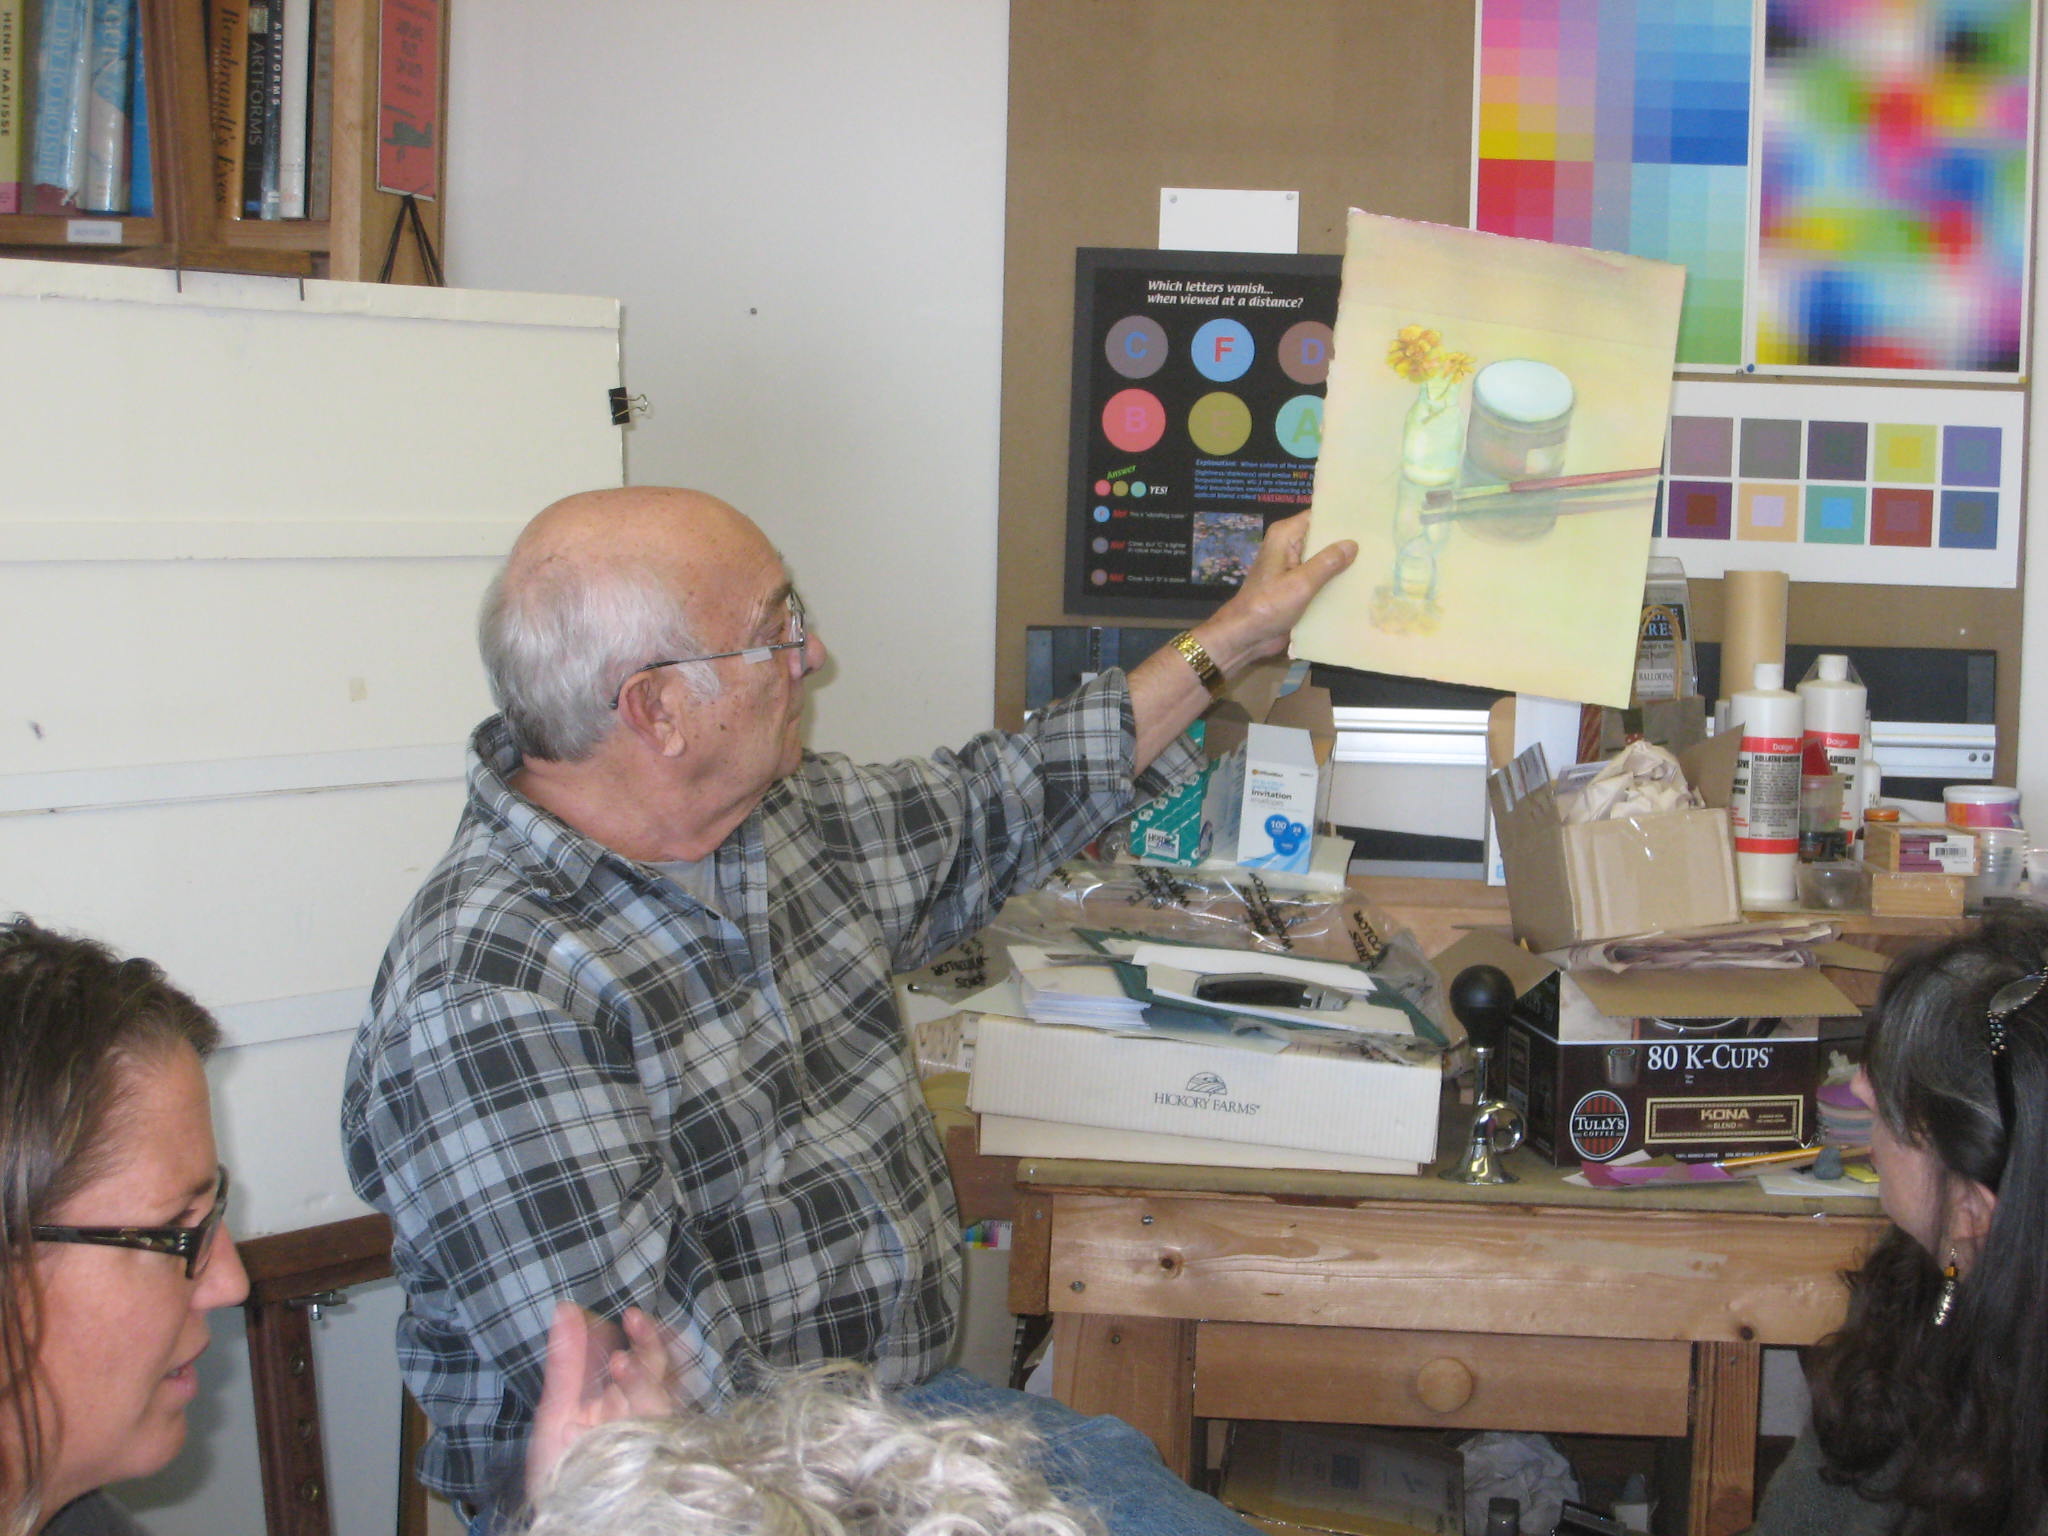
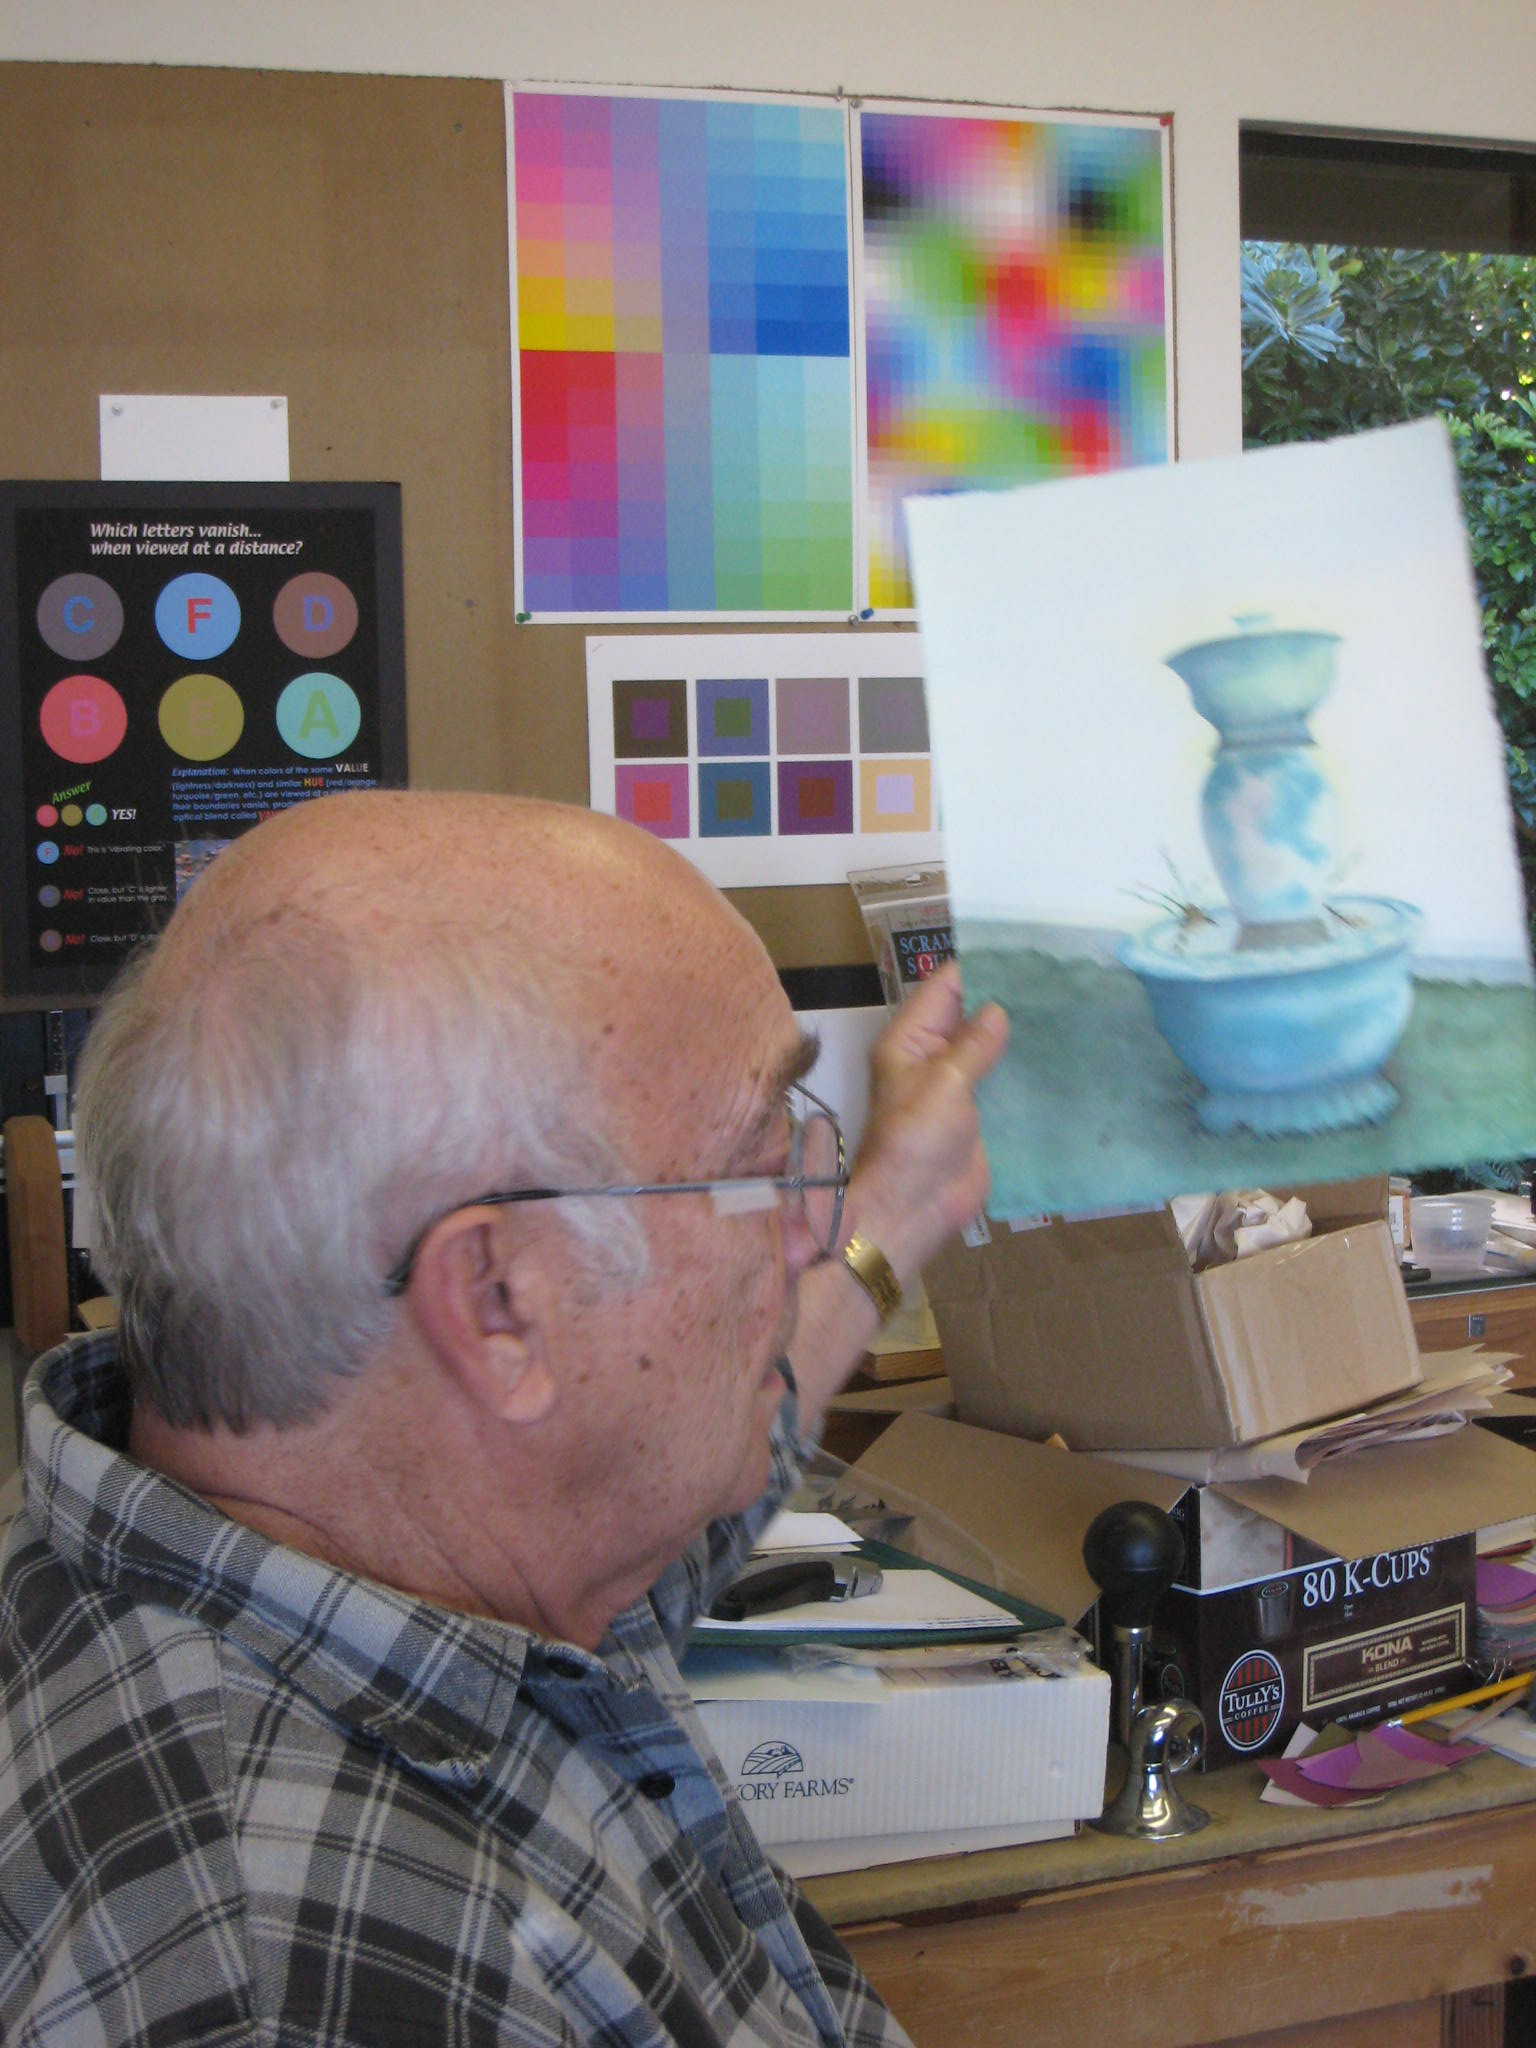
Homework critique
Homework – Gradated veil, surface & volume color
Sunday class photos
To review and solidify some fundamental concepts, the group answered the Color Pretest from the first week. During the review, Dick asked Carleton to mix some colors to match those on the sheet, which helped clarify understanding of tones and shades.
Week 9: “Do-over” session
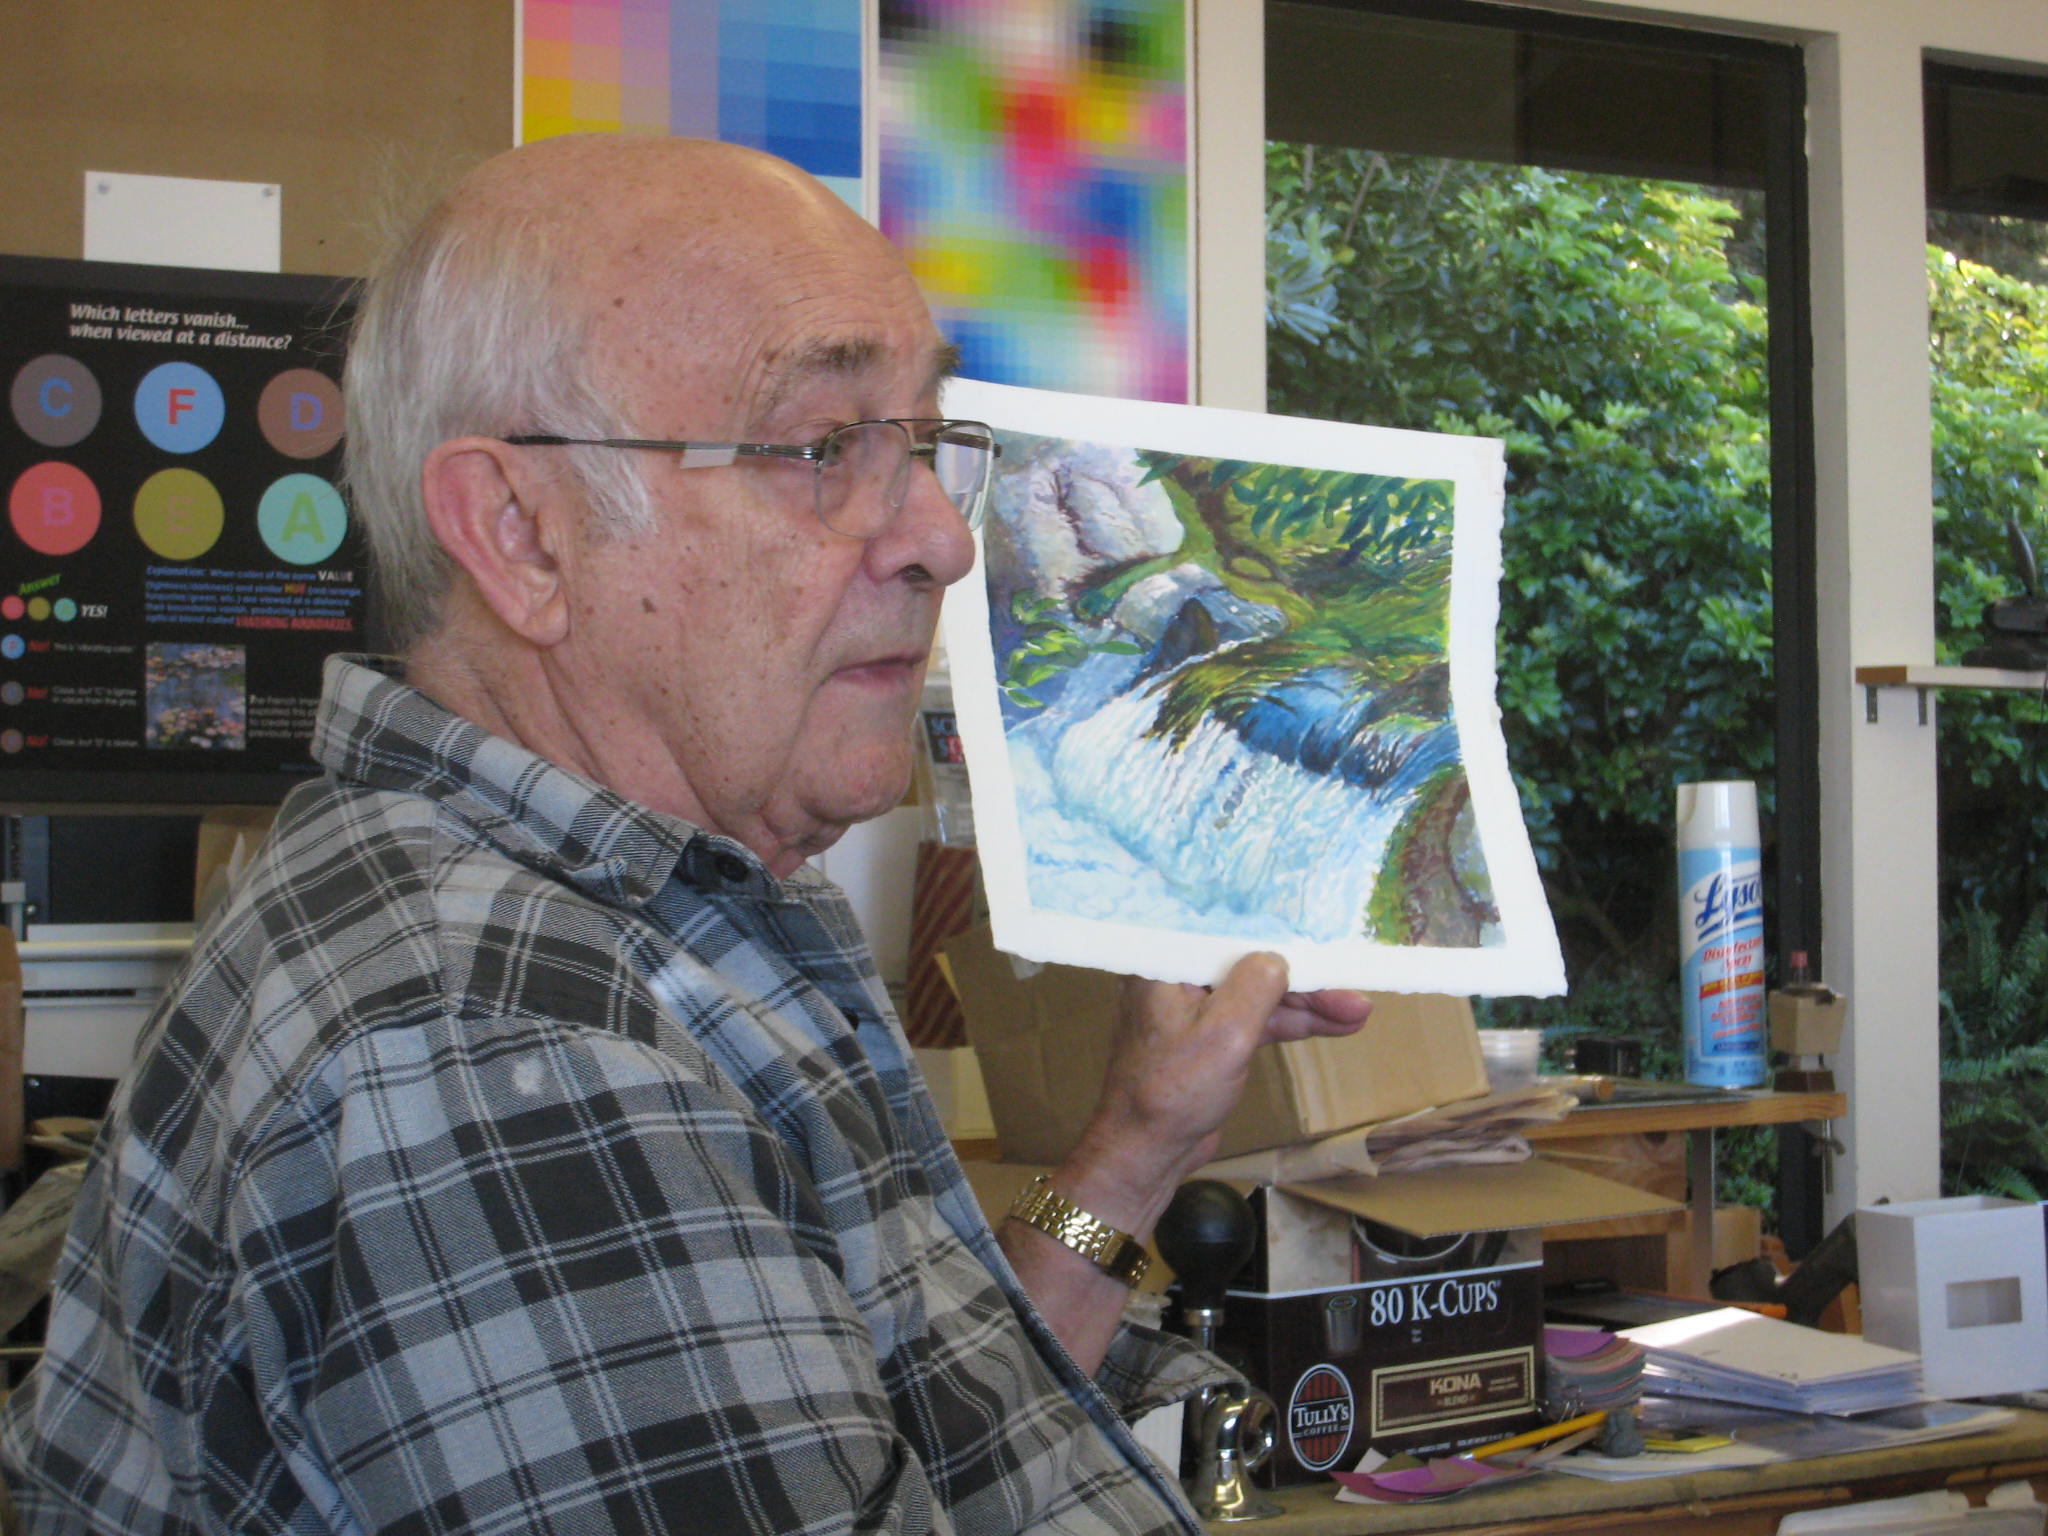
Dick held an extra session, for people to bring reworked studies for critique. Much of the time was spent on the surface exercise, which was a very challenging illusion of how water can be both transparent and reflective.
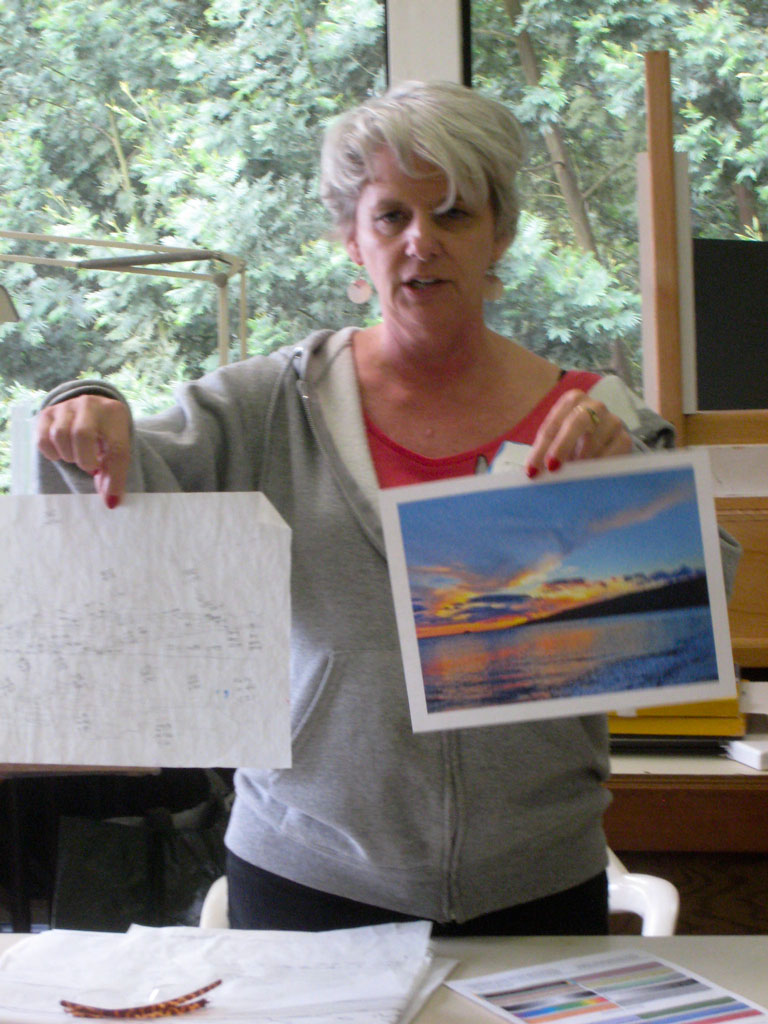
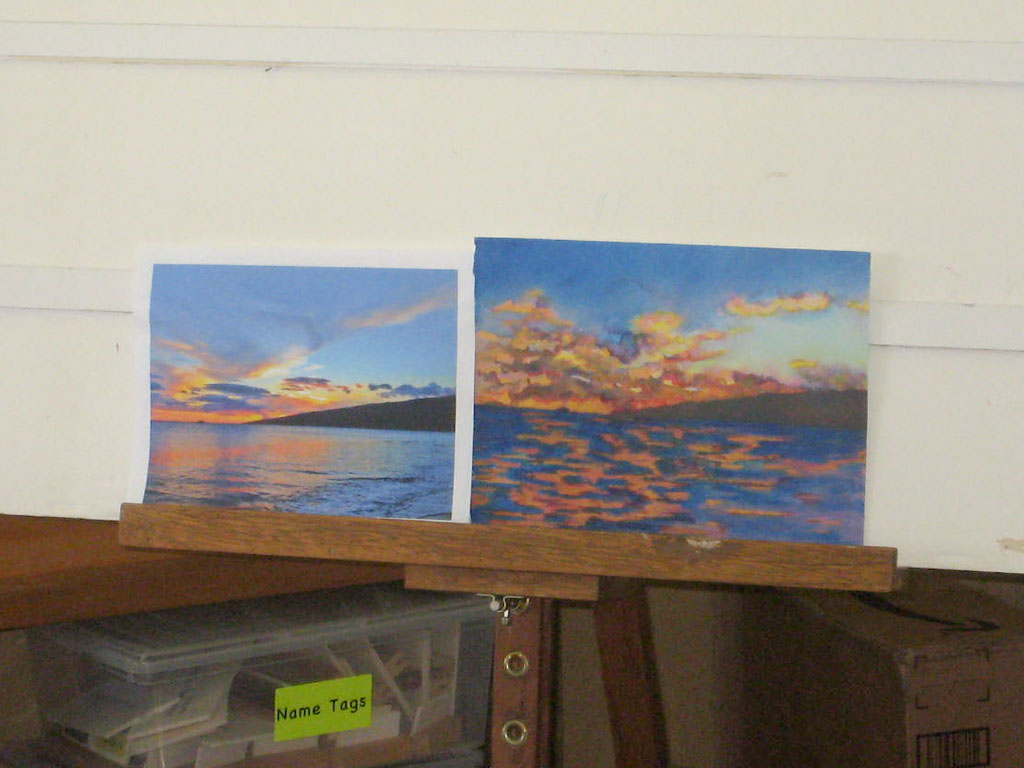
During the critique, Dick drew attention to the value of the water’s reflective surface. In the distance, it is reflecting the sky, which is generally the lightest area in the painting, so it should also be light. The surface in the foreground is generally darker. He also explained how to plot the height of reflected objects. Reflections depend on the position of the viewer. Dawn Jernaill sent the three photos below, which she took with a drone at three different altitudes, which illustrate both points.
Plotting reflections & shadows, then observing them
Dick Nelson illustrates how to plot reflections and shadows, describes how they behave differently, and provides an opportunity to observe them. (5:10)
Why bother learning to paint reflections?
Being able to pull off an illusion as challenging as reflection and transparency allows you to create visual magic. Careful observation is essential, combined with understanding. (3:15)
You will see when you understand
More on plotting reflections. Understanding the phenomenon intellectually will help you copy or create more accurately and convincingly. (6:13)
Never leave well enough alone
Cropping and playing. Painting demo, experimenting on “playgrounds”. (15:26)
Photos
Cropping
Cropping
Cropping
Susan and her study
Susan’s study of a rain squall in Maui’s central valley
Dick’s watercolor of a rain squall in Maui’s central valley
Rain squall (atmospheric veiling) in Maui’s central valley, from week 7 handout on Volume Color
Surface reflection and transparency in shallow water (from week 7 Surface Demo handout)
Playgrounds
Playgrounds
Mahalo to Valérie Richter for Wednesday photos and videos, and to Holly Duane for Sunday photos.
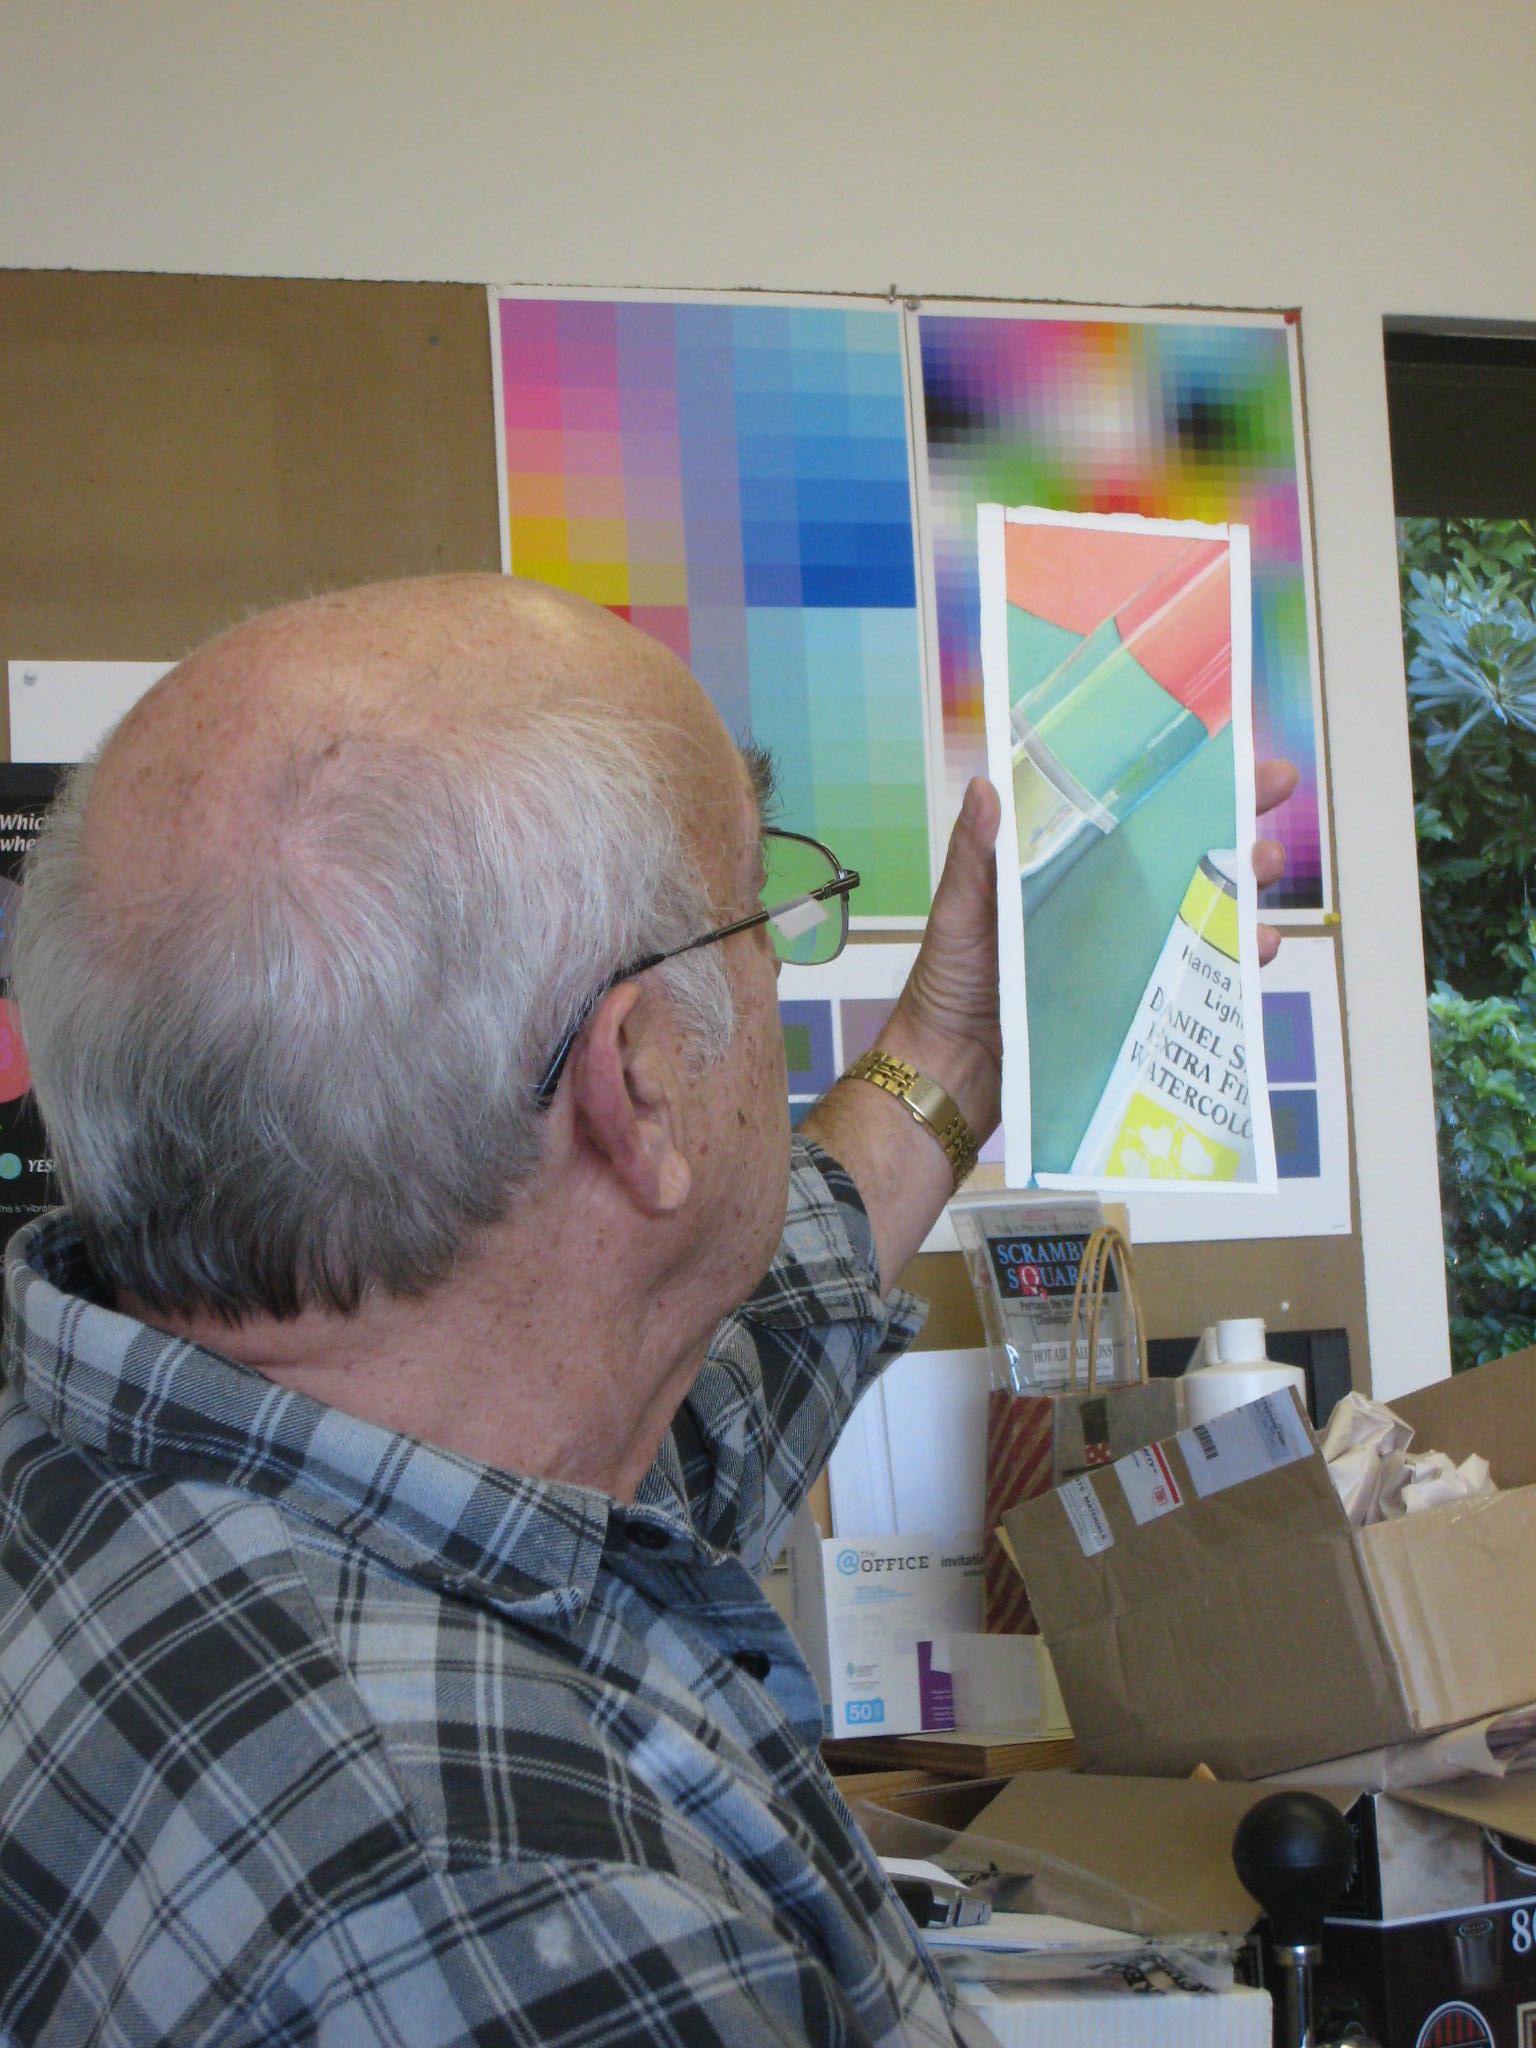
The seventh sessions of the Trihue Watercolor class for Winter 2018 were held on Wednesday, February 28 and Sunday, March 18. The colored light studies were critiqued. The new topic, surface, was introduced. Surface has to do with light being reflected or absorbed. Similar to the value scale of white to black, you can imagine a surface scale from very reflective to not at all reflective: mirror to black velvet. Still water at a distance will reflect the sky or other surroundings, acting like a mirror, while looking down into it at a steep angle, or where an object is between us and the light source, you can see through it like a window. The new painting assignment provides a chance to tackle this intriguing phenomenon.
The seventh sessions of the Trihue Watercolor class for Winter 2018 were held on Wednesday, February 28 and Sunday, March 18. The colored light studies were critiqued. The new topic, surface, was introduced. Surface has to do with light being reflected or absorbed. Similar to the value scale of white to black, you can imagine a surface scale from very reflective to not at all reflective: mirror to black velvet. Still water at a distance will reflect the sky or other surroundings, acting like a mirror, while looking down into it at a steep angle, or where an object is between us and the light source, you can see through it like a window. The new painting assignment provides a chance to tackle this intriguing phenomenon.
Dick showed this photo that Kathy had sent him with a clear example of colored light and shadows.
Notice the colors of the light and shadows
Videos – Class explanations and demos
Colors of light and shadow
Dick Nelson explains the relationship between the colors of a light source, its shadow, and the ambient light, and how to apply it to mixing colors for a watercolor. Cover the entire paper with a tint of the light color. Mix a shadow color containing black (because there is a lot of white light in any light), the complement of the light color, and the color of the ambient light. (2:30)
Painting strategy: Illusion of a gradated veil
Dick Nelson shows an illusion of a gradated veil, and describes the watercolor painting strategy for achieving it. (4:07)
Critique of transparency illusions in Albers book
Dick Nelson analyzes two transparency illusions from the Josef Albers book Interaction of Color, pointing out where the illusions fail to be completely convincing because they behave inconsistently with real life. (3:38)
Dick Nelson shows and describes strategies for conveying the illusion of water or another reflective surface, volume color (atmospheric perspective), and how to plot reflections. (6:14)
Wednesday class photos
Sunday class photos
Mahalo to Valérie Richter for Wednesday photos and videos, and to Holly Duane for Sunday photos.
The fourth session of the Advanced Drawing and Composition class for Winter 2016 was held on Wednesday, February 3. We shared and critiqued our skull drawings, discussed surface differences in more detail, and refreshed our memory on the ‘six phases of creative problem solving’. We spent a good portion of class discussing our next challenge, COMPOSITION. What is it, and why is it important? Read an excerpt, and listen to the full discussion near the end of the post.
The fourth session of the Advanced Drawing and Composition class for Winter 2016 was held on Wednesday, February 3. We shared and critiqued our skull drawings, discussed surface differences in more detail, and refreshed our memory on the ‘six phases of creative problem solving’. We spent a good portion of class discussing our next challenge, COMPOSITION. What is it, and why is it important? Read an excerpt, and listen to the full discussion near the end of the post.
We began the class by reviewing a couple more shadow assignments, which again brought up the issue of ‘relationship’. For this assignment, it is imperative that all objects in an image are in context with each other, which means they should be aware of each other. One way to do this is to keep the lighting and the shadows consistent, which tells the viewer that all objects in a scene are influenced by the same circumstances.
“These shadows all know about each other, because they are all telling me it’s a very bright light, but this shadow doesn’t: it falls out of context. And that’s the whole idea of how artists work with light, because the light is always consistent. It doesn’t play one game here and another game there. If you’re telling me that is a really bright light [with a very dark shadow], then this [a very light shadow] isn’t telling me the same story. Here, a dim light; here, a bright light.”
Dick has repeatedly stressed that this course is about relationships, not just drawing, and his task is to help us identify what that means. Giving equal treatment to the subjects of your image is one of the easiest ways to achieve visual harmony.
Discussing cast shadow drawings
Sharing student’s work with cast shadows
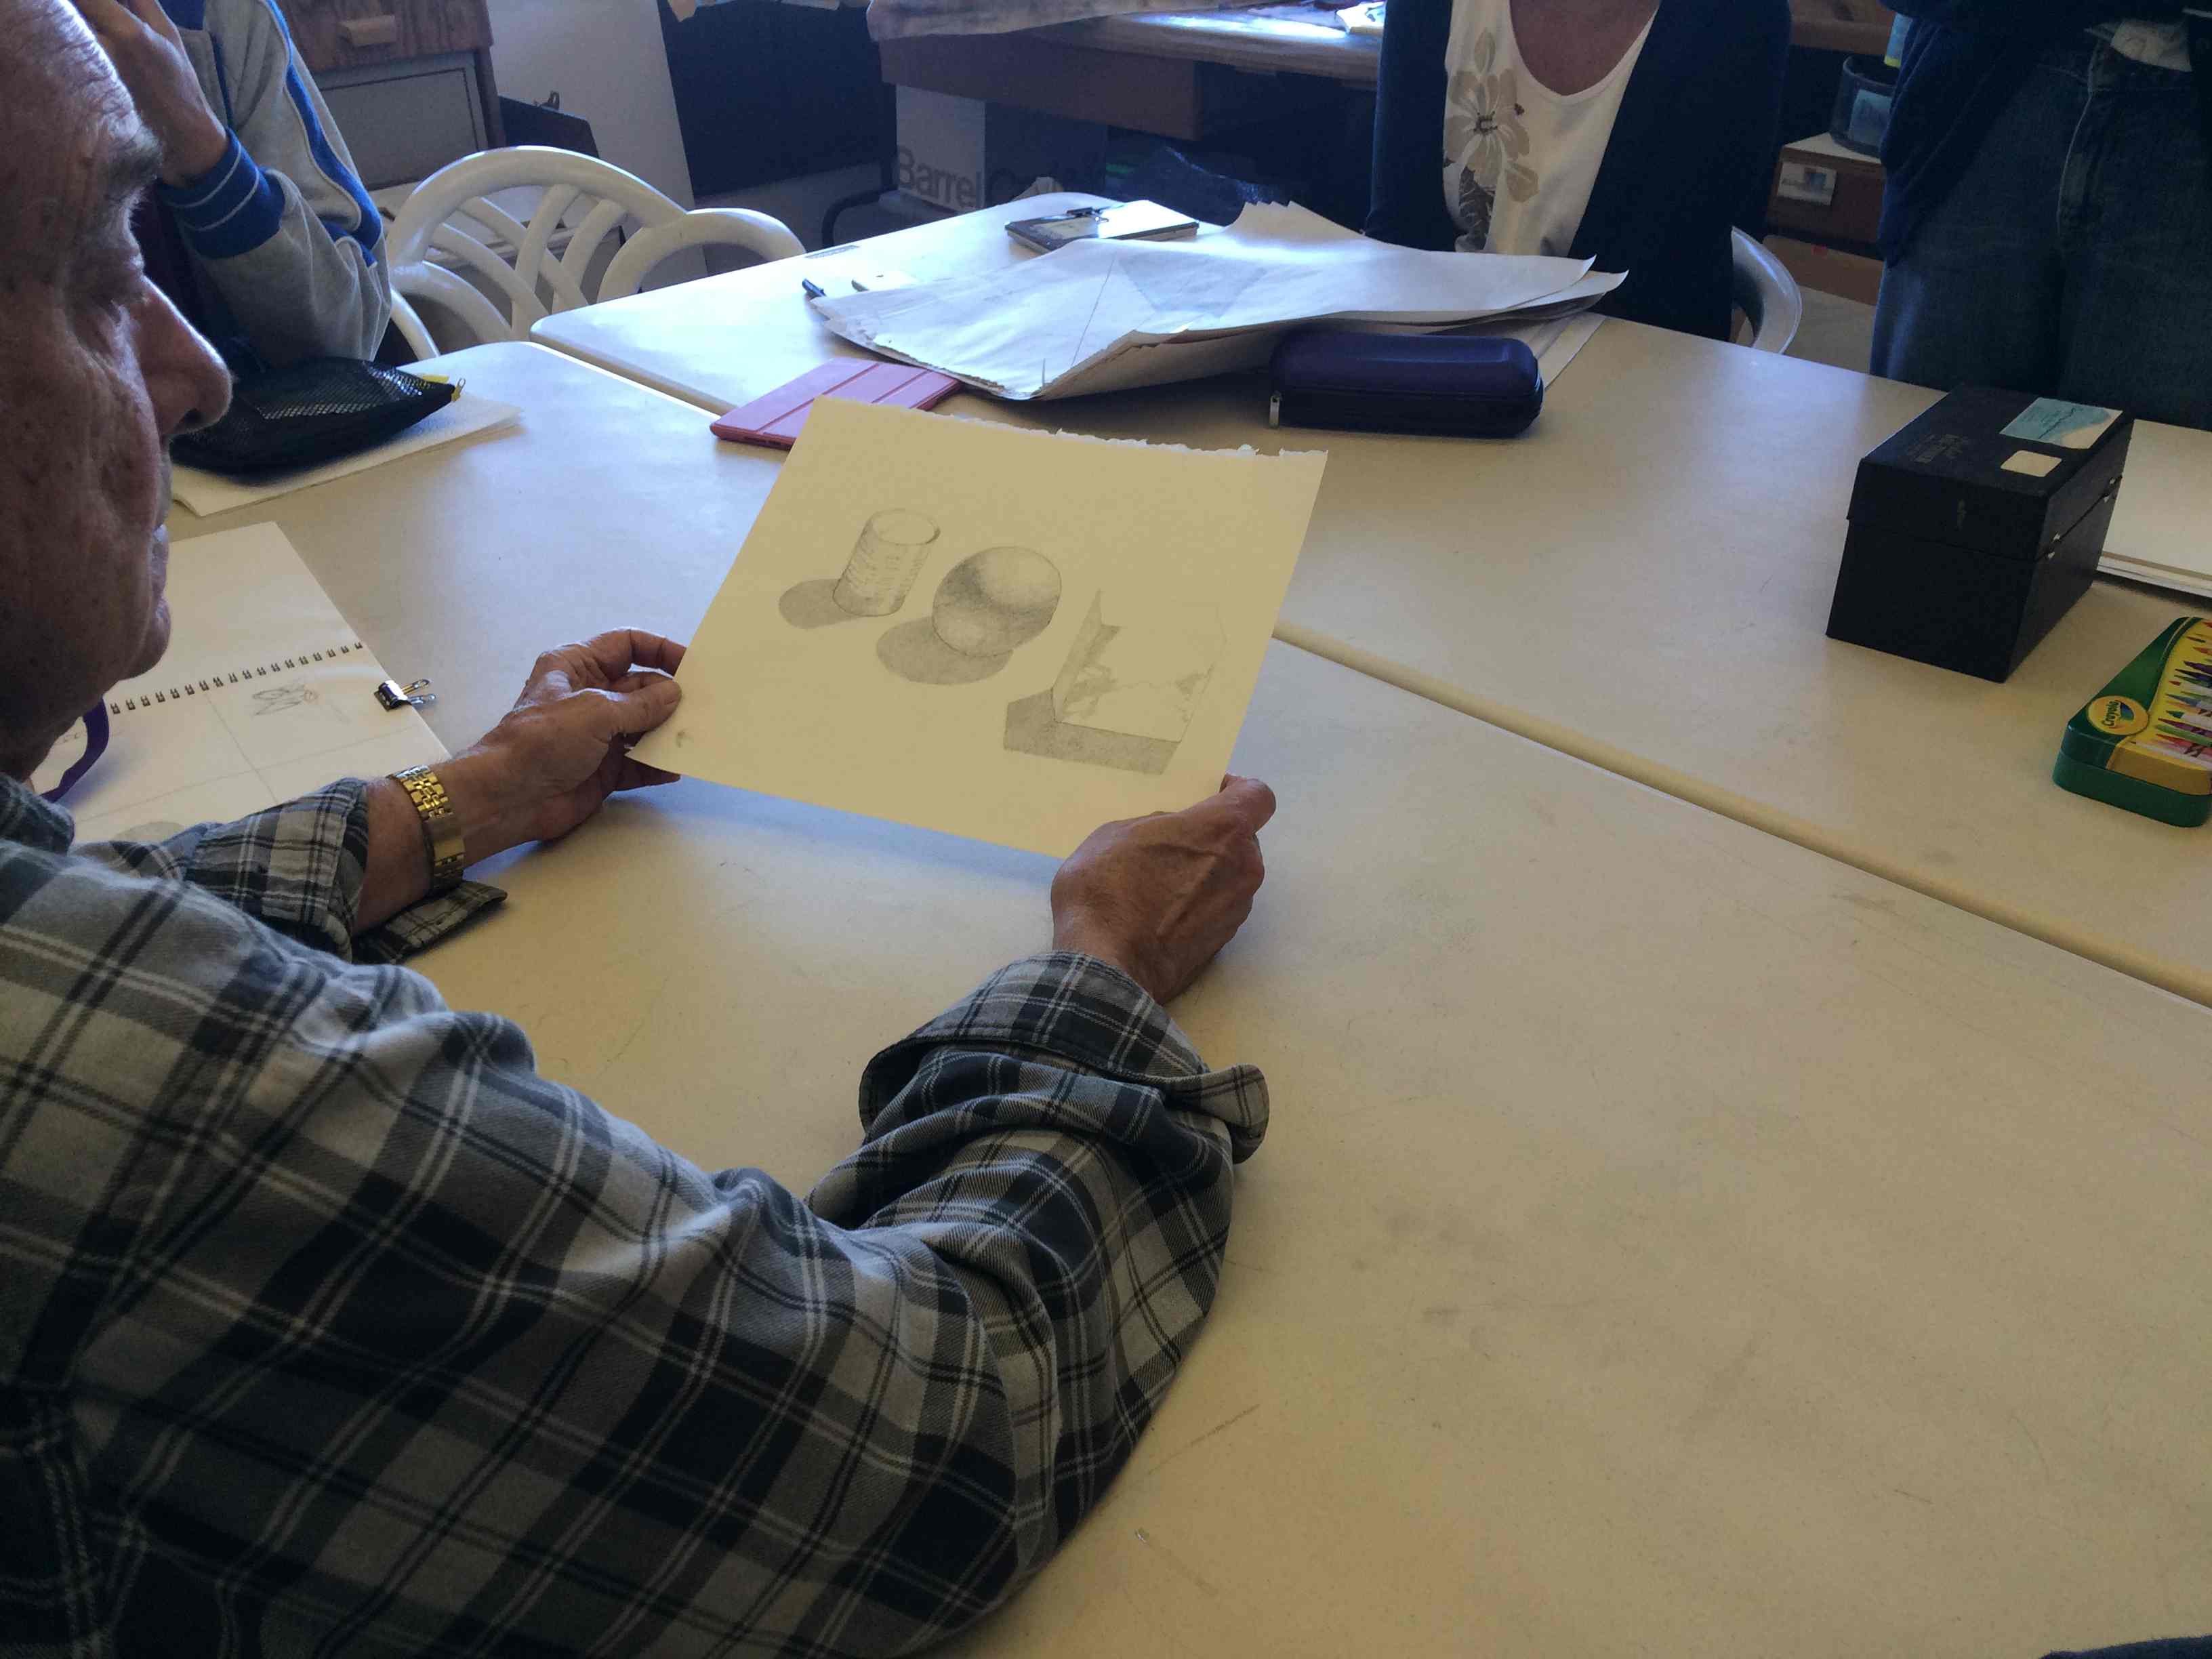
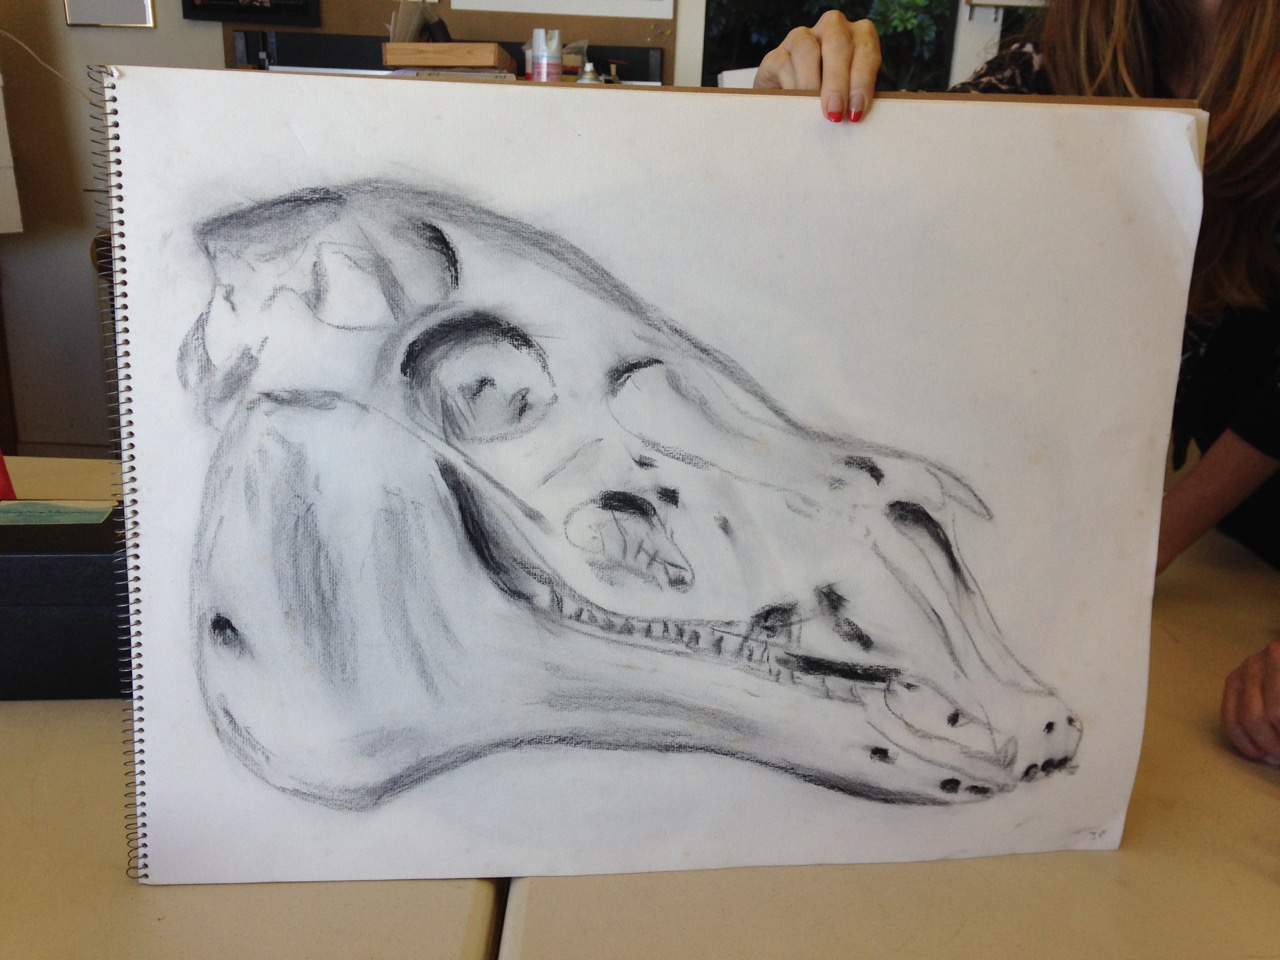
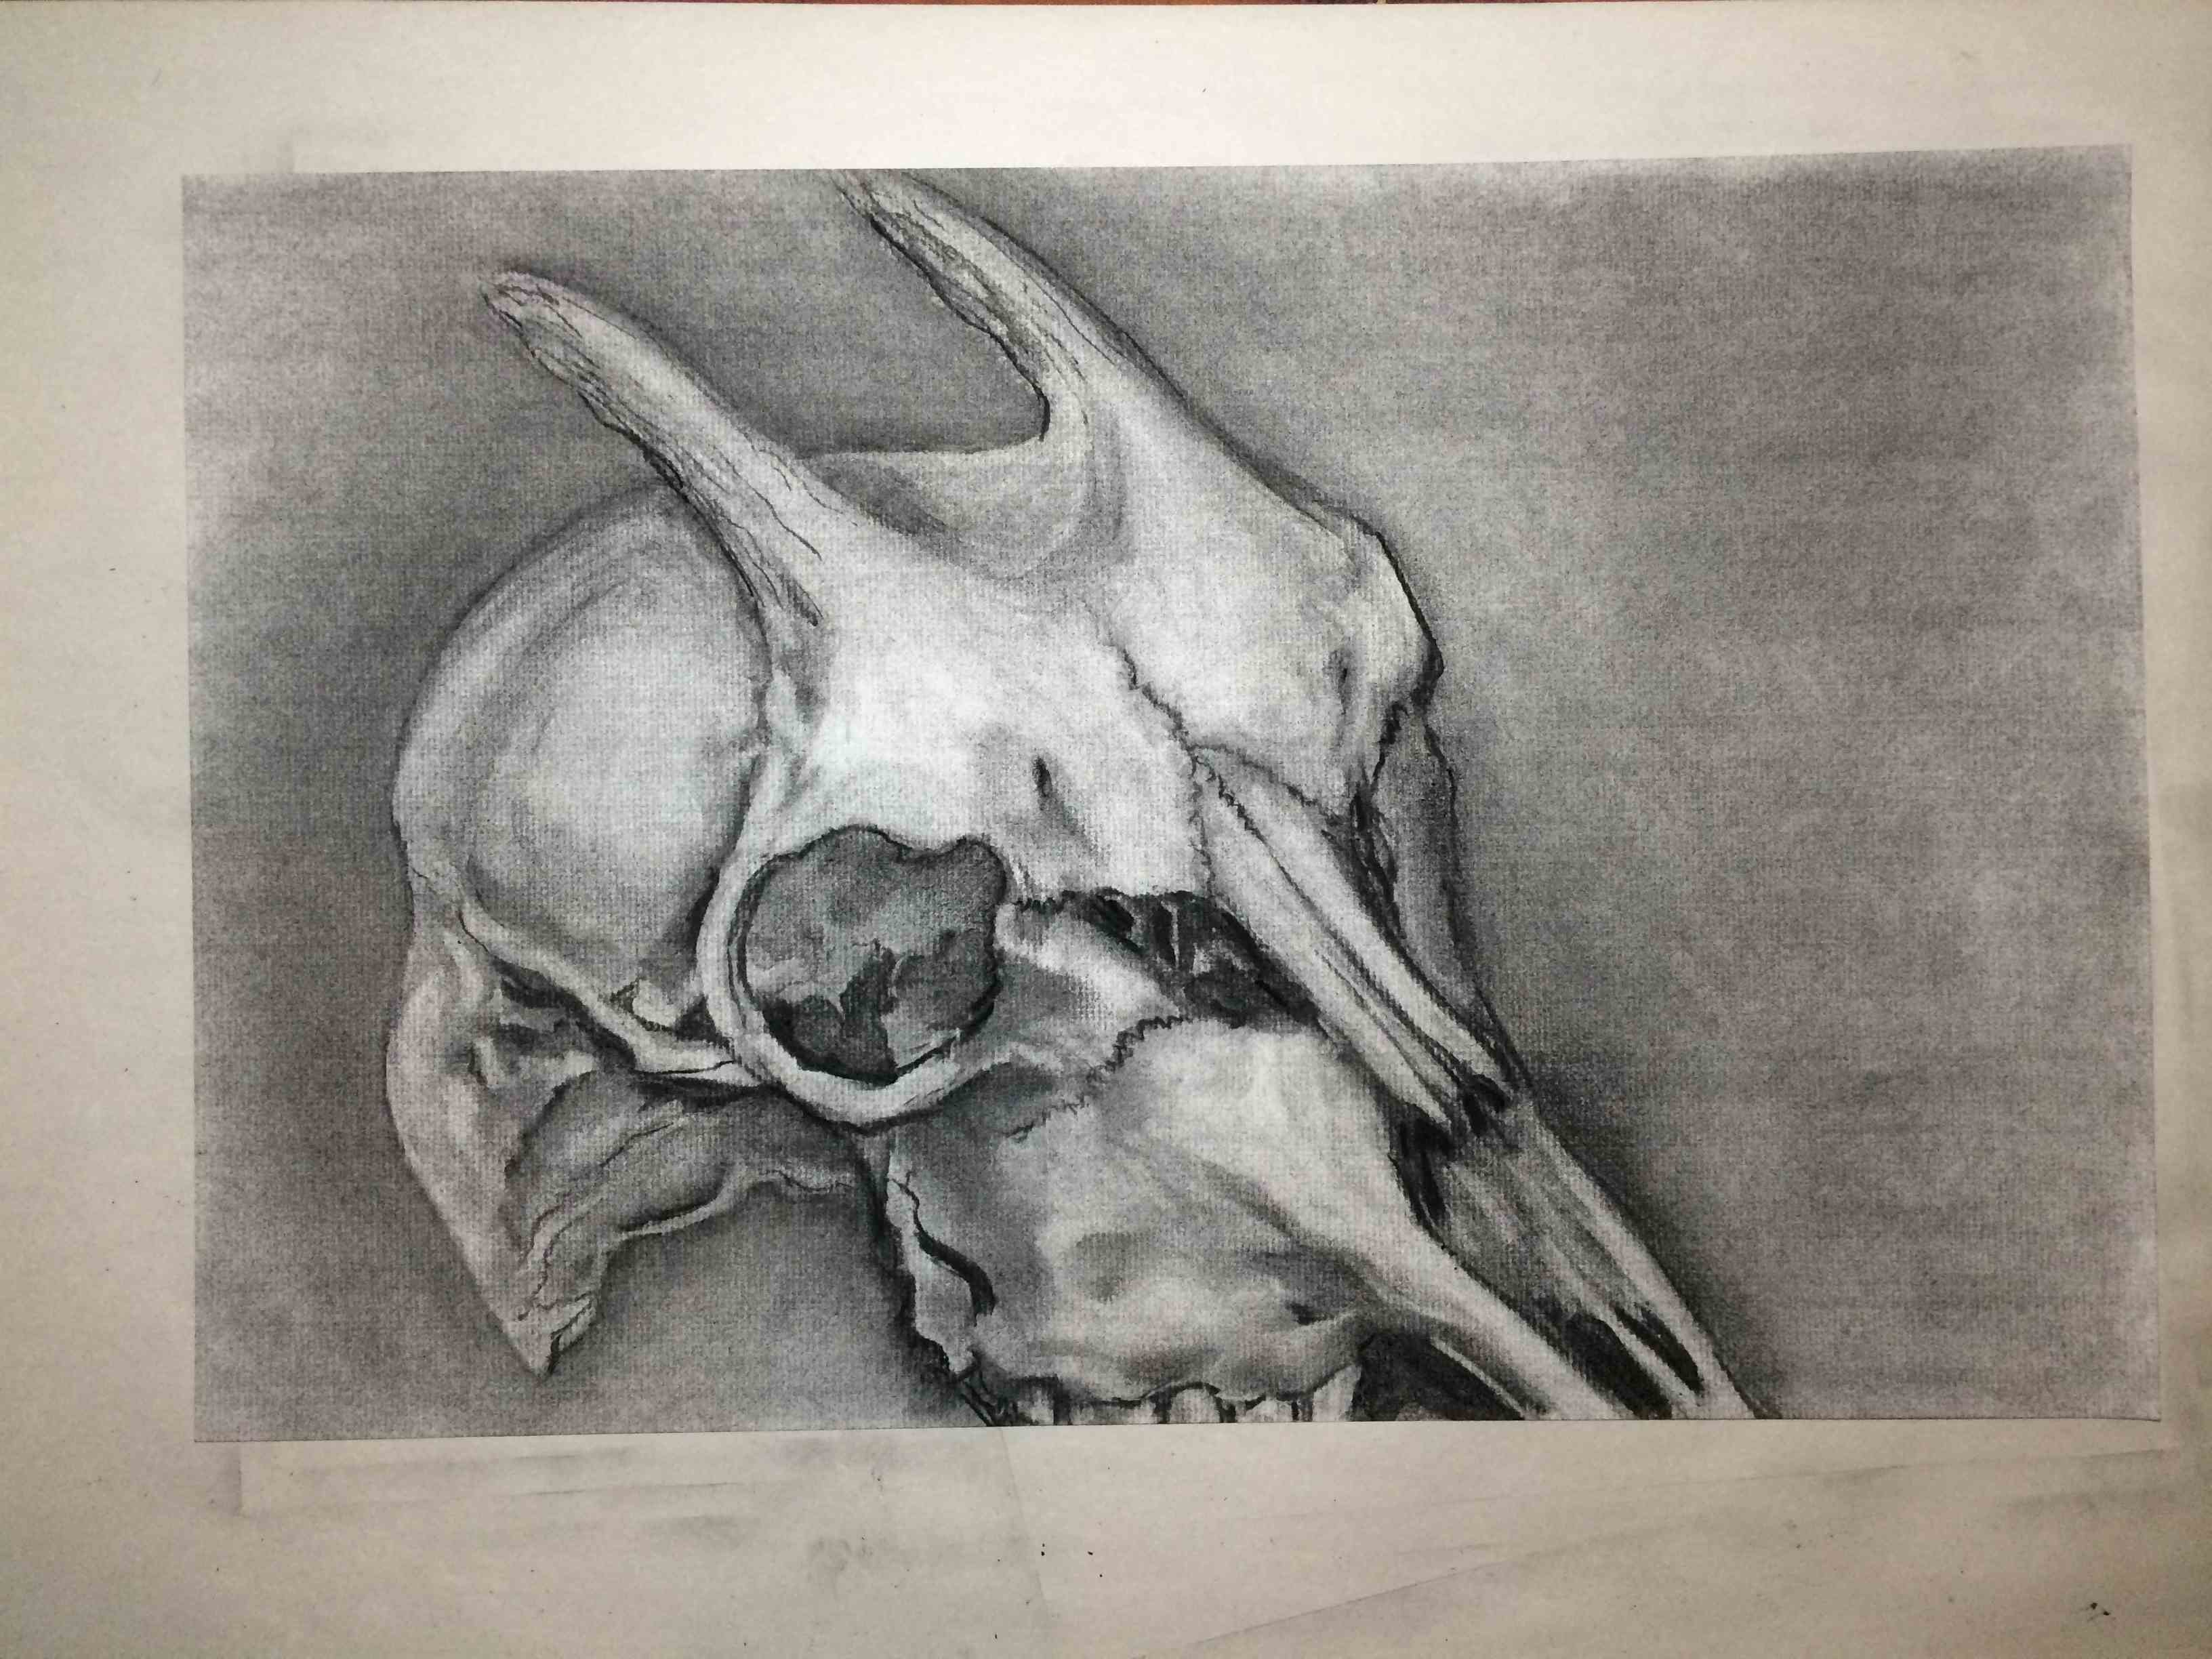
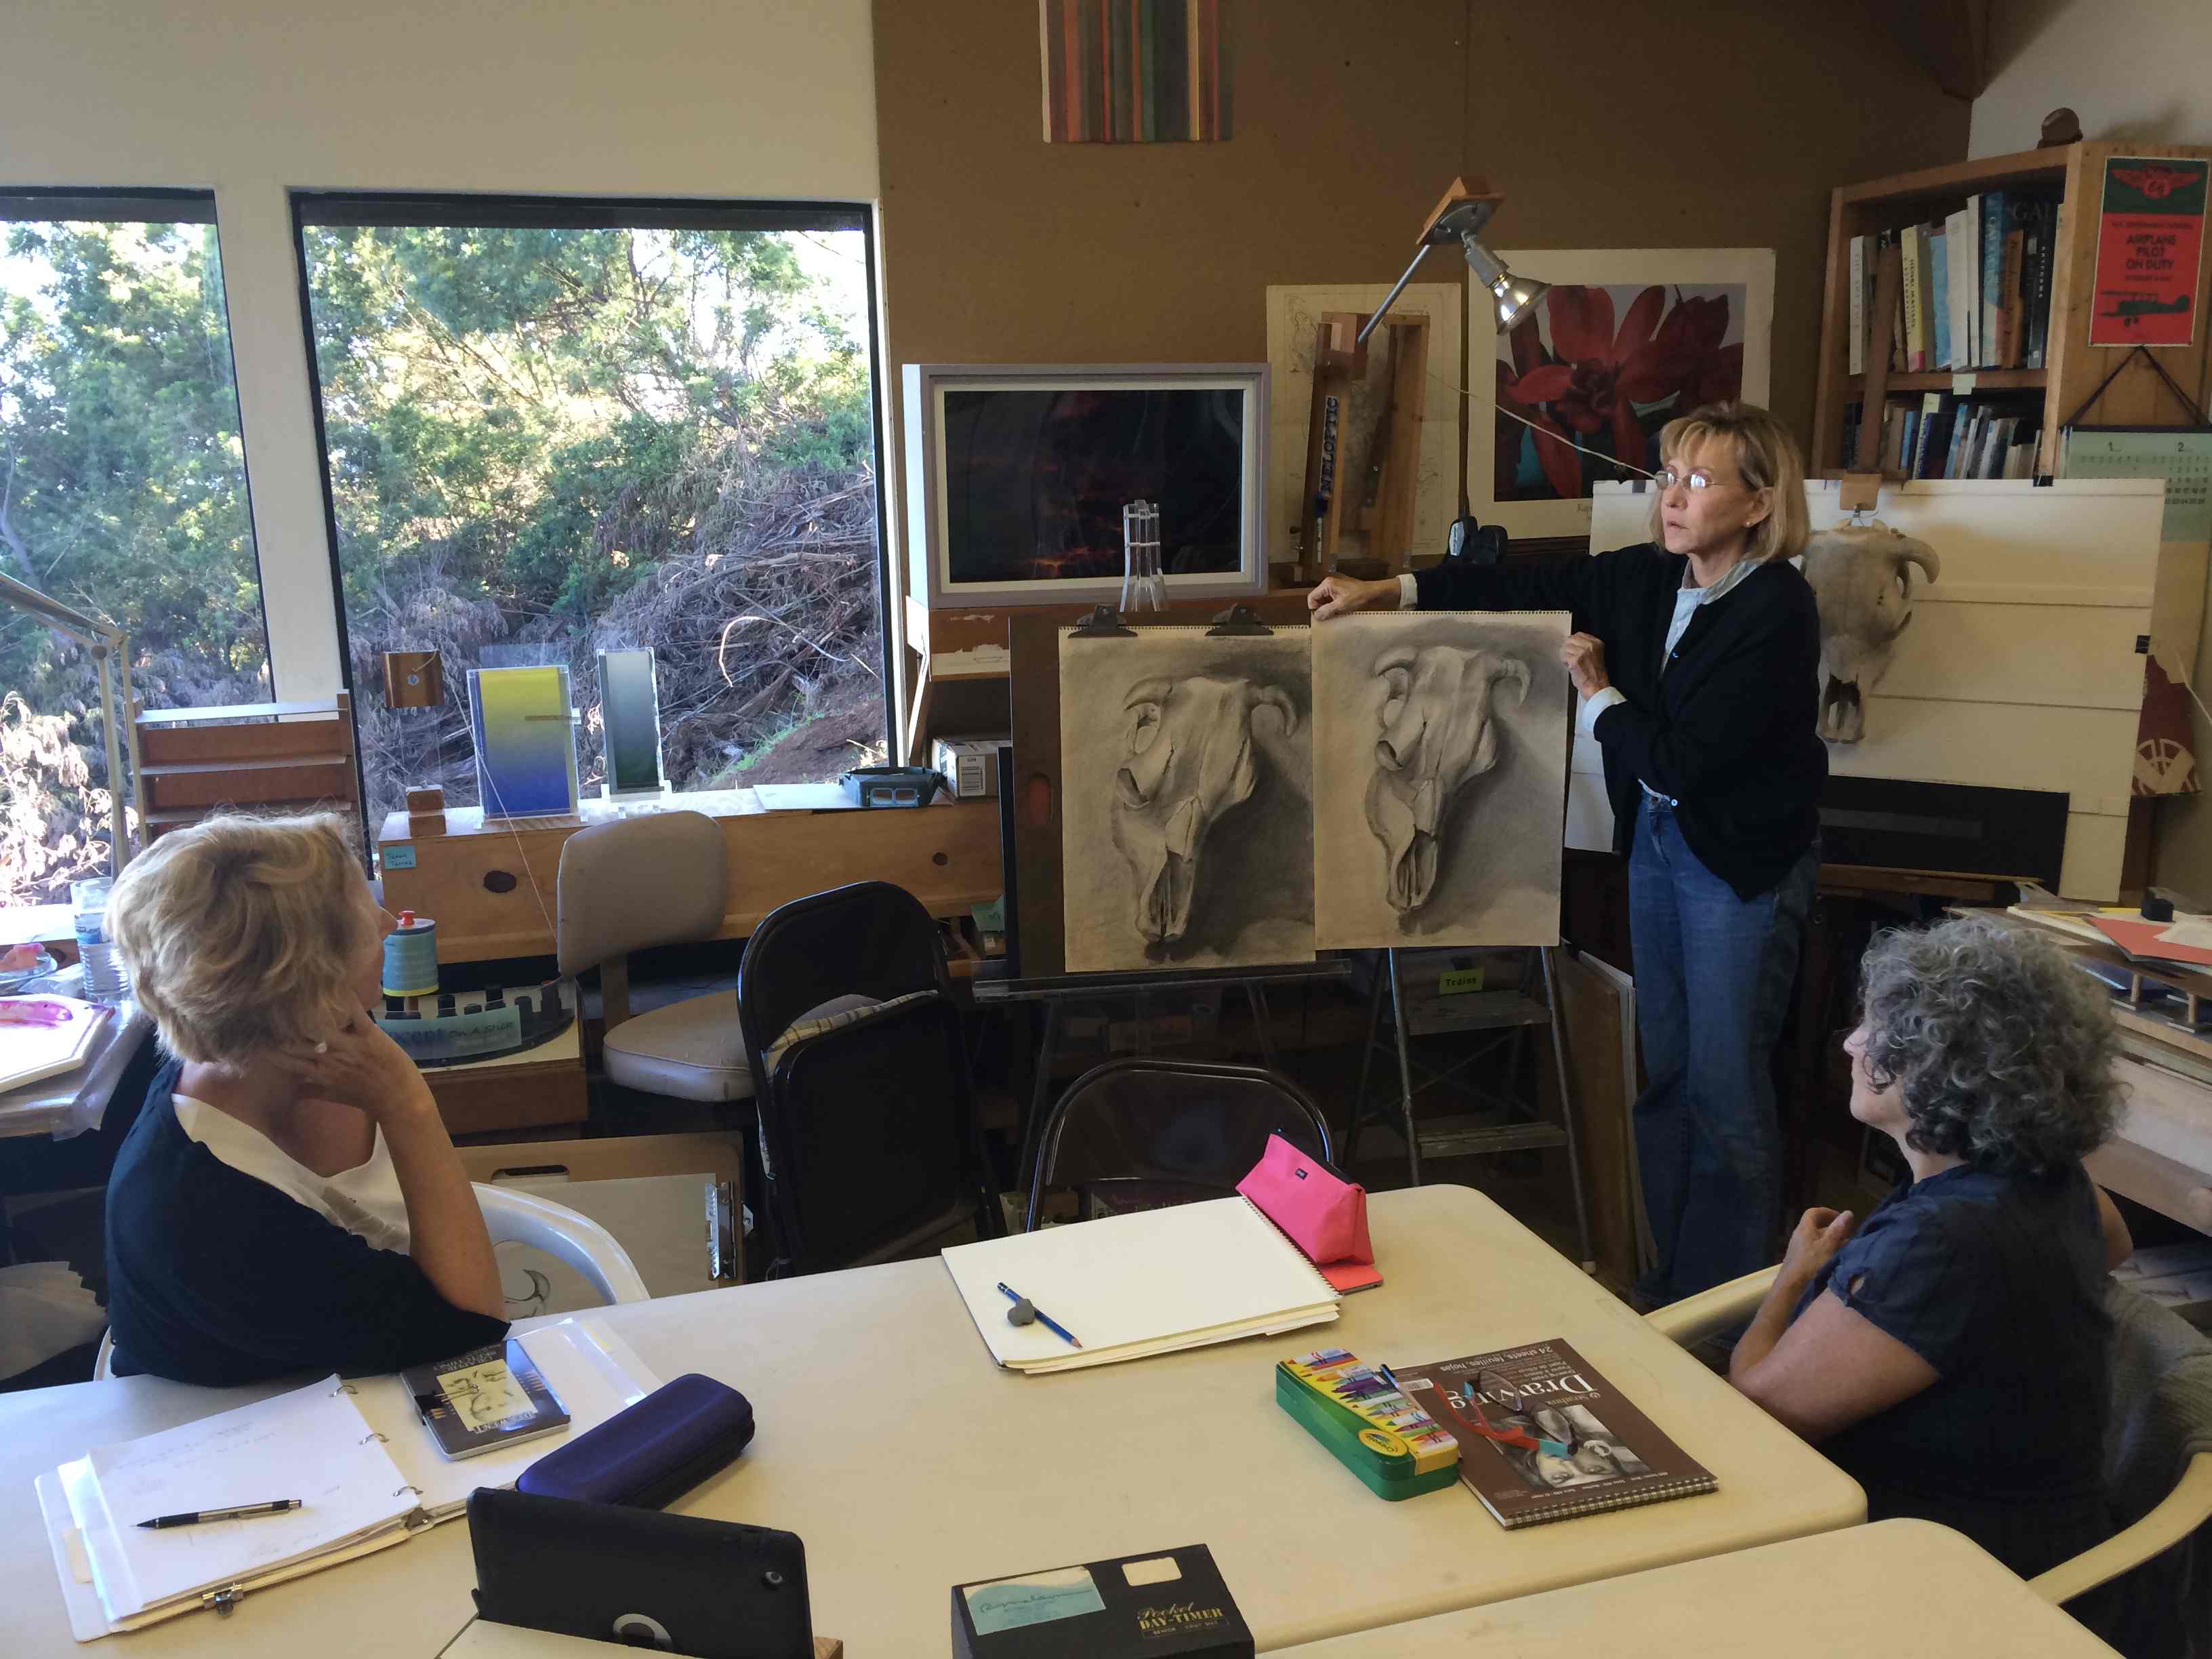
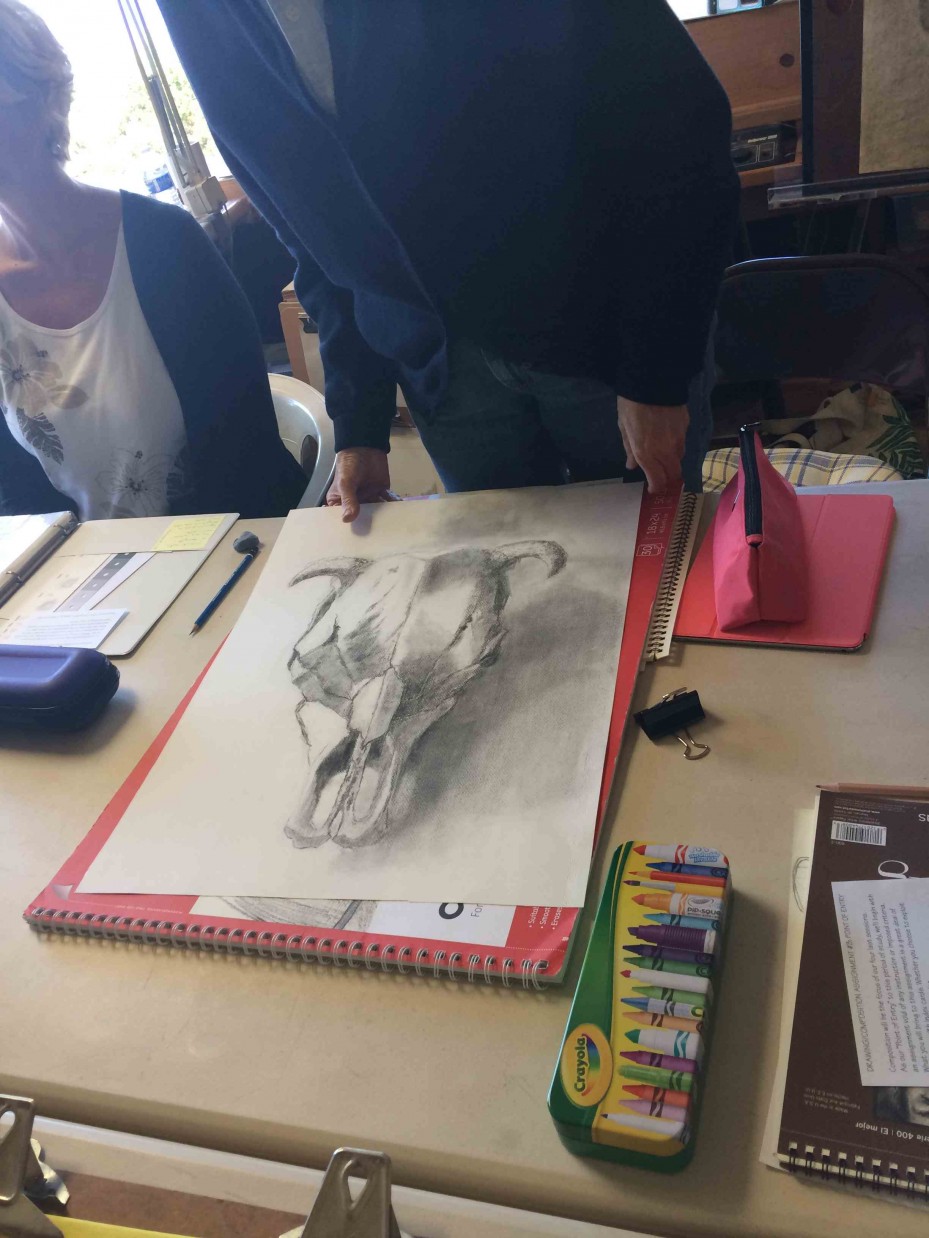
Skull drawings in charcoal
We moved on to critiquing some of the homework submissions, charcoal skull drawings that students had either continued to work on using a photo for reference, or by drawing another skull or object that they had at home. Again, Dick was looking for consistency in the light and shadows, a range of values to show the difference in surfaces (and especially for highlights), and how well a student was able to use the charcoal to render their image.
Critiquing student’s charcoal drawings
One subtlety Dick has been pointing out to us is to find the areas where the lines between object and background (or figure and ground) seem to disappear, where the value changes match each other enough to blur the boundary between them. This kind of effect was used most famously by the Baroque artists of the 17th century to create a visual ‘softness’ and sense of mystery that can be very compelling to our eyes.
“Do you see any place where she literally loses the edge, where the value of the area is the same as the cast shadow? Do you see right above the eye there, do you see how your imagination has to complete that? Now, why would you maybe consciously set up your lighting, or do some editing where that would take place? This is an idea that was clearly developed by Caravaggio and da Vinci, to engage the viewer to complete the drawing or the image, because that’s how it works in nature as well. And if you want to make something more engaging, which the Baroque artist is trying to do, then don’t show everything. [By showing every little detail], you don’t engage your viewer emotionally that way.”
Cow Skull Critique 2 (4:30)
A discussion of relative values and artistic choices.
Leonard Cow Skull (2:03)
Looking for relative values – where is the skull the same value as the background?
Elizabeth Skulls (0:49)
A brief look at one student’s charcoal drawings of the cow skull.
Finding the correct shapes and planes of an object
We also talked again about looking first for the governing shapes and forms that surround a particular object, an invisible framework that will dictate the proper angles and planes of our object. It we do not know, or are not aware, of the larger form that an object subscribes to, then we may not get the angles to line up correctly, and run the risk of creating discrepancies which will warp our subject matter.
“I’m trying constantly to see all of these planes. If I start by putting the hair in, and then I put in the details of the face, this is going to happen: the distortion. Nothing will be distorted if I recognize this idea [finding the basic governing forms] first: whatever I do here, I do here; whatever I do to this, I do here, because everything is symmetrical. So if Michelangelo is carving something out of marble, you’re doing basically this first before you’re concerned with the [details]. And all of these details then can be placed properly, and you don’t get these crazy distortions.”
Dick Demos (9:59)
Dick Nelson demonstrates how to use an understanding of perspective to accurately draw complex shapes.
Shape Clues (3:23)
Recognizing key visual clues in organic shapes and how to portray them to convey depth and volume.
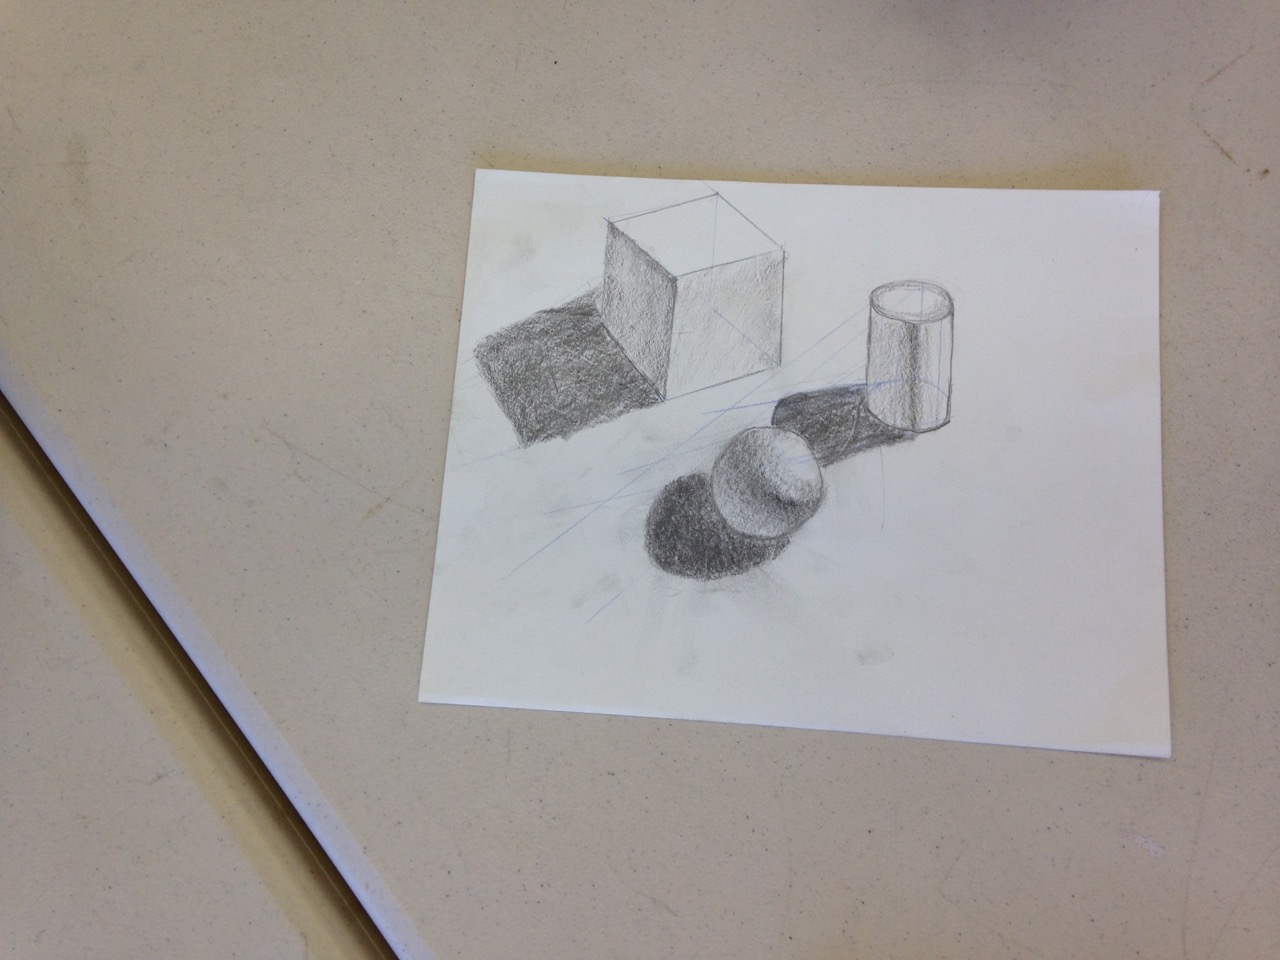
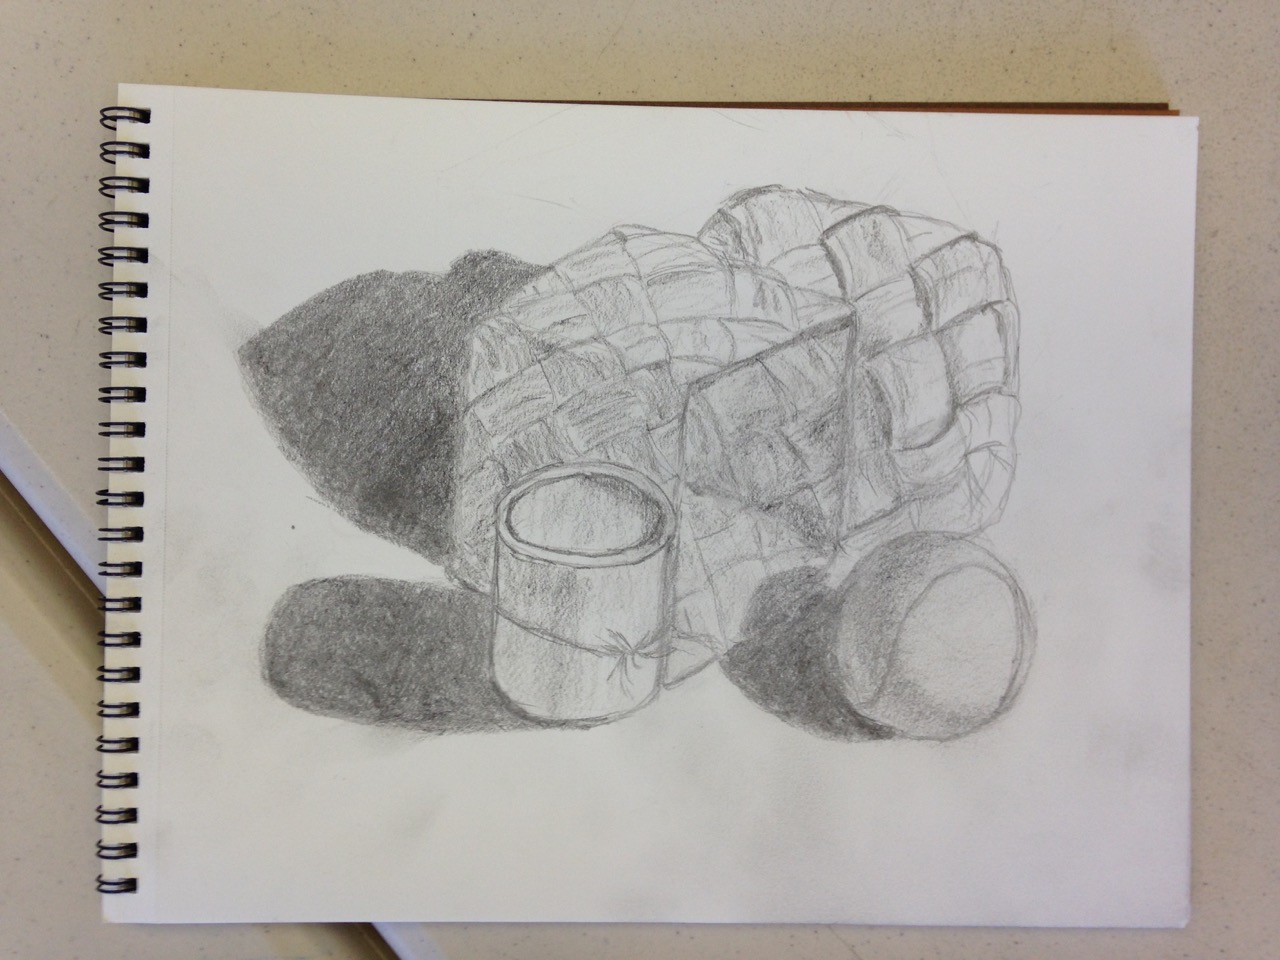
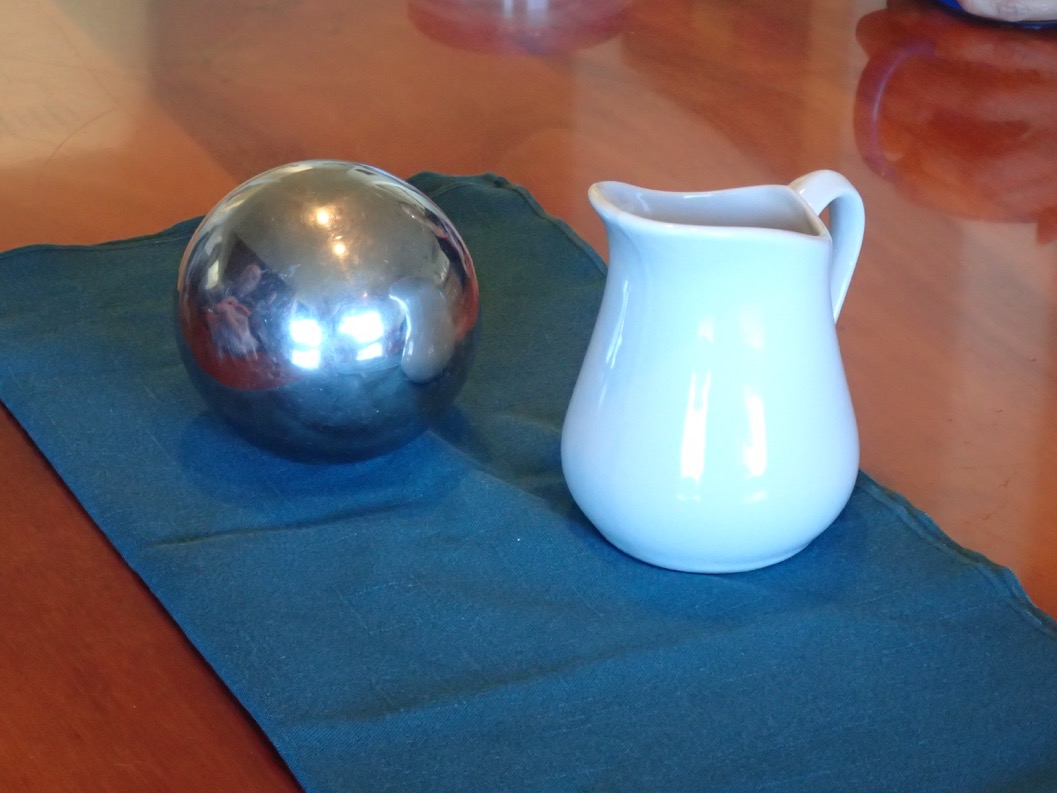
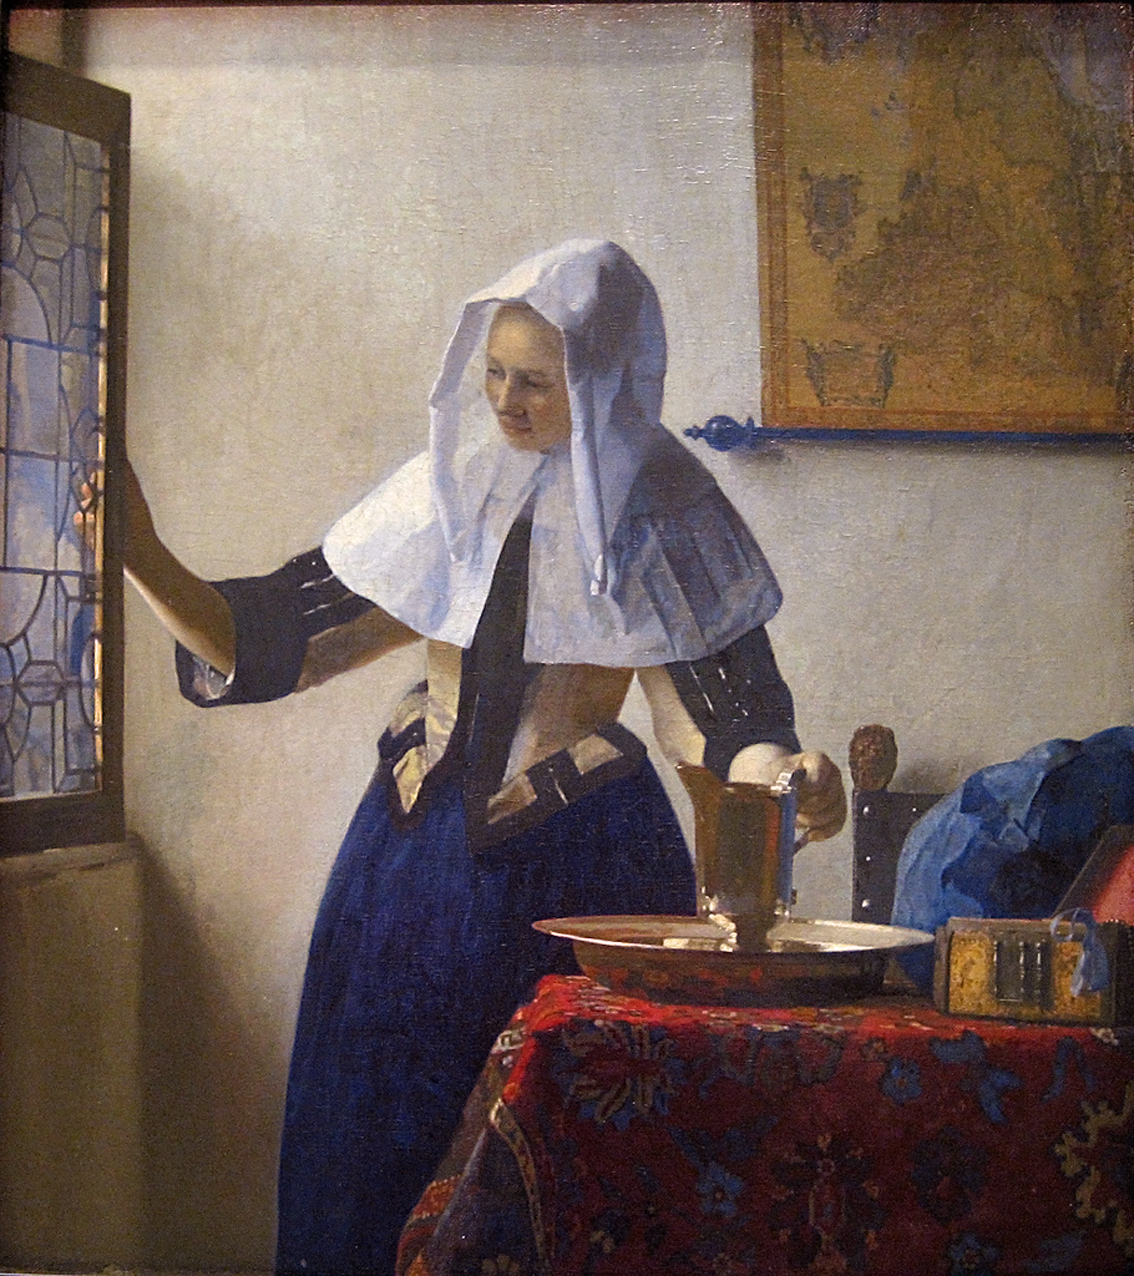
Surface differences: reflective vs. absorbent
After our coffee break, we talked about differences in surface qualities, and discussed how we might approach rendering these in a drawing. The idea is to look for the levels of reflection versus absorbency in your object, and that will inform your choice of value for highlights, shadows, and the sharpness of whatever it is reflecting. A very shiny, reflective surface will show us more of its surroundings (which also means stronger contrast and sharper lines) than a dull, absorbent material.
The visual difference in materials can be seen here in the metal sphere, the ceramic pitcher, the cloth napkin, and the table top
A painting by Vermeer, in which he depicted a wide range of surfaces
“The observation has to do with surface – not texture, surface. For example, I go into galleries, and I see paintings where the ocean surface is painted the same way as the sand. But we see throughout art history artists who have been fascinated with surfaces. And it is a visual message, that not everything is shiny, not everything is dull, and the variety of that is like the variety of color or whatever, makes for a visual circus or experience as any composition in music; you have textures, a different feel. So looking at this as a scale from the most shiny to the most dull – and we all agreed last week that the most shiny is what? A mirror.”
The key (as with most things) is to use your powers of observation and really LOOK at the visual clues in an object that are telling you what it is made out of. Dick advised us to look past the ‘labels’ we tend to use internally, and to describe an object in terms of shape, value, color, and line quality.
“If you stop thinking, “It’s shiny”, and simply look at what it is (what is the color, what is the value, what is the shape) and you put it down as you see it, what is amazing to a lot of people it that it will look wet, it will look metallic. If you are able to get your left brain out of the way, which says, “That is silver, that is metallic”, and simply see shape and value and put it down exactly as you see it, then while you’re doing it, it may seem very, very strange; until you step back and all of sudden the thing is metal.”
Surface Observation (19:35)
Dick Nelson leads a discussion on “surface”. The level of reflection of an object conveys to us what its surface is. Considering a value scale from white to black, the “surface scale” analog would be from mirror to velvet.
Dick also mentioned that this kind of knowledge and observation is entirely up to the artist to use as they see fit, but the important part is being aware that depicting surface is a visual option, one that we should know how to utilize when necessary.
“So, again, in the recognition of this, and I’m mentioning this not necessarily with the idea of your being able to use this in every drawing, because that may not be important. But it’s part of your visual vocabulary, and not to take into account the role that light plays, and the role that surface plays, and the role that space plays … [it is important] to have this as part of your repertoire. To me, education is really about knowing your options, and if you have this, you may never use it. But it should be like a checklist: do I or do I not want surface differentiation, and why would I?”
Dick summed it up by having a student read aloud from a handout (below): “Artists are problem solvers. They thrive on their ability to see, understand, and visually render the realities of their external and internal world. These artists are inquisitive and, like a child, see the world with wonder.”
Composition assignment, and the six phases of creative problem solving
We spent the rest of the class discussing our rather vague homework assignment, which boiled down to: ‘Create a “composition”!’ This assignment, as Dick noted, is devoid of any instruction or imposed criteria, and offers up an incredible amount of freedom for interpretation. Of course, freedom comes with its own challenges, one being ‘where do I begin?’
This is actually the first step in what was Dick’s graduate thesis for his Master’s degree in Education: the six phases of creative problem solving. We have gone over these six steps before (see a previous class post), and this is what we will be focusing on for the next four weeks as we explore composition.
When faced with a problem, humans tend to react in predictable ways, and part of learning to be a visual ‘problem solver’ is learning how to approach your art with as much conscious awareness as possible. This will allow you to find new and creative ways of expressing yourself, without getting hemmed in by self-imposed boundaries.
Here are some excerpts from our conversation about ‘composition’ (to hear the full dialogue, please listen to Valérie’s audio recording below):
“Okay, the first phase of problem solving is what: POINT OF ENTRY. And what does that mean? I gave you an assignment when we started the [first] course: to draw a square. That was a point of entry. You came at it with what? Preconceptions. The given index card prevented you from tilting or turning it, for some reason it imposed that the edges of your square would have to be parallel to your index card. And day after day, week after week, those preconceptions were shattered by really creative breakthroughs. Consequently, the point of entry is to address and be conscious of what your preconceptions are.”
“But we have to recognize that when we compose, if we don’t know what we are trying to say, or we don’t know what is real and important to us, then the composition is, for me, a little bit of a fakery, or very superficial. So the artist must reach within, and have not only the expertise or be able to draw, but then make a decision, ‘Am I going to draw exactly as it is, and be a Realist; or am I going to distort it in some way?’ It’s nice to have the [visual] grammar so you can do anything you want with it, you can start playing games with it.”
“Can any of you see if you’ve identified any preconceptions of the word ‘composition’? That’s what I would like to have you do between now and next week: identify, right off the top of your head: this is what I thought a composition would be. What are your preconceptions? This is the hardest part, because the point of entry is all your preconceptions and you can’t spot them because they’re so hidden. [You don’t recognize what is inhibiting you, what you take for granted.] This is really important, that point of entry, and really being able to examine your own preconceptions.”
Listen to the full discussion, which includes student discoveries of using composition in their own lives.
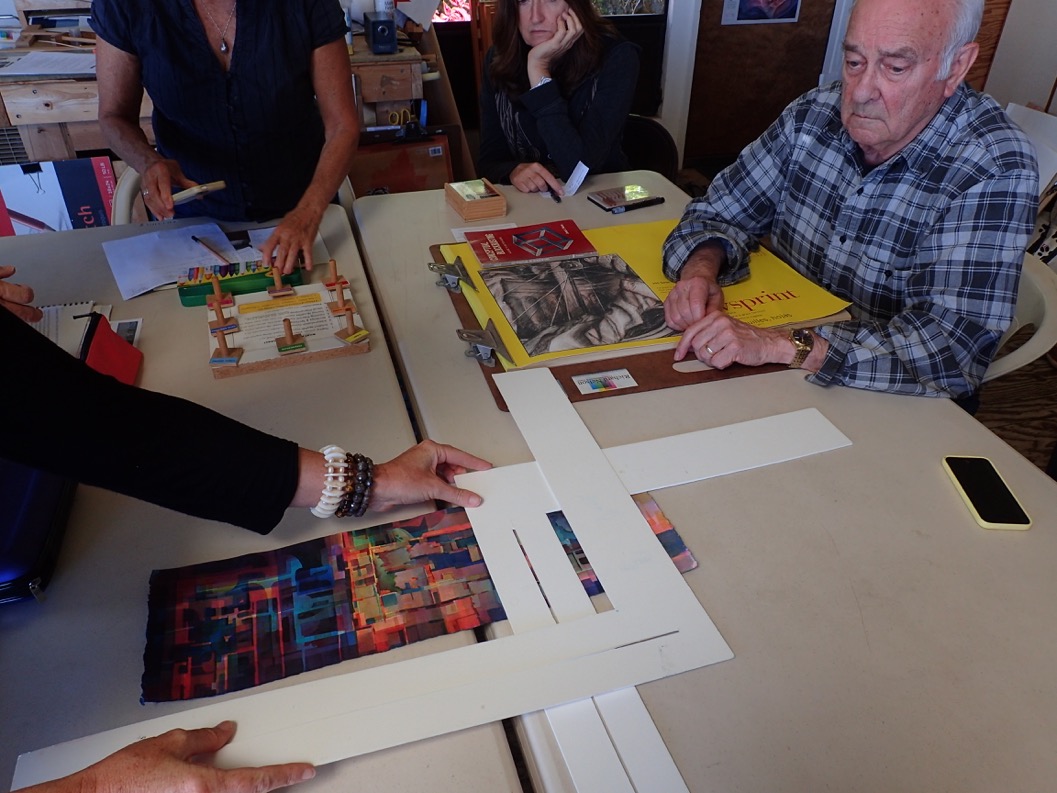
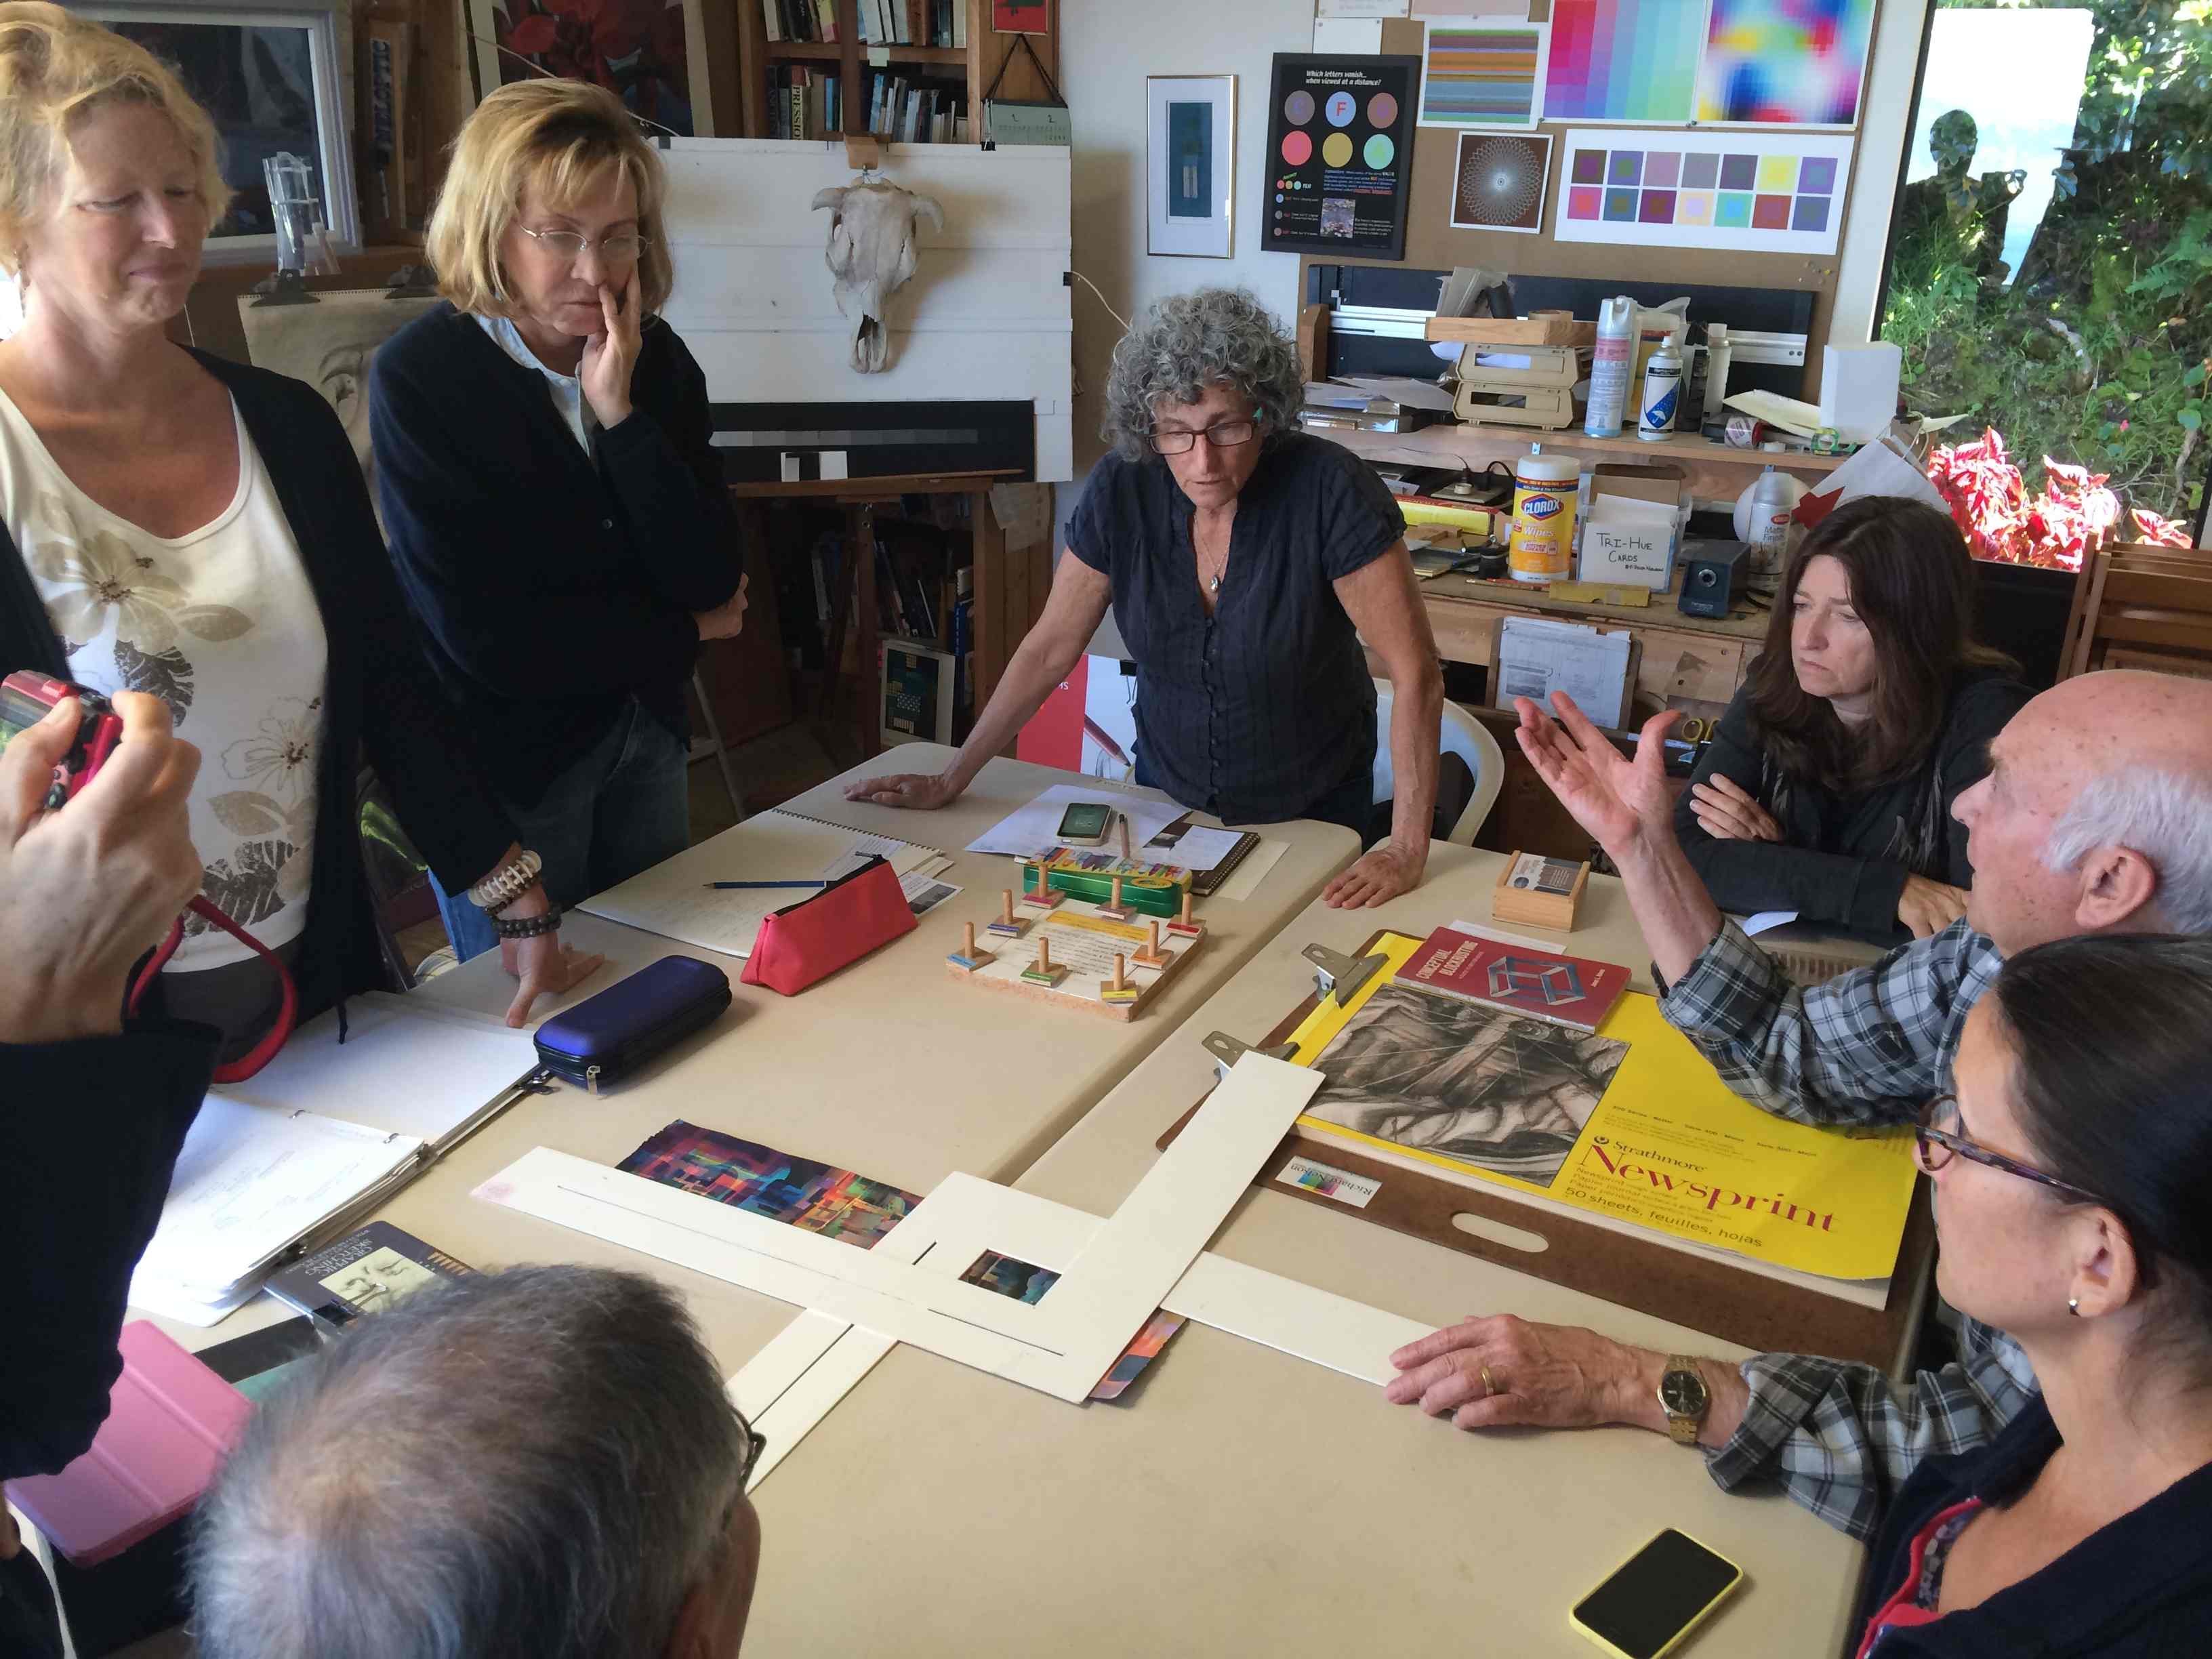
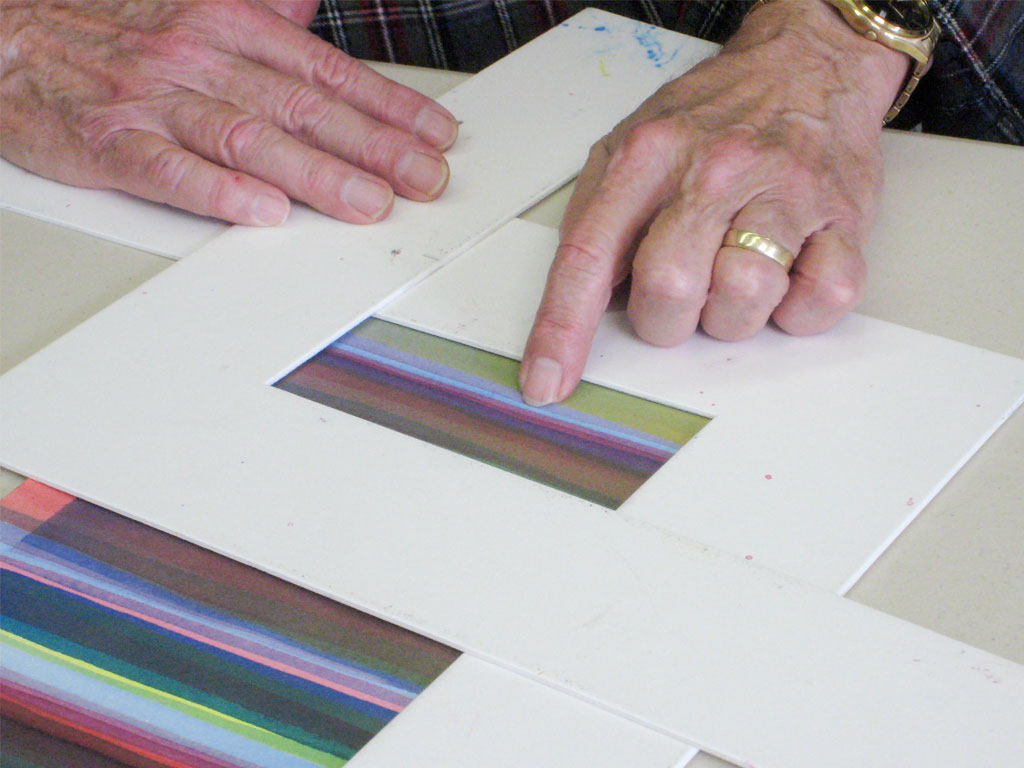
Using the L shapes to selectively crop a larger image
Choosing a composition based on a theme
Subtle differences in composition can arise from cropping choices
The discussion continued through the next five stages, although Dick stressed that the only one we are concerned with right now is the first one. Recognizing your own biases is very tricky, and will probably take most of us much longer than one week to figure out. But for now, pondering COMPOSITION is a good place to start!
Additional videos
Drawings Critique 5 (6:39)
Dick Nelson critiques a pencil drawing where the assignment was to carefully observe and render light and shade on geometric forms. He points out factors which cause it to not be “read” properly, because values are not consistent in following the rules of nature.
Drawings Critique 6 (1:30)
Examining another pencil rendering for accuracy in portraying light and shade.
Leonard’s Skulls (0:55)
Human skull drawings.
Drawing Reflection (3:29)
How to plot reflections, compared to shadows.
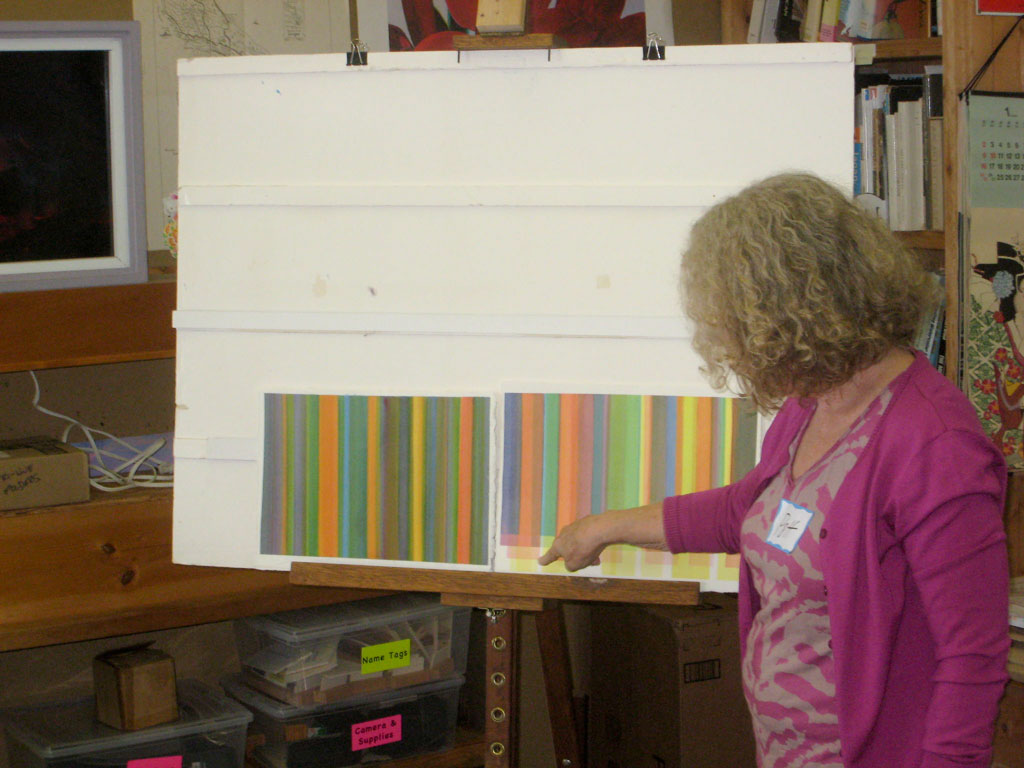
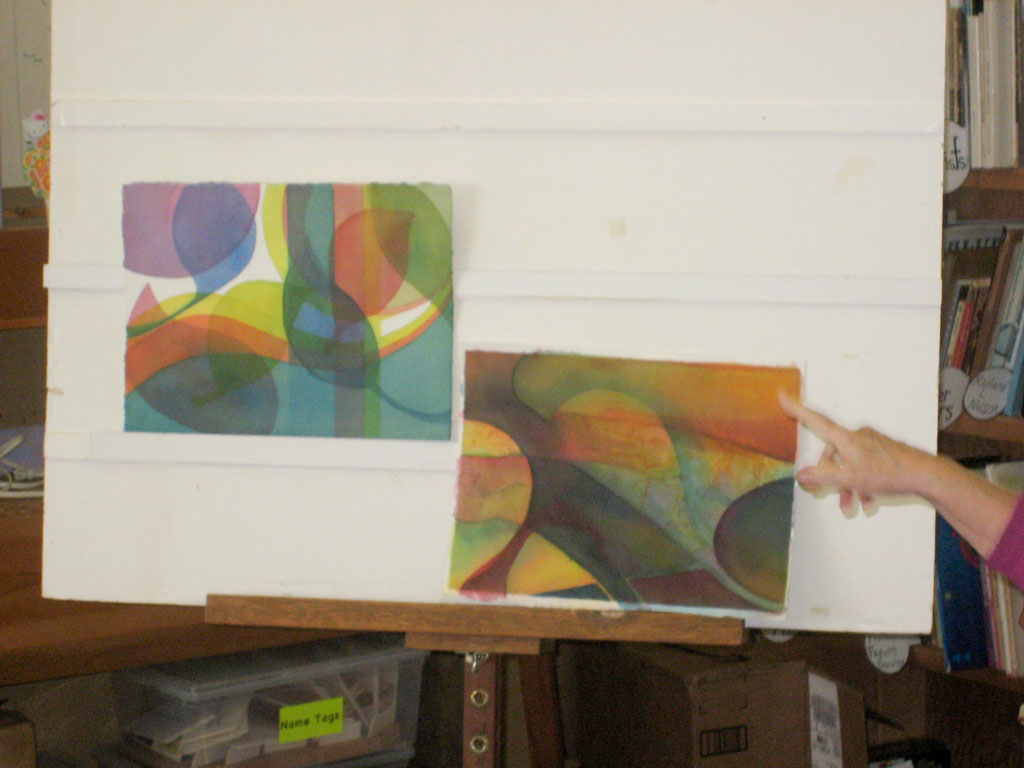
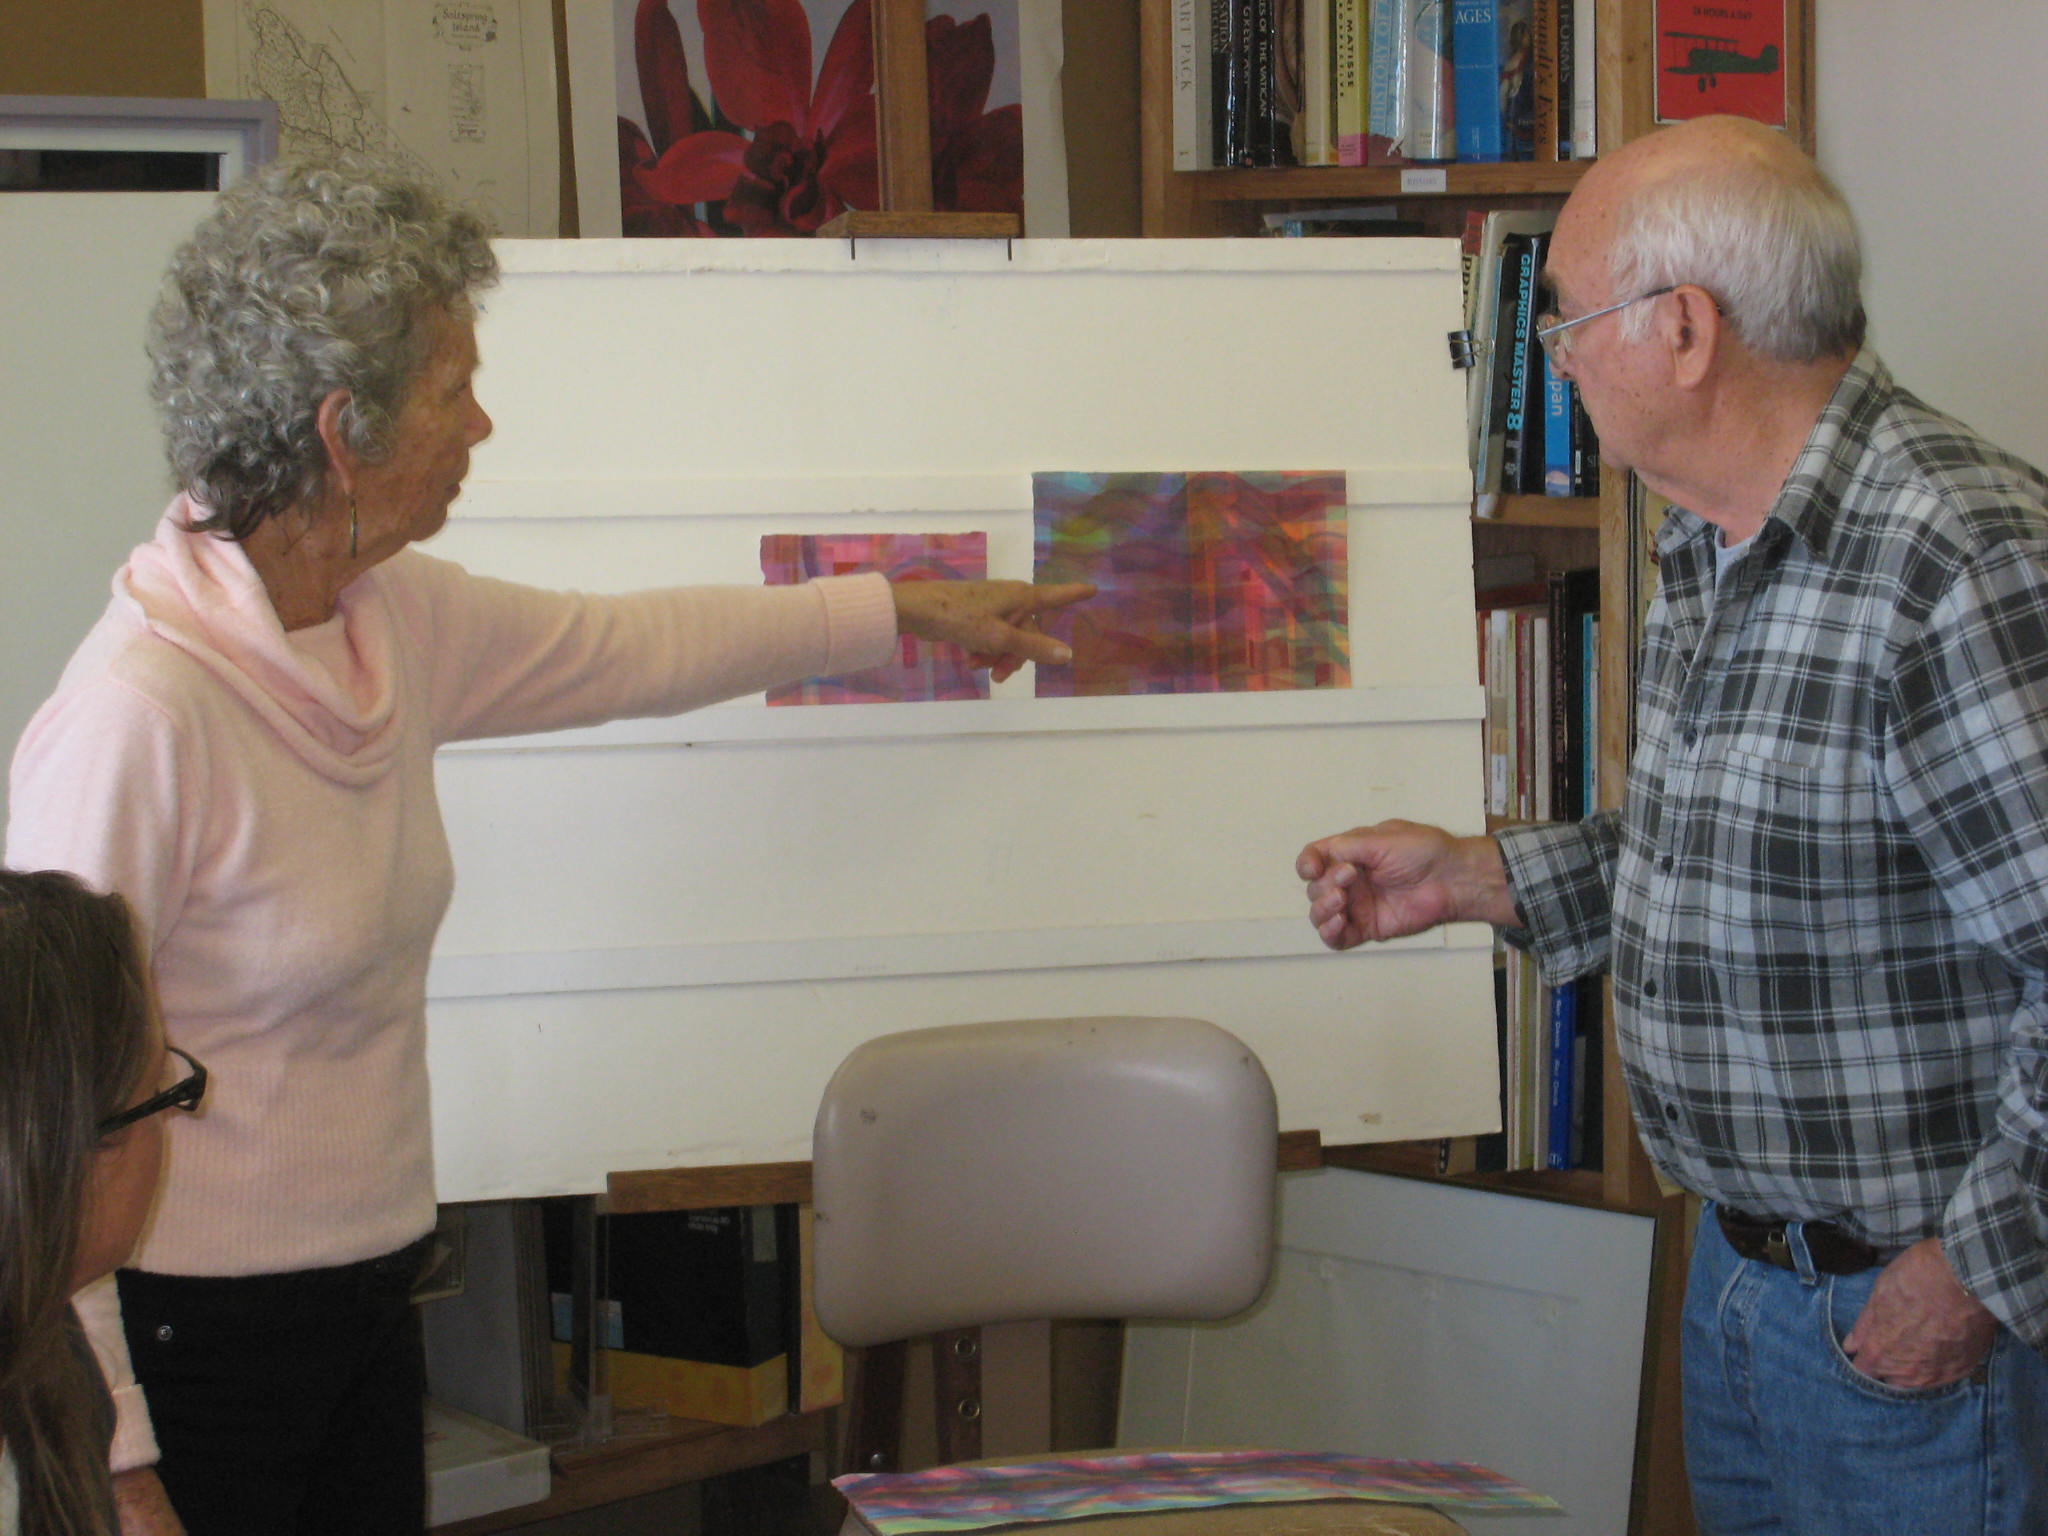
Cropping and Composition (7:20)
Students are asked to select compositions by cropping within an abstract watercolor.
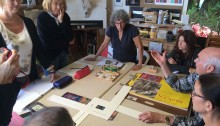
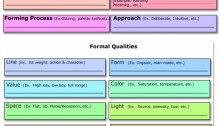
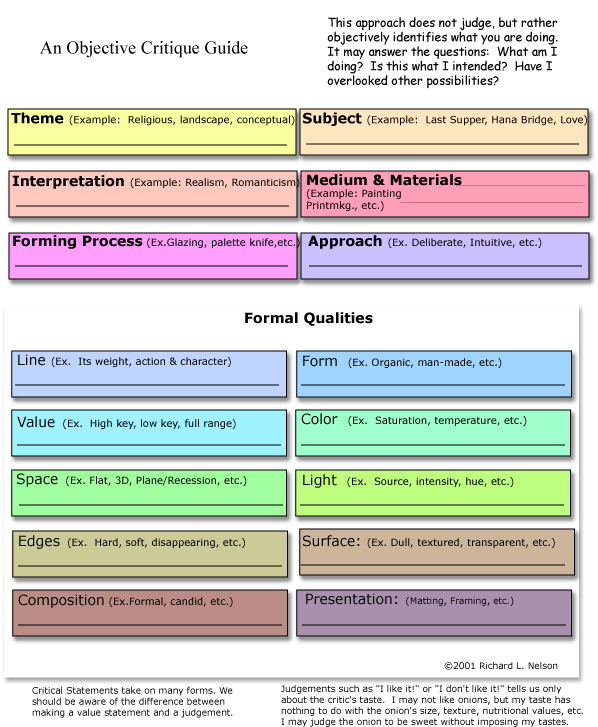
Artists shared current studies and work in the second color residual session, and Dick led a formal critique using the critique guides in this post. The topic of surface was discussed, and principles of films were reviewed.
The second color residual session was held on Saturday, February 22. Artists shared current studies and work, and Dick led a formal critique using the critique guides below.
Water was a subject in one piece discussed, which brought up the topic of “surface”. Light behaves differently when it encounters different surfaces. Water is transparent – light penetrates it – and it can be reflective – light bounces off it. Light is absorbed or reflected to different degrees by other surfaces. Paying attention to this behavior will help your paintings be more realistic, if that is a goal. Dick recommended the Arnolfini wedding painting by Jan van Eyck as a good one to study for examples of careful observation and rendering of different surfaces. Look closely at different parts of this full resolution version of the painting to see for yourself.
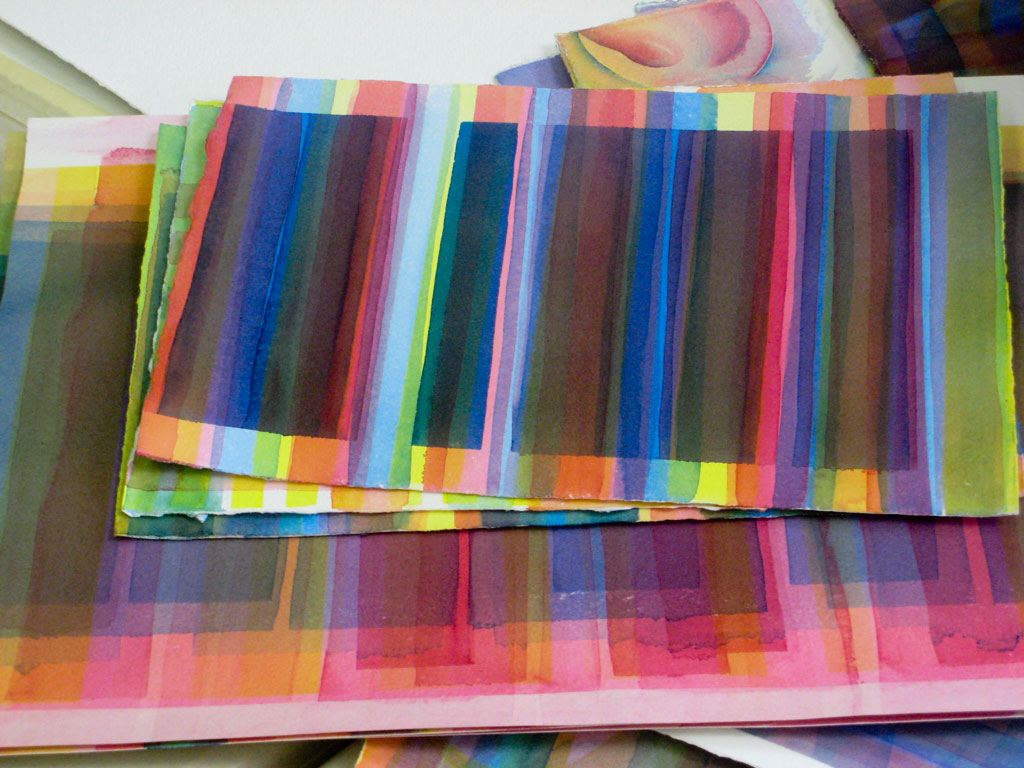
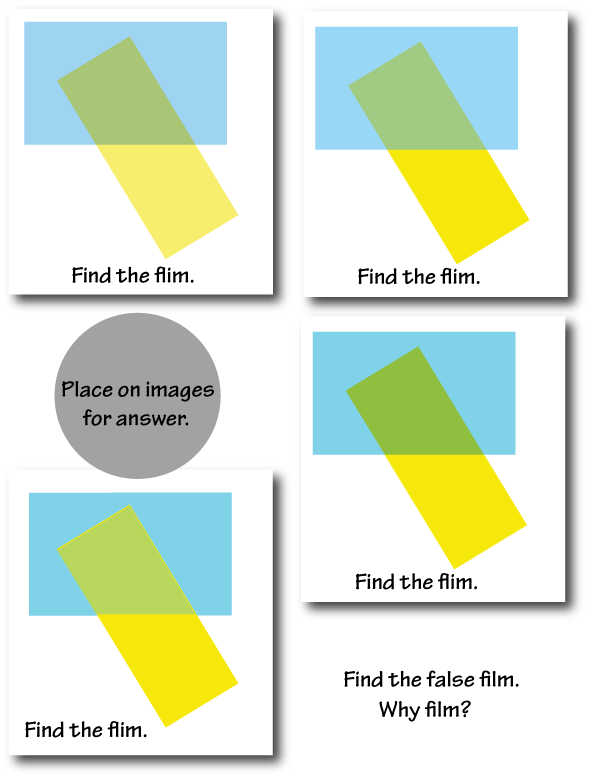
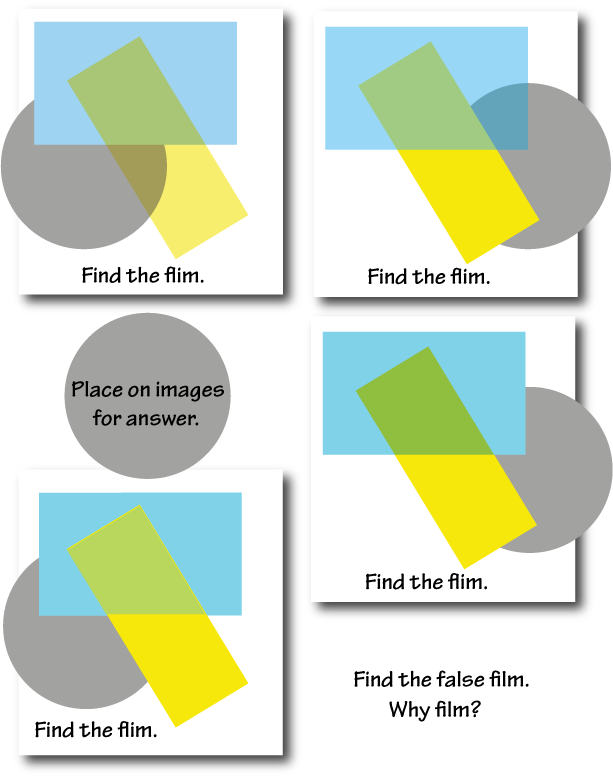
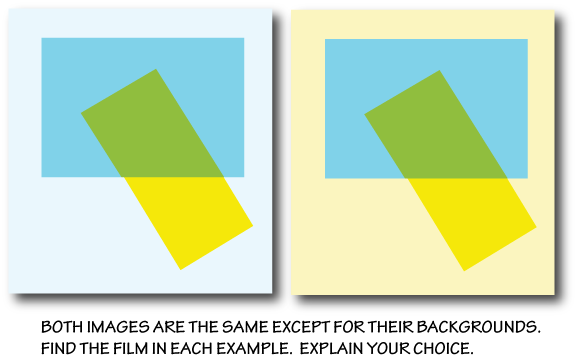
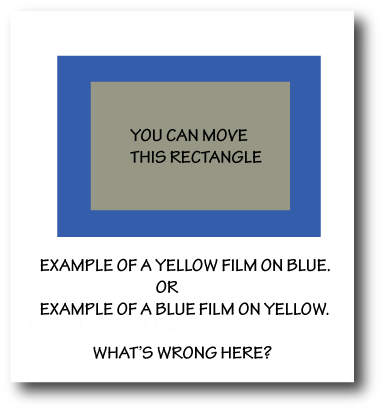
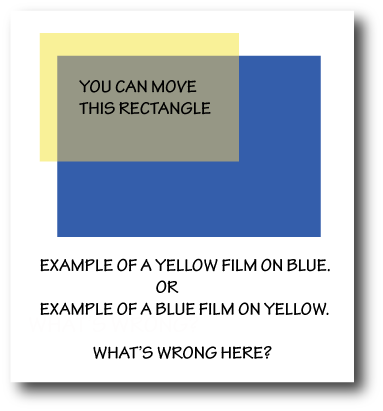
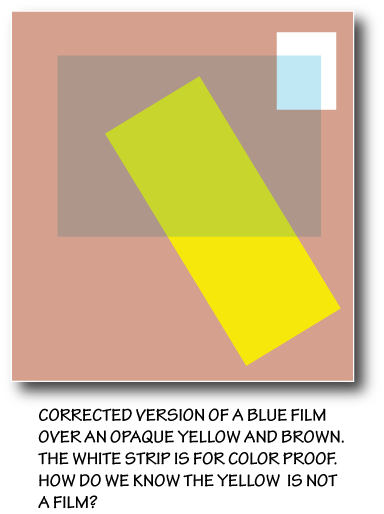
Review quiz – films
There was a brief review of concepts of films using the quiz images below. These images were chosen to really challenge your understanding of how colored films work! Refer to Color Relationships week 4 and week 5 for more examples and explanations of films.
Talking about recognizing and representing surfaces
Chris brought in a photo of fruit on a reflective surface, which Dick used to point out visual cues of surface qualities.
The image under discussion
Critique: simple watercolor compositions focusing on surface
Tips for painting surfaces
A number of tips came out during the critique:
Water and glass have two qualities in common, transparency and reflection. Use them to create more convincing and interesting results. Use principles of veils to explore the mist quality of water.
Reflective surface will reflect anything in the environment – use your eyes and your mind to recognize that a surface will be influenced by the things around it. That’s how nature works, and it ties things together. It’s all relationship.
If there’s a highlight, take care to leave it (for instance, in an eye or a reflection). It provides an important visual cue.
If it’s worth doing, do it again and again. Each time will bring more sureness. Dick would do as many as five or six paintings for a major commission, working through different problems each time. Working in watercolor, he could do a complete painting in a day.
Reserve white for a small accent (see above), rather than keeping it as the majority of the space, because it takes the scene out of context.
Try to create exciting colors. You’re working with shape, and color – the problem comes when you say, “Grass!” Most of your viewers will look for subject matter, but the artists in the audience will look for visual excitement in your shapes and colors.
To make grass more interesting and less flat, start with some yellow interspersed with white. This will promote vanishing boundaries when you add other colors over it.
“I’m trying to get you to see what you paint – to recognize – to RE-COG-NIZE.”
How to plot reflections
How to plot reflections
Reflections behave differently than shadows. A shadow’s position depends on where the light source is, relative to the object. Reflections always point straight toward the viewer.
Why go to the trouble of using surfaces in a painting?
Great composing, whether in music or art, requires a heart, and a mind, that wants to share. These are tools under your command for conveying emotion as well as subject matter. To Dick, it is important to show each of us what can be achieved. You don’t have to use the tools, but be conscious of the choice. You have to work hard to be great, as a musician practices. Dick shared that this was the one year anniversary of his wife, Elly’s, death, and said, “You only get one life. Live every single moment. Don’t put it off. Enjoy the process.”
Seeing neighborhoods and painting demo
Using Ls to find “neighborhoods” in a painting
We used mat board Ls to frame “neighborhoods” in the demo piece. A neighborhood has a common language and culture. Look for a focal point, like a special park or restaurant.
The evolving demo piece
Dick gave another painting demo, going into the ongoing piece and finding unresolved areas, joining some, highlighting places. Use gradations between light and dark, and warm and cool. Create areas of darker-than, lighter-than, where a shape transitions.