Course description
As we emerge from more than a year of restrictions due to the coronavirus pandemic, Dick Nelson is pleased to offer his famous Color Relationship course this summer. Feed your artistic creativity in the company of other artists this summer!
“You’ll never see the world the same way again!” is a frequent comment from past students in Dick’s color classes. In this class, students will be exposed to a level of color understanding few ever know or experience. When you see and understand, you have the tools to exploit your knowledge, to set a mood, create a luminous effect or convey a convincing illusion. This course offers tools and insight for any artist or designer working with color in visual or physical media.
This will be a nine-week class, on Saturday mornings, 9-noon, beginning July 3 and ending August 28. Tuition cost is $575. See the course description below for more details. Dick will be assisted by Ann Wittenbrock. Class size is limited, and ALL STUDENTS MUST BE VACCINATED AGAINST THE CORONAVIRUS.
Students will be expected to submit homework studies developed in Adobe Illustrator, Boxy SVG, or other vector graphics program of your choice. Assistance with these computer programs will be provided for topics needed in the course.
[gview file=”https://dicknelsoncolor.com/wp-content/uploads/2021/06/Color-Relationships-Course-Description-2021.pdf”]
Tutorials and references
Dick’s video tutorials will be linked within the class tab for the assignment they apply to.
You will be doing your homework on a computer or tablet. Dick originally used Adobe Illustrator, and that is still an option, if you want. But it is a very complex and expensive program, and other options have become available that are easier to learn and less expensive.
Boxy SVG
Boxy SVG (boxy-svg.com) is our recommendation, if you will be using a laptop or desktop computer. Unfortunately, a technical issue has prevented development of an iOS/iPadOS version of Boxy. So if you want to use an iPad you will need to choose another application (such as Vectornator, below).
The official Boxy tutorials demonstrate much of its functionality and are a good place to start learning how to use it (also on this YouTube playlist). Boxy doesn’t have help documentation, but it does have a very responsive developer. You may find answers to many of your “How do I …” questions in the Questions section of the Boxy website. (Use the Search capability.)
The official Boxy tutorials each cover a lot of ground, quickly, and sometimes they go into topics or depth we don’t need. But you will learn a lot about what you can do with it, some of which you may have been wondering about, and some which may give you some ideas. Remember, you can pause it or replay a section as needed, no need to get overloaded.
Jason Erdreich’s Boxy tutorials from 2017 provide a little more explanation, but be aware that some aspects of the program may be different now, since it’s had a few more years of development.
Vectornator
Vectornator (vectornator.io} is a free application that runs on Mac computers and iPads. This is a good solution for those who can’t use Boxy, and it makes arrays more easily than Boxy.
Adobe Illustrator
Getting started with Adobe Illustrator
Adobe Illustrator User Guide
Submit homework
[button size=”large” color=”purple” style=”flat” url=”https://dicknelsoncolor.com/submit-homework-studies/?class=974&assignment=1101″]Submit homework 9: Illusion of a White Light[/button] (requires password)
[button size=”large” color=”purple” style=”flat” url=”https://dicknelsoncolor.com/submit-homework-studies/?class=974&assignment=1102″]Submit homework 10: Illusion of a Colored Light[/button] (requires password)
Class materials and homework assignments
[accordions load=”10″][accordion title=”Week 0, Upload your selfie”]
Submit Assignment [frm-field-value field_id=143 entry_id=734]
View photos of your classmates for Assignment [frm-field-value field_id=143 entry_id=734]
[/accordion][accordion title=”Week 1, July 3: Arrays; Make one color appear as two”]
Color Deception 1: Make 1 color look like 2
Submit Assignment [frm-field-value field_id=143 entry_id=992]
View homework submitted for Assignment [frm-field-value field_id=143 entry_id=992]
See previous Week 1 class summaries, materials and homework
From 2016 | From 2015 | From 2014
Homework 1: Make one color appear as two

Make one color appear as two
Homework 1 tutorial: Making an array with Boxy SVG
Dick Nelson demonstrates his recommended layout and steps, using Boxy SVG, for creating a solution to the first homework assignment in his Color Relationship 2021 class, “Make one color look like two.” This is the tutorial shown in class July 3.
Boxy tips: 1. To make an exact copy of an object, select it, then hold down the Option key and drag. 2. Use a grid and/or guides to make alignment more precise (see View menu)
Create an Array Tutorial (Illustrator)
Create An Array Tutorial from Richard (Dick) Nelson on Vimeo.
A step-by-step tutorial on how to create a VALUE array in Adobe Illustrator.
[/accordion][accordion title=”Week 2, July 10: Make 3 colors look like 2″]
Color Deception 2: Make 3 colors look like 2
Submit Assignment [frm-field-value field_id=143 entry_id=24]
View homework submitted for Assignment [frm-field-value field_id=143 entry_id=24]
See previous Week 2 class summaries, materials and homework
From 2016 | From 2015 | From 2014
(In the 2015 and 2016 classes, Assignment 3 was given as homework along with Assignment 2, but your homework is only Assignment 2.)
Homework 2: Make 3 colors appear as 2
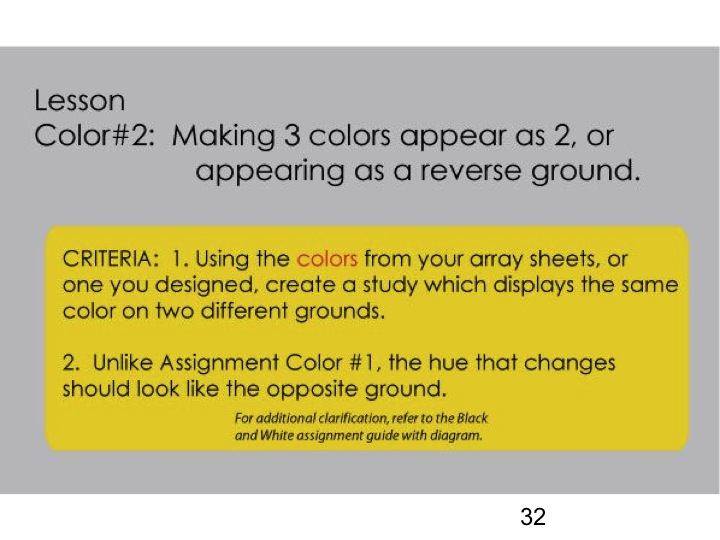

Students came up with these solutions to the reverse-ground problem in class
[/accordion][accordion title=”Week 3, July 17: Make 4 colors look like 3″]
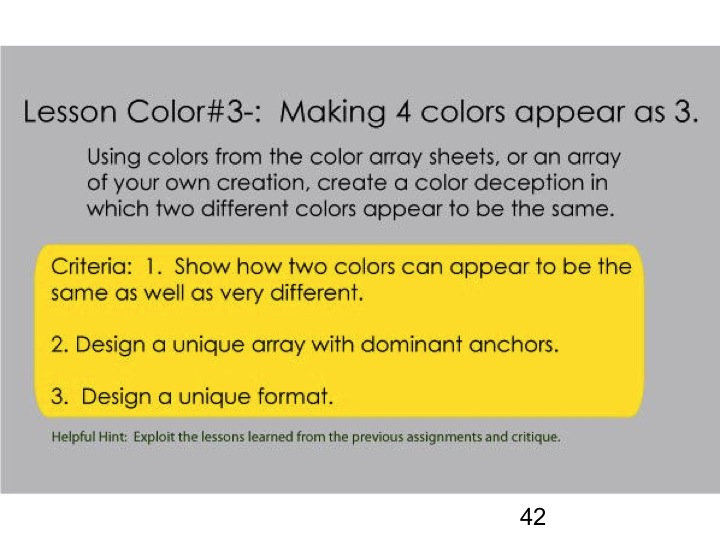
Color Deception 3: Make 4 colors look like 3
Submit Assignment [frm-field-value field_id=143 entry_id=25]
View homework submitted for Assignment [frm-field-value field_id=143 entry_id=25]
See previous Color Deception 3 class summaries, materials and homework
From 2016 | From 2015 | From 2014
(In the 2015 and 2016 classes, Assignments 2 and 3 were both given in the second week.)
Homework 3: Make four colors appear as three
[/accordion][accordion title=”Week 4, July 24: Transpose colors of equal value”]
Homework 4: Transpose colors of equal value
Submit Assignment 4: Transpose colors of equal value
View homework submitted for Assignment 4: Transpose colors of equal value
![]()
See previous Equal Value class summaries, materials and homework
From 2016 | From 2015 | From 2014 | From 2013
Homework 4 tutorial: Transposing colors of equal value
Watch and listen as Dick talks you through the thinking process for this week’s homework.
[/accordion][accordion title=”Week 5, July 31: Vanishing Boundaries”]
Homework 5: Vanishing Boundaries
Luminosity is a fascinating effect, sought after by many artists and recognized unconsciously by many viewers. As Monet discovered, and Dick has codified, one way to achieve it is with vanishing boundaries, a “visual phenomenon in which two colors of equal value and similar hue are seen as a single color when viewed from a specified distance”. The second way to achieve luminosity is with halation, inherent in arrays. This week’s homework assignment gives you the chance to put both of these effects to work for yourself. If successful, you may be surprised and delighted with your results.
Submit Assignment 5: Vanishing Boundaries
View homework submitted for Assignment 5: Vanishing Boundaries
[gview file=”https://dicknelsoncolor.com/wp-content/uploads/2021/08/Assignment-5-VB-stripes.pdf”]
See the most recent Vanishing Boundaries class summary, materials and homework
From 2016. Be sure to study the Vanishing Boundaries handout on that page. Should you want to dig deeper, links to previous years’ summaries are provided at the end of the 2016 post.
[/accordion][accordion title=”Week 6, August 7: Veils and Atmosphere”]
Veils and Atmosphere
In the first five weeks of class, the focus was purely on color: learning, through the three color deception exercises, to see how relative it is, and how to control the viewer’s perception; refining your own judgment of hue and value in the transposition exercise; and last week, becoming aware of mechanisms for creating luminosity in your own work through halation and vanishing boundaries. This week marks the start of the visual phenomena portion of the course, in which we learn to really see and understand appearances in the world around us that we may have never examined closely.
We start with veils, which lead naturally into volume color or atmospheric perspective. These were addressed separately in past classes, so be sure to check out the previous years’ summaries for both topics.
Homework 6: Veils and Volume Color
Submit Assignment 6: Veils & Volume Color
View homework submitted for Assignment 6: Veils & Volume Color
[gview file=”https://dicknelsoncolor.com/wp-content/uploads/2021/08/VeilVolColor-kb.pdf”]
See previous Veil Illusion class summaries, materials and homework
From 2016 | From 2015 | From 2013
Volume color
Volume color builds on the concepts of veils, because atmosphere (or liquid) behaves like an infinite series of veils: objects deeper in space take on more of the color of the atmosphere; the veiling becomes more opaque.
See previous Volume Color class summaries, materials and homework
From 2016 | From 2015 | From 2013
Homework 6 tutorial: Creating a veil illusion with Boxy SVG
[/accordion][accordion title=”Week 7, August 14: Liquid Immersion and Films”]
This week we ontinued our investigation into the visual phenomenon of transparency. We explored how objects immersed in a colored liquid take on the color of the liquid, and how a colored film darkens all colors below it. The two homework assignments challenge the student to create illusions representing these phenomena.
Some of the examples of transparency effects in the Albers book are inconsistent or impossible. They look plausible until you compare how real veils and films behave.
[gview file=”https://dicknelsoncolor.com/wp-content/uploads/2021/08/FilmVolumeEx.pdf”]
Homework 7: Illusion of Liquid Immersion
Submit Assignment 7: Illusion of Liquid Immersion
View homework submitted for Assignment 7: Illusion of Liquid Immersion
The appearance of objects immersed in a colored liquid behaves the same way as aerial perspective or volume color. Review the volume color class summaries from previous years:
From 2016 | From 2015 | From 2013

The illusion of liquid immersion is essentially the same as atmospheric veiling or aerial perspective, but with stronger color. The deeper an object is in the liquid, the less its own color is visible and the more it blends into the volume color.
There are at least two ways to create this illusion on the computer:
- Using layers – as Dick showed yesterday, mimicking nature
- Using arrays – as described and shown in past years
Key features if creating as layers:
- Build from the back (far distance) forward
- All cards/objects have the same color and aspect ratio, but vary in size with distance, and rotation angle for gestalt.
- All “liquid” layers have the same color, but vary in transparency (and/or opacity) setting with depth between objects. Use “Normal” setting for Blend mode in Illustrator, Compositing panel in Boxy, or Style panel in Vectornator.
Homework 8: Illusion of a Film
Submit Assignment 8: Illusion of a Film
View homework submitted for Assignment 8: Illusion of a Film
A film always darkens any color below it. See previous Film Illusion class summaries, materials and homework:
From 2016 | From 2015 | From 2013
(This was the first assignment given in the Color 2 classes from 2015 and 2016.)
Homework 8 tutorial: Creating a film illusion with Boxy SVG
Also watch the Illustrator tutorial below for more detail.
Dick Nelson demonstrates how to create components to make an illusion of a colored film affecting other colored shapes beneath it, using Boxy SVG.
Important note: Set the blending mode of the “film” object to “Multiply” in Illustrator, in the Compositing panel of Boxy, or in the Style panel in Vectornator. Also reduce the opacity (or increase the transparency) to modulate the color change. If you are recreating the illusion with opaque shapes, set them to Normal and full opacity/no transparency.
Homework 8 tutorial: Creating the illusion of a film in Illustrator
[/accordion][accordion title=”Week 8, August 21: White Light and Colored Light”]
White Light and Colored Light
Without light, there would be no color. For this reason, Dick was always surprised that Albers never addressed it. It can have a huge impact in art, so it is well worth studying. You got a whirlwind introduction to it on Saturday. Some key points to remember about light are:
- The color of the shadow is the complement of the color of the light: white light, black shadow
- Shadows behave as films, darkening all colors below them (remember to use the Multiply blending mode in computer graphics programs)
- The brighter the light, the darker the shadow
- All colored shadows will still have a significant amount of black in them
- Similarly, colored light is mostly white; the color shouldn’t be too heavy (use the Overlay blending mode)
- Shadows outdoors will have some amount of blue in them due to ambient light from the sky, the blue dome under which we live
You have TWO homework assignments, one for white light and one for colored light. You may use the same format for both: your choice of a flat, 2D surface (easier), or a simple 3D scene (harder). See the class handouts for details and examples.
Near the end of class, Dick was looking for a video he wanted to show about plotting shadows for white light. It is below, and should be helpful if you’re thinking of trying a 3D scene, along with the Plotting Shadows handout.
This week’s handouts (see also previous years’ posts):
White light
Submit Assignment 9: Illusion of a white light
View homework submitted for Assignment 9: Illusion of a white light
See previous White light class summaries, materials and homework
From 2016 | From 2015 | From 2013
These include photos from white light demos, tutorial videos, presentations, and handouts.
Homework 9 tutorial: Creating the illusion of a white spotlight with Boxy SVG
Note: Dick forgot to mention that you must also set the Compositing Blend mode to “Multiply” for the black film.
White spotlight illusion in 2D
An Illustrator tutorial for artists who wish to incorporate the illusion of a light on a variety of hues and values.
White light illusion in 3D
An Illustrator tutorial on plotting white light, its cast shadow, and reflected light.
Colored light
Submit Assignment 10: Colored light and shade
View homework submitted for Assignment 10: Colored light and shade
See previous Colored light class summaries, materials and homework
From 2016 | From 2015 | From 2013
These include photos from colored light demos, tutorial videos, presentations, and handouts.
Homework 10 tutorials: Creating the illusion of a colored spotlight with Boxy SVG, Illustrator
Demonstrating how a colored spotlight modifies both the colors in the light as well as cast shadow
A tutorial on how to create the illusion of a cast shadow on a form and colors from a colored light source.
[/accordion][accordion title=”Week 9, August 28: Translucence and Surface” last]
Translucence and Surface
In the final class session, Dick introduced two more visual phenomena that can enrich one’s work, that both depend on careful observation of the effects of light on objects and their surfaces.
-

- Translucency: Light shining through, as a stained glass window
-

- Water has both reflective and transparent qualities

We discussed this handout analyzing what makes us perceive translucence (and thus, what visual cues we must be sure to include if we wish to convey this effect). See this post for more on translucency. We watched a video Dick created in 2018 analyzing how water can act as both a mirror and a window.
Joëlle commented, “Dick is turning us into scientists!” Be curious and observant, and your work will be better for it. Much of what Dick has taught us, he learned through his own curiosity and observations. In this class, you have been learning to see for yourself, objectively and analytically, and to put your knowledge to work to create illusions that convey your vision.
[/accordion][/accordions]
Learning Never Ends
[gview file=”https://dicknelsoncolor.com/wp-content/uploads/2016/10/Learning-never-ends.pdf”]